Wednesday, April 30, 2014

Run Dog Run - American Crafts April Gallery Layout

Hi everyone,

As promised I am back again today to share another gallery layout that I made for American Crafts this month.


The second layout that I created this month is of my dog Kona.  We took her to some open land where we could let her run free off the leash.  I love her expression as she is running wildly free.

Run Dog Run Layout


To begin my layout, I punched several stars (using the 2" star punch by American Crafts) out of Amy Tangerine Plus One papers.  I also cut several larger stars using my Silhouette Cameo.  I then adhered them onto white cardstock in a diagonal fashion.

I added lots of fun embellishments (rub ons, wood veneers, vellum stickers, puffy stickers, enamel dots and some spray mist too.


Thanks for stopping by again today!  Join us for the American Crafts National Scrapbook Day blog hop this Saturday May 3rd.


Monday, April 28, 2014

You & Me - American Crafts April Gallery Layout

Hi everyone,
Good afternoon!  Wow, the month of April sure flew by fast.  I can't believe it is going to be May this week.  I have a layout to share with you today for the American Crafts April gallery.

The first layout that I made for the gallery is of my two adorable nieces.  Sophia is 5 and baby Olivia is 8 weeks.  They make the perfect subjects to scrap!


You and Me Layout


To create my layout, I started by cutting a 12x12 background with my Silhouette Cameo, then I used it as a mask to spray mist the background.  I also cut a few additional pieces (the same size as the drops in the mask) out of Amy Tangerine Plus One paper, and used a sewing machine to sew them down.

 I used a mix of Amy Tangerine Plus One, Cut and Paste, Dear Lizzy 5th & Frolic, SC Printshop, SC Lemon Lush and Crate Paper Oh Darling on my layout.  I love being able to mix and match the lines that AC and their sub companies make.


Thanks for stopping by today!  I will be back tomorrow with another new layout :)  Have a good one!


Wednesday, April 23, 2014

Getting the most out of your kits using paper strips

Hi everyone!  Good morning!
I have a post up on the Paper Bakery Blog today to share with you one of my favorite techniques for using up leftovers from my kits.  For the following projects I used extras I had leftover from the March SCRAPBOOK kit called Daylight Savings!
When I really want to stretch my kit I use leftover punched pieces that I may have from a prior project and paper strips.  Using paper strips to create a visual design is a great way to use up your kit.  To create my first layout I layered several paper strips together in a horizontal fashion along the right side of my layout.
 Family Forever and Ever Layout


I used paper strips in different lengths and widths and layered them together.
Because I had so much going on on the right side, I kept the left side of my layout minimal so that the layout would not seem too cluttered.  It is always a good rule when working with several patterns to allow your layout to have ‘white space’.
To finish off my layout and frame my photo I used a few punched star pieces that I had leftover from another project.

For my second project I cut a chevron background file using my Silhouette Cameo and then backed several pieces with paper strips
in a diagonal fashion.
Love xoxo Layout


I used a variety of pattern papers but also left some pieces of my design empty to allow the background cardstock to show through.

I added some journaling below my photo and also tucked behind on a small shipping tag.  I embellished my layout using
a fun combination of wood veneers and chipboard pieces included in the kit.


I hope you found some inspiration here for using your paper scraps creatively, effectively, and efficiently!  Thanks for stopping by!


Thursday, April 10, 2014

Incorporating ombre into your projects with the paper bakery

Hi , good morning!
I have a post up on the Paper Bakery Blog today and I would  like to share with you how I incorporate the ombre trend into my projects.  The ombre trend is very popular right now in both the fashion and scrapbooking industry.  Using their March Daylight Savings Scrapbook Kit I am going to show you two ideas to get you started.
To create an ombre effect with embroidery, start by choosing 3 or more gradual colors.  For my project I chose to work with white, gray and black.
I used a stencil to poke the holes for my project.  Then, I started threading them in order using the white thread first, and then the gray, and then the black.


Here is a look at the stitching and full layout:
Happy 2gether layout

I also added some simple stitching to my title.  Because I wanted the stitching to really stand out I kept the rest of my design modest.


I also created a card using the same ombre technique.
Smile card

Because of the large title I decided to keep the card simple and just added two borders and machine stitching.
Thanks for stopping by today!


Wednesday, April 9, 2014

American Crafts Banner Tutorial


Hi everyone!  Happy Wednesday!
I had a tutorial up on the blog yesterday that I would like to share with you.
I love using the Knock Outs punches on my projects.  They are very easy to use,
and small and portable enough to take with me to crops.

1. Cover pieces of smooth cardstock with DIY shop washi tape.  
Using Knock Outs punches, punch out several shapes.

Inspire Banner Tutorial


2. Gather punched pieces and DIY shop banner and pennant pieces.


3. Using a sewing machine stitch the punched pieces onto the DIY shop
     banner and pennant pieces.


4. Using Knock Outs 1.5" and 2" circle punches, punch out several pieces
from DIY shop paper.  Layer pieces together, adhere and then use scissors 
to fray the edges to create paper flowers.


5. Adhere glitter tape across the top of the pennant and banner pieces.
Embellish by adding paper flowers, fabric flowers and thickers.


Inspire Banner


supplies: Knock Outs Punch 2" Circle (KOP63112) - Punches, Knock Outs Punch 1.5" Circle (KOP63100) - Punches, Knock Outs
Triangle Banner Dear Lizzy Punch 2" (KOP63123) - Punches, Knock Outs Punch 2" Banner (KOP63117) - Punches, Knock Outs
Punch 1.5" Star (KOP63102) - Punches, Glitter Paper Tape Gold (AC-GT-96039) - Ribbon, DIY Black & White Washi Tape (DIYWT-66615) -
Washi Tape, DIY Gold & Silver Washi Tape (DIYWT-66613) - Washi Tape, DIY SHOP Kraft Notch Banner (DIY-BAN-66649) - DIY Shop, 
DIY SHOP Chalkboard Pennant Banner (DIY-BAN-66651) - DIY Shop, Maggie Holmes Glitter Foam Letter Stickers Daiquiri Gold
(MH-TH-81354) - Thickers, On Trend Fabric Flowers Pom Poms (683062) - Embellishments, DIY Shop Paper Pad 6X6 (366983) -
Paper Pads,  Smooth Cardstock White (AM71-793) - Cardstock, This To That (AM617-13) - Adhesive, 


Make sure to check out the American Crafts store to see their wide selection of punches.  I started with just a few and now I have a large collection of them.  I love their cute little shapes and ease of use.  Thanks for stopping by today!  I hope you enjoyed my tutorial!


Thursday, April 3, 2014

Nesting dies with American Crafts

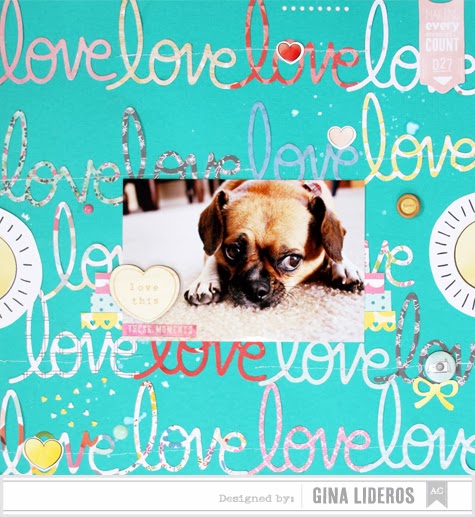
Hello all!  Yesterday I had a post up at American Crafts with a couple of layouts featuring the new nesting dies that came out at winter CHA.

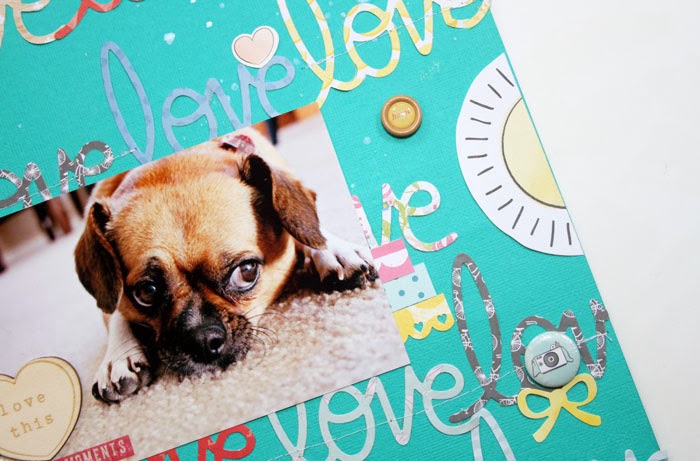
Love This Layout


I had fun with this layout.  I had this sweet photo of my dog Lilo and I just had to use it on a
layout!  Nesting dies are a great way to jazz up your layouts.  I use them to create fun titles and embellishments.  I also love that they are small and convenient so that I can take them along with me when I go to crops.


supplies: Dear Lizzy Daydreamer dies (366731) - Dies,  Daydreamer 6x6 Paper Pad (366767) - Cardstock,
Puffy Matte Stickers- Hearts (366777) - Dear Lizzy, Daydreamer Wood Veneer Shapes (366781) - Accents & Phrases,
Adhesive Back Enamel Dots (366785) - Dear Lizzy, Daydreamer Chipboard Shapes (366789) - Bits, Daydreamer Cardstock
Stickers (366776) - Accents & Phrases, Daydreamer Adhesive Metal Badges (366795) - Flair, Scallop Heart Border Punch 
(KOP-63000) - Knock Outs, Spiral Notebook Border Punch (KOP-63054) - Knock Outs, Tiny Alpha Cardstock Stickers - Typed
Transparent (366065) - Remarks, Wood Buttons & Epoxy Accents (85598) - Buttons, Textured Cardstock (AM710-468) - 
Cardstock


To create this layout I started off by using watercolor paints on a white cardstock background.  I then used the nesting die hearts (that come in two sizes) to make my fun colorful background.  I placed the smaller heart inside the larger heart before die cutting to get the double heart cut.  I loved playing with these shapes, so cute!

Happy Place Layout


I also die cut the love and xoxo words and the small camera.  Photo is of my two children featured right with their two cousins.


supplies: Buddy (PLUDS-66812) - Cardstock, Assistant (PLUDS-66806) - Cardstock,
Pair (PLUDS-66821) - Cardstock, Counterpart (PLUDS-66807) - Cardstock, Doubles (PLUDS-66808) - Cardstock,
Party of Two (PLUDS-66815) - Cardstock, Match (PLUDS-66819) - Cardstock, Twosome (PLUDS-66820) - Cardstock, 
Friend (PLUDS-66825) - Cardstock,Peer (PLUDS-66826) - Cardstock, Puffy Matte Stickers (366842) - Remarks, Die-Cut 
Shapes (366849) - Bits,Fabric Brads (366852) - Elements, Plus One Associate (366860) - Dies, Plus One Adhesive Metal 
Badges (366906) - Flair,Typed Transparent Tiny Alpha Cardstock Stickers (366065) - Remarks, Polka Dot Party Epoxy 
Stickers (366198) - Accent & Phrase, White Textured Cardstock (AM710-81) - Cardstock, Wood Buttons & Epoxy Accents 
(85598) - Buttons, Dear Lizzy Daydreamer dies (366731) - Dies,

I hope you enjoyed my nesting dies post.  Thanks for stopping by today!