


Who doesn’t like an easy to make paper star? These multi dimensional stars are really easy to make, all you need is a few supplies to get started. I used papers and embellishments from the Pink Paislee Yuletide collection to create mine. They make cute decorations that can be used for all sorts of decorating.

Materials:
- patterned paper or other square paper (mine was approx. 6″)
- pencil
- scissors
- glue
- string to hang hem
- pencil
- scissors
- glue
- string to hang hem
How to:
Just follow the directions in the picture tutorial below.
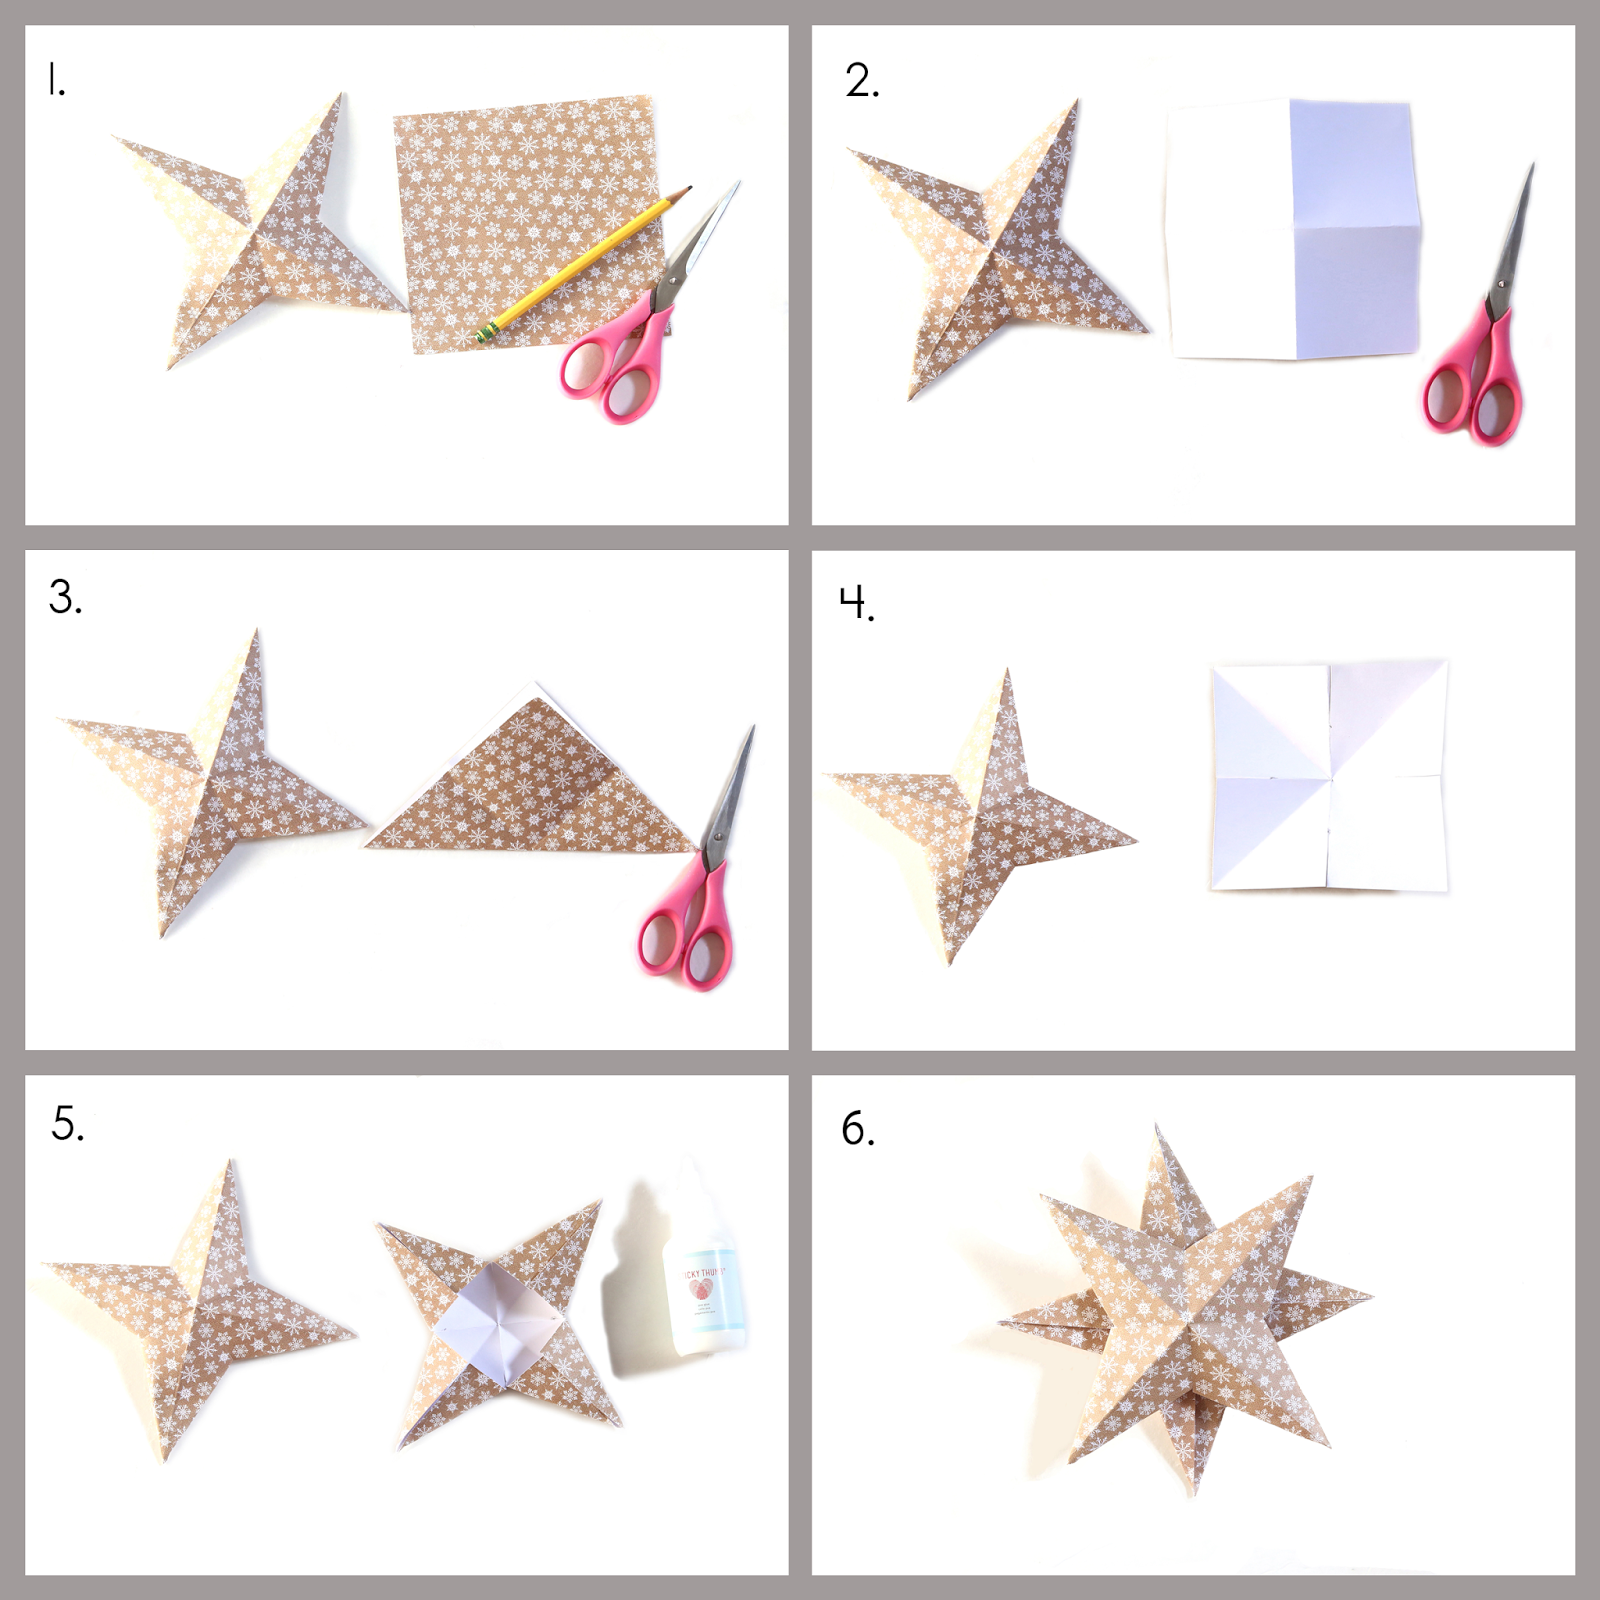
1. Gather materials.
2. Turn the paper over and fold into 4 quarters as shown in picture 2.
3. Turn the paper back over and fold diagonally in both directions.
4. Use a pencil to mark the middle of the folds that are creased towards you. These are the horizontal and vertical creases that you made in step 2. Cut with scissors from the edge to your pencil mark on all four sides.
5. Fold sides down and adhere with liquid glue.
6. One side is ready, but you need one more to complete the star. Repeat the previous steps to make another star. Place glue on the backsides of two stars and adhere together. When the stars are done the pointed 3d sides should be facing out on both sides.
You can do variations on these stars, by switching up patterned paper, or switching up sizes.
I dressed my stars up by adding tags, canvas stars, and ephemera pieces from the Yuletide collection.


Since I don't have my Christmas tree up yet, I pinned my paper star ornaments onto a frame using burlap string and clothespins. I also filled a little basket with extra ones.

You could easily add these to a tree with clips, hooks or use a hole punch and thread to create loops to hang them with.


Well, I'm a few years late, but I'm so glad I found this! These are beautiful!
ReplyDelete