Showing posts with label DIY Shop 3. Show all posts

Sunday, January 10, 2016

American Crafts | Winter

This is a personal blog.  All editorial content and projects are intellectual property of http://americancrafts.typepad.com/.  I do receive financial compensation and material product from American Crafts to develop my craft posts, but all ideas and opinions are my own.

This hot cocoa bar will keep you warm during the winter. You could also give these treats out as gifts to friends, neighbors and teachers.


Supplies: DIY Shop 3 (370879) - Tacks Gold Hearts, DIY Shop 3 (370887) - Metal Word Bobbies Gold & Silver, DIY Shop 3 (370890) - Gift Tags & String, DIY Shop 3 (370894) - Muslin Treat bags, DIY Shop 3 (98698) - Chalk Markers, DIY Shop 3 (370898) - Banner Kit, Maggie Holmes Confetti Party Kit (683715) - Crocheted Doily Garland Kit


How To:  Fill three jars with hot cocoa and marshmallows. Take gold twine from banner kit and wrap around each jar, tying on a gift tag to each. Embellish each tag with gold heart tacks. Fill muslin treat bags with sweets and adhere a metal word bobbie to each bag.  Enjoy!


Tuesday, December 29, 2015

American Crafts | New Years Eve Party Pieces

This is a personal blog.  All editorial content and projects are intellectual property of http://americancrafts.typepad.com/.  I do receive financial compensation and material product from American Crafts to develop my craft posts, but all ideas and opinions are my own.


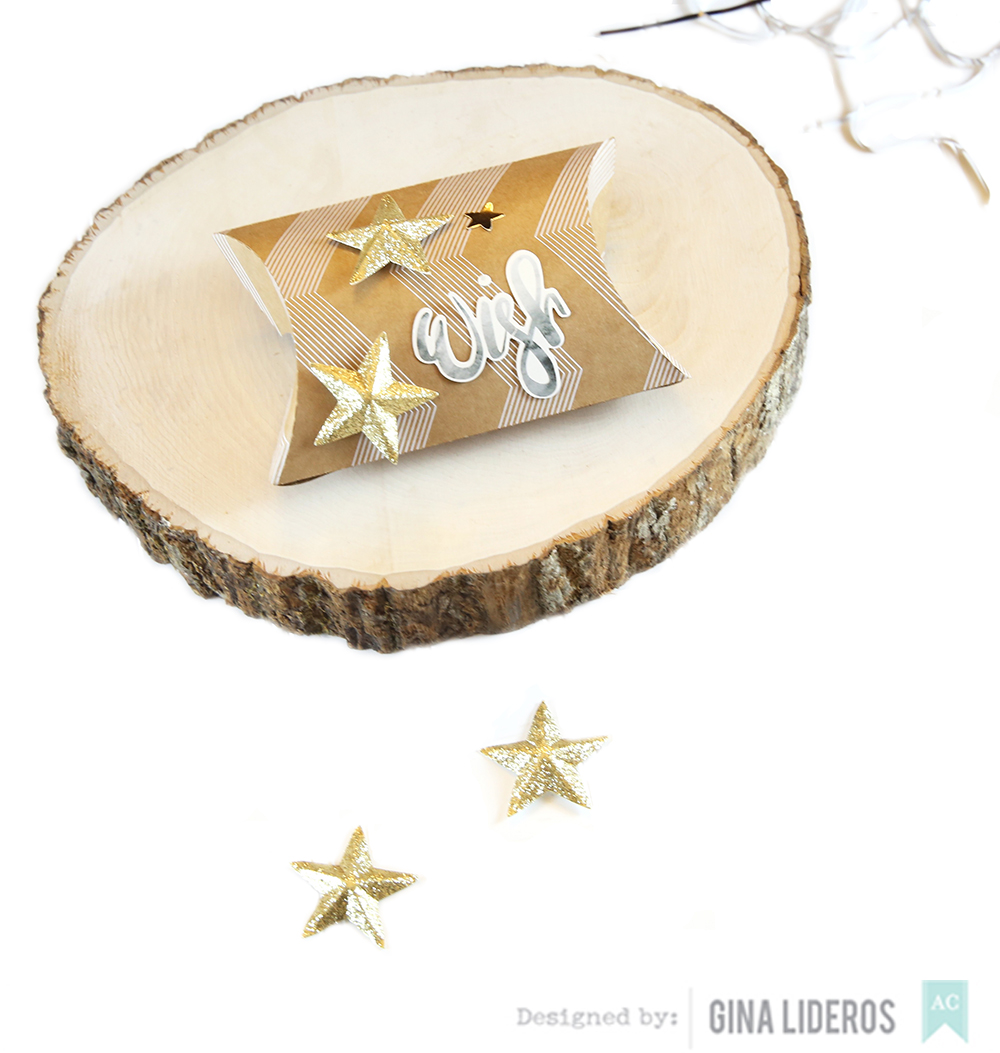
Hi everyone!  It's New Years Eve party pieces week on the American Crafts blog.  I'm sharing festive treat boxes that I created using their DIY Shop 3 and Dear Lizzy Documentary collections.


You can create quick New Years Eve party pieces in a flash by using supplies that you
already have on hand.  These came together in a snap using cardstock, and stickers.


supplies: Deck The Halls (DTHSTAR-40415) - Details Dimensional Stars Silver & Gold, DIY Shop 3 (370857) - Kraft Cardstock White Chevron, DIY Shop 3 (370862) - Varnish Carstock Black Triangles,  DIY Shop 3 (370868) - Alphabet Stickers Silver Foil, Dear Lizzy Documentary (340200) -Foiled Stickers Accents & Phrases


How To:  Use cut files to create pillow boxes in Silhouette Studio.  Assemble boxes and fill with New Years Eve treats.  Embellish boxes with dimensional stars.  Finish boxes by adding accents & phrases stickers and adding silver foil numbers to spell out "2016".


Tuesday, November 10, 2015

American Crafts | Place Cards

This is a personal blog. All editorial content and projects are intellectual property of http://americancrafts.typepad.com/.  I do receive financial compensation and material product from American Crafts to develop my craft posts, but all ideas and opinions are my own.


The DIY Shop 3 collection is perfect for making Fall Place Cards.  
Combine gold, black and white accents to make a card that really
stands out.


Supplies: DIY Shop 3 (370878) - Cards W/Envelopes, DIY Shop 3 (370890) - Gift Tags & String, DIY Shop 3 (370888) - Enamel Dots Stickers Gold, DIY Shop 3 (370852) - Vellum White Numbers, DIY Shop 3 (370854) - Vellum Gold Foil Hearts, DIY Shop 3 (37086) - Acetate Gold Foil Herringbone, DIY Shop 3 (370862) - Varnish Cardstock Black Triangles, DIY Shop (366900) - Stapler W/100 Staples, Sticky Thumb (ST340261) - Adhesive Runner & Refill, Dear Lizzy Documentary (340202) - Desktop/Gold Foil Puffy Thickers Alpha Stickers


1.  Select card from the cards w/envelopes set and selected pattern papers and embellishments, set aside.


2. Use die cutting machine to cut feathers out of selected patterned papers.


3. Use stapler to adhere five selected feathers to card face.


4. Use Sticky Thumb Adhesive runner to adhere gold/white tag to left 
hand side of card.


5. Adhere Dear Lizzy gold foil puffy stickers to tag to spell out desired name.


6. Finish card by adhering gold enamel dots to card.


Thanks for stopping by today!  I hope this has inspired you to make your own Place Cards for your next get together!


Friday, November 6, 2015

American Crafts | DIY Shop 3


This is a personal blog.  All
 editorial content and projects are intellectual property of http://americancrafts.typepad.com/.  I do receive financial compensation and material product from American Crafts to develop my craft posts, but all ideas and opinions are my own.


The DIY shop 3 collection is one of my favorites to design with.  I love the combination
of gold, kraft and black, and the fun embellishments.


Supplies: DIY Shop 3 (370851) - Kraft Cardstock Black Dots, DIY Shop 3 (370857) - Kraft Cardstock White Chevron, DIY Shop 3 (370854) - Vellum Gold Foil Hearts, DIY Shop 3 (370860) - Acetate Gold Foil Herringbone,DIY Shop 3 (370861) - Acetate Gold Foil Triangles, DIY Shop 3 (370862) - Varnish Cardstock Black Triangles, DIY Shop 3 (370867) - Wordfetti Stickers Gold Foil, DIY Shop 3 (370868) - Alphabet Stickers
Silver Foil, DIY Shop 3 (370878) - Cards W/Envelopes 5 Gold Foil Designs, DIY Shop 3 (370883) - Decorative Tape Woodgrain, DIY Shop 3 (370884) - Decorative Tape Gold, DIY Shop 3 (370887) - Decorative Metal Word Bobbies Gold & Silver, DIY Shop 3 (370888) - Enamel Dots Stickers Gold, DIY Shop 3 (370890) - Gift Tags & String, DIY Shop 3 (370891) - Metal Rim Circle Tags, Cardstock (AM710-81) - White, DIY Shop (366900) - Mini Stapler W/ 100 Staples, Dear Lizzy Neopolitan (59160) - Roller Date Stamp


How To: Use a 2 1/2" square punch to punch several squares from a mix of DIY Shop 3 patterned papers.  Use scissors or a paper trimmer to cut squares in half diagonally, to create triangular pieces.  Print a small black and white photo. Trim photo to 2 1/2"x 2 1/2".  Use scissors to cut photo in half diagonally.  Arrange photo and triangular pieces on a white
cardstock background, adhere down with adhesive.  Flick drops of black ink across the page.  Use a sewing machine and white thread to stitch down pieces.  Tear strips of washi tape and adhere to layout.  Adhere tag and string to left hand side of page and use a stapler to staple down.  Adhere a piece of white string to top right hand side of page, adhere with a paperclip and staple down. Add metal rimmed tag to page.  Add date and phrase stamp to both tags.  Finish by adding stickers and enamel dots to page.


Thanks for stopping by today, I hope you enjoyed my layout!