Showing posts with label scrapbook. Show all posts

Wednesday, March 23, 2016

Pink Paislee | Mix n' Match

This is a personal blog. All editorial content and projects are intellectual property of http://canoncreativegirl.blogspot.com/.  I do receive financial compensation and material product from Pink Paislee to develop my craft posts, but all ideas and opinions are my own.


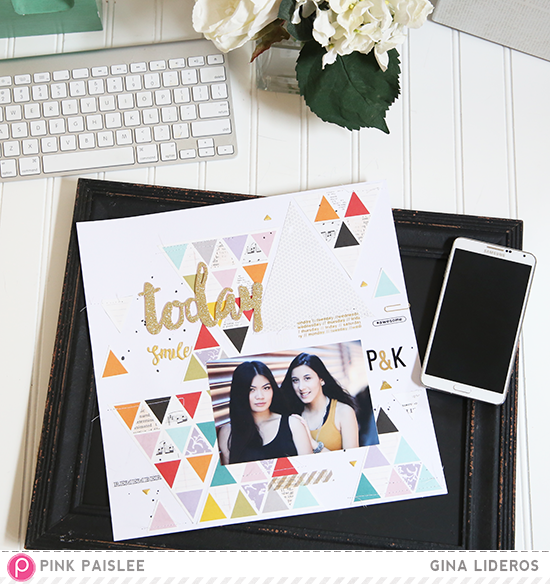
I hope that you are enjoying the projects that the Pink Paislee team has shared so far in Mix'n'Match week!  I'm sharing a layout using pieces from the C'est La Vie and Fancy Free collections.

Mix And Match #ppfancyfree #ppcestlavie | @gina_lideros for @pinkpaislee

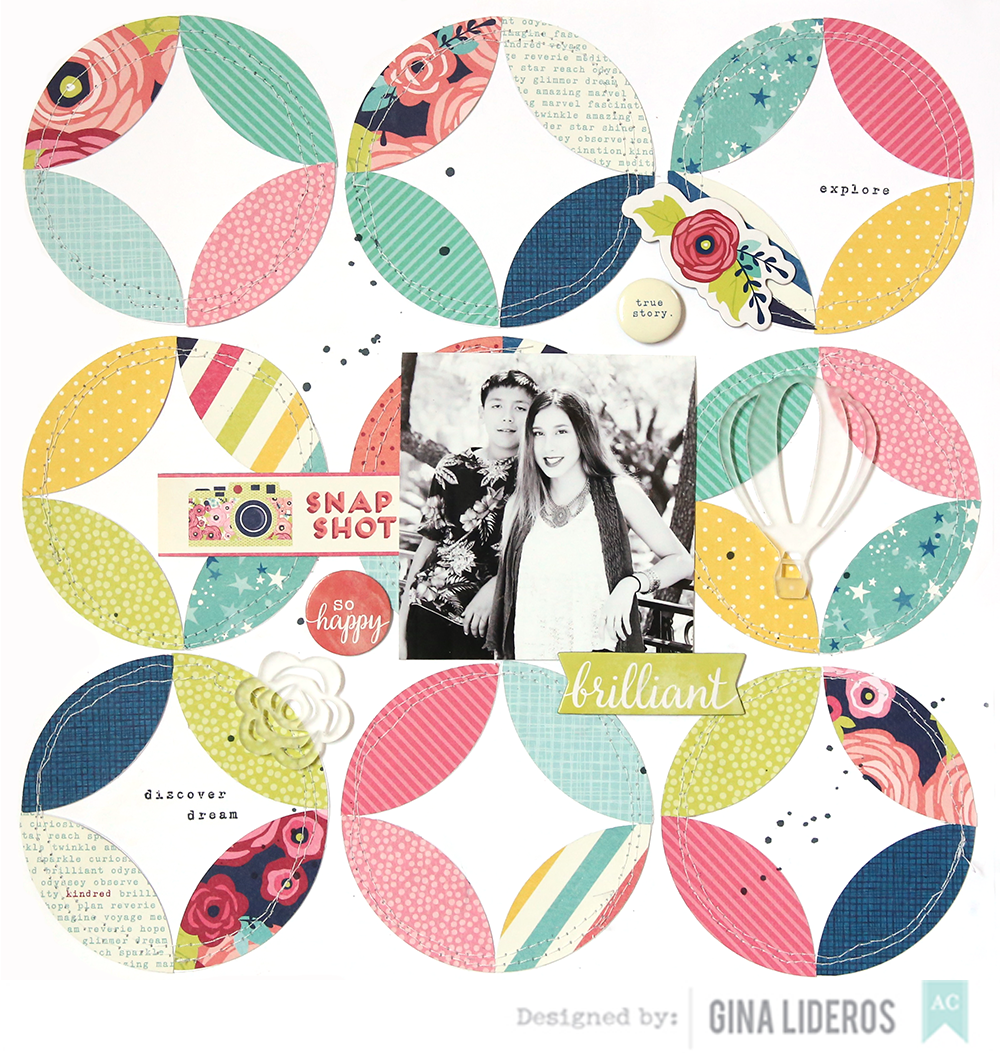
Pattern piecing is one of my favorite techniques. I love mixing patterns and colors together. When I saw this beautiful pink paper with a hexagon print from the C'est La Vie collection, I knew right away just how I wanted to use it.

Mix And Match #ppfancyfree #ppcestlavie | @gina_lideros for @pinkpaislee

With a pencil and a piece of tracing paper, I measured the the size of the hexagons on the background paper. Then I hand cut several pieces of patterned paper from the C'est La Vie and Fancy Free collections into small hexagons. I used the background paper as a template for my cut pieces.

Mix And Match #ppfancyfree #ppcestlavie | @gina_lideros for @pinkpaislee


I added several puffy stickers and a paper clip from the C'est La Vie collection, as well as puffy stickers, ephemera, and buttons from the Fancy Free collection. I love how well these two collections coordinate together. Do you like to mix and match more than one collection together while working on a project? If so, we would love for you to share it with us on the Pink Paislee Facebook Page!

Mix And Match #ppfancyfree #ppcestlavie | @gina_lideros for @pinkpaislee
Collections used: Fancy Free, C'est La Vie


Monday, March 14, 2016

Pink Paislee | Spring

This is a personal blog. All editorial content and projects are intellectual property of http://canoncreativegirl.blogspot.com/.  I do receive financial compensation and material product from Pink Paislee to develop my craft posts, but all ideas and opinions are my own.

Hi friends, welcome!  We are celebrating Spring week over on the Pink Paislee blog! So many of the colors, papers, and embellishments in the Fancy Free collection remind me of spring.

Spring #ppfancyfree | @gina_lideros for @pinkpaislee

When I first saw this floral paper in the collection, I fell in love with the flowers immediately. I couldn't wait to cut them apart.

1920c

I fussy cut them and layered them against a light blue background paper. Next, I dipped a paint brush in white paint and splashed paint across the page. After the paint was dry, I printed a small photo and added it to my page. I chose the chipboard piece "Colorful" and ephemera piece "wonderful day" to create my title. I love how happy the title looks and helps to bring out other colors on the page.

March1_GinaLideros_SpringPP2c1

Because there is so much going on in the center of my layout I decided to leave the left and right side of the page mostly blank (white space). I finished the page by adding some chipboard elements, buttons, and layered stickers.

Spring #ppfancyfree | @gina_lideros for @pinkpaislee

What ideas do you have for incorporating spring photos onto your layouts?

Spring #ppfancyfree | @gina_lideros for @pinkpaislee
Collection Used: Fancy Free


Monday, March 7, 2016

American Crafts | Circles Week

This is a personal blog.  All editorial content and projects are intellectual property of http://americancrafts.typepad.com/.  I do receive financial compensation and material product from American Crafts to develop my craft posts, but all ideas and opinions are my own.


How To: Cut out circular background with an electronic die cutting machine.  Place cut circle pieces onto a white background paper, adhere down.  Use a sewing machine with white thread to stitch pieces down. Sprinkle navy ink across the page.  Print a small black and white photo and adhere to the center of the layout.  Trim snapshot title from patterned paper and adhere to the left side of photo.  Embellish layout by adhering chipboard stickers to the page.  Adhere acrylic pieces and flair button to page.  Finish page by stamping word stamps onto layout.


Supplies: Shimelle Starshine (374022) - Gemini, Shimelle Starshine (374025) - Hubble, Shimelle Starshine (374026) - Horizon, Shimelle Starshine (374030) - Odyssey, Shimelle Starshine (374033) - Mercury, Shimelle Starshine (374034) - Mariner, Shimelle Starshine (374035) - Artemis, Shimelle Starshine (374039) - Apollo, Shimelle Starshine (374041) - Rosetta, Shimelle Starshine (374042) - Orion, Shimelle Starshine (374043) - Viking, Shimelle Starshine (374044) - Voyager, Shimelle Starshine (374052) - Chipboard Stickers 3/Sheets, Shimelle Starshine (374054) - Acrylic Shapes, Shimelle Starshine (374058) - Acrylic Stamps, Shimelle Starshine (374059) - Flair Plastic Buttons


Monday, February 1, 2016

Crate Paper Design Team

I'm so excited to announce that I have joined the Crate paper design team!  Crate paper has been a long time favorite of mine!  With every new release I always look forward to their designs and their Maggie Holmes collections are always gorgeous!


Here are a couple of projects that I have made recently using Crate Paper!


Thank you for stopping by and enjoying my news!  I will have projects soon using their new lines that debuted at CHA!


Saturday, January 23, 2016

American Crafts | Happy Together

This is a personal blog.  All editorial content and projects are intellectual property of http://americancrafts.typepad.com/.  I do receive financial compensation and material product from American Crafts to develop my craft posts, but all ideas and opinions are my own.


The colors and patterns in the new Happy Together collection by Amy Tangerine are so vibrant and upbeat, they coordinate beautifully together.


Supplies:  Amy Tangerine Better Together (373999) Rub on Pens, Amy Tangerine Better Together (3739900) Clear Stickers, Amy Tangerine Better Together (373992) Sticker Book, Amy Tangerine Better Together (373993) Die Cut Shapes,  Amy Tangerine Better Together (373975) Him + Her Paper, Amy Tangerine Better Together (373976) Yin + Yang Paper, Amy Tangerine Better Together (373963) Stars + Stripes Paper, Amy Tangerine Better Together (373966) Push + Pull Paper, Amy Tangerine Better Together (373971) Soap + Water Paper, Amy Tangerine Better Together (373964) Sweet + Sour Paper, Amy Tangerine Better Together (373974) Cloud + Sunshine Paper, Amy Tangerine Better Together (373983) Peanut Butter + Jelly Paper, Amy Tangerine Better Together (373982) Bow + Arrow, Amy Tangerine Better Together (373980) Blogs + Coffee Paper, Amy Tangerine Better Together (373979) Fact + Fiction Paper, Amy Tangerine Better Together (373978) Ladies + Gentlemen Paper, Amy Tangerine Better Together (373977) Knot + Bow Paper, Amy Tangerine Better Together (373973) Mom + Dad Paper, Amy Tangerine Better Together (373972) Jack + Jill Paper, Amy Tangerine Better Together (373962) Each + Every Paper, Amy Tangerine Better Together (373969) Back + Forth Paper, Amy Tangerine Better Together (373967) Near + Far Paper, Amy Tangerine Better Together (373960) Hugs + Kisses Paper, Thumb (ST340276) Sticky Dots 0.5


How To: Cut heart background out of background paper using free cut file from Paige Evans available here http://americancrafts.typepad.com/studio/2015/09/instagram-layout-by-paige-evans.html  Fold each heart over and secure with sticky dots.  Cut small pieces of pattern papers and adhere behind each folded heart.  Use a paint brush and white paint
to flick paint across the page.  Set aside to dry.  Print a small black and white photo and trim into a circle.  Adhere circular photo to center of the layout.  Adhere die cut pieces and stickers throughout the page.  Finish page by adding rub on pen to the bottom 
right of page.


Friday, January 15, 2016

American Crafts | Happy Place

This is a personal blog.  All editorial content and projects are intellectual property of http://americancrafts.typepad.com/.  I do receive financial compensation and material product from American Crafts to develop my craft posts, but all ideas and opinions are my own.


This week on the American Crafts blog is Happy Place week!  We are sharing projects using Dear Lizzy's new collection!

I love the tropical designs mixed with bold and pastel patterns in the Happy Place collection.  They brought this design together in a snap.


Supplies: Dear Lizzy Happy Place (373670) - Accent & Phrase Stickers, Dear Lizzy Happy Place (373676) - Rub On Pens, Dear Lizzy Happy Place (373671) - Die-Cut Shapes, Dear Lizzy Happy Place (3736688) - Accent & Phrase Stickers, Dear Lizzy Happy Place (373675) - Tassels, Dear Lizzy Happy Place (373652) - Patterned Paper Bahama Mama, Dear Lizzy Happy Place (373641) - Patterned Paper Be Free, Dear Lizzy Happy Place (373649) - Patterned Paper Beachy Betsy, Dear Lizzy Happy Place (373640) - Patterned Paper Kokomo, Dear Lizzy Happy Place (373644) - Patterned Paper Lemon Berry, Dear Lizzy Happy Place (3736500) - Patterned Paper Tropical Tango, Dear Lizzy Happy Place (373653) - Patterned Paper Wild Watermelon, Bazzill (BCS12) - White Smooth Cardstock, American Crafts (AM71-766) - Black Cardstock


How To: Use scissors to fussy cut around Kokomo patterned paper.  Cut around some of the hexagons and leave some open, use adhesive to adhere design to white cardstock paper.  Handcut some hexagons from various patterned papers and adhere to background design in a sporadic pattern.  Handcut hexagons from black cardstock and adhere to background design.  Use a sewing machine with white thread to stitch some of the pieces down.  Use a dropper to splash black ink across the page.  Print a small 3" x 3" black and white photo and adhere to the center of page.  Thread a paper clip with tassels and clip on to photos.  Adhere die cuts to page.  Spell out the title "Noteworthy Yes" using accent & phrase stickers.  Adhere phrase stickers underneath photo.  Finish layout by embellishing with rub on pens.


Thanks for stopping by today!


Tuesday, November 17, 2015

American Crafts | Titles


This is a personal blog.  All editorial content and projects are intellectual property of http://americancrafts.typepad.com/.  I do receive financial compensation and material product from American Crafts to develop my craft posts, but all ideas and opinions are my own.


I love creating creative titles for my pages.  Big titles can make a huge impact and become a statement on your page. 


Supplies: Amy Tangerine Finders Keepers (FKDS-40320) - Field Trip paper, Amy Tangerine Finders Keepers (FKDS-40322) - Pursuit Paper, Amy Tangerine Finders Keepers (FKDS-40327) - Wild Goose Chase, Amy Tangerine Finders Keepers (FKDS- 40332) - Expedition, Amy Tangerine Finders Keepers (FKDS-40334) - Clues, Amy Tangerine Finders Keepers (FKDS-40337) - Quest, Amy Tangerine Finders Keepers (FKDS-40339) - Treasure, Amy Tangerine Finders Keepers (FKSP-40333) Die-Cut Scout, Amy Tangerine Finders Keepers (FKTH-40234) - Today Phrases/White Foam Thickers Stickers, Amy Tangerine Finders Keepers (340235) - Transparent Stickers Accents & Phrases, Amy Tangerine Finders Keepers (340237) - Puffy Stickers, Amy Tangerine Finders Keepers (340243) - Cardstock & Acetate Shapes W/Foil, Amy Tangerine Finders Keepers (340246) -
Stamped Mylar Flair Embossed Gold, Amy Tangerine Finders Keepers (340247) - Wood Slices, Amy Tangerine Finders Keepers (340251) - Washi Tape Booklet W/Gold Foil, Amy Tangerine Finders Keepers (340256) - Grab Bag Assorted Embellishments, Cardstock (AM710-81) - White, Sticky Thumb (ST340261) - Adhesive Runner and Refill

How To:
Cut out title using die cutting machine on white background paper.  Paint orange watercolor paints against cut title background, set aside to dry.  Cut each word out from different pieces of patterned paper.  Adhere white cardstock die cut title piece (with orange paint) onto a second piece of white background paper and adhere down.  Place die cut title word pieces within the negative spaces and adhere down. Flick black spray mist across the page and set aside to dry.  Print a small black and white photo measuring 2.7"x2.7" back it with a slightly larger piece of cut specialty Die-Cut Scout paper and adhere down to left bottom side of layout.  Adhere a white foam "xo" sticker on top.  Use a date stamp to stamp date below the bottom left side of photo.  Place a die cut piece from cardstock & acetate shapes pack just above photo (tucking it slightly behind).  Place a stamped mylar flair embossed gold sticker right next to die cut.  On the bottom right hand side of page adhere a torn strip of washi tape.  Place a transparent sticker just above washi tape.  Adhere a small arrow sticker from grab bag just above.  Apply adhesive to the back of a wood slice.  Embellish wood slice with ampersand and camera puffy sticker and then adhere to the bottom right hand side of page.  Place a transparent arrow sticker just above.  Use a needle and white thread to handstitch around the words "like" and "love" in the title.  Finish page by adhering a large transparent floral sticker to the top right hand side of page.


I hope that I have inspired you to create your own creative title!


Friday, November 6, 2015

American Crafts | DIY Shop 3


This is a personal blog.  All
 editorial content and projects are intellectual property of http://americancrafts.typepad.com/.  I do receive financial compensation and material product from American Crafts to develop my craft posts, but all ideas and opinions are my own.


The DIY shop 3 collection is one of my favorites to design with.  I love the combination
of gold, kraft and black, and the fun embellishments.


Supplies: DIY Shop 3 (370851) - Kraft Cardstock Black Dots, DIY Shop 3 (370857) - Kraft Cardstock White Chevron, DIY Shop 3 (370854) - Vellum Gold Foil Hearts, DIY Shop 3 (370860) - Acetate Gold Foil Herringbone,DIY Shop 3 (370861) - Acetate Gold Foil Triangles, DIY Shop 3 (370862) - Varnish Cardstock Black Triangles, DIY Shop 3 (370867) - Wordfetti Stickers Gold Foil, DIY Shop 3 (370868) - Alphabet Stickers
Silver Foil, DIY Shop 3 (370878) - Cards W/Envelopes 5 Gold Foil Designs, DIY Shop 3 (370883) - Decorative Tape Woodgrain, DIY Shop 3 (370884) - Decorative Tape Gold, DIY Shop 3 (370887) - Decorative Metal Word Bobbies Gold & Silver, DIY Shop 3 (370888) - Enamel Dots Stickers Gold, DIY Shop 3 (370890) - Gift Tags & String, DIY Shop 3 (370891) - Metal Rim Circle Tags, Cardstock (AM710-81) - White, DIY Shop (366900) - Mini Stapler W/ 100 Staples, Dear Lizzy Neopolitan (59160) - Roller Date Stamp


How To: Use a 2 1/2" square punch to punch several squares from a mix of DIY Shop 3 patterned papers.  Use scissors or a paper trimmer to cut squares in half diagonally, to create triangular pieces.  Print a small black and white photo. Trim photo to 2 1/2"x 2 1/2".  Use scissors to cut photo in half diagonally.  Arrange photo and triangular pieces on a white
cardstock background, adhere down with adhesive.  Flick drops of black ink across the page.  Use a sewing machine and white thread to stitch down pieces.  Tear strips of washi tape and adhere to layout.  Adhere tag and string to left hand side of page and use a stapler to staple down.  Adhere a piece of white string to top right hand side of page, adhere with a paperclip and staple down. Add metal rimmed tag to page.  Add date and phrase stamp to both tags.  Finish by adding stickers and enamel dots to page.


Thanks for stopping by today, I hope you enjoyed my layout!


Tuesday, November 3, 2015

Pink Paislee | Memory Keeping

This is a personal blog. All editorial content and projects are intellectual property of http://canoncreativegirl.blogspot.com/.  I do receive financial compensation and material product from Pink Paislee to develop my craft posts, but all ideas and opinions are my own.


Hi everyone, I have a new Pink Paislee project to share with you today.  When I think of memory keeping I think of photos.  And it brings me back to why I first started scrapbooking – to document and remember special days and events.  So, with that in mind, I decided to keep my design simple, so that the main focus was the photo.


Recently my daughter and her friend went on a photoshoot.  They are both learning about photography and took turns taking photos.  Her friend is currently taking a  photography and editing class and took several photos for an assignment.  On this day, I let the girls borrow one of my most cherished photo lenses a Canon 85mm, and they took photos at an old train station.  I was so impressed with their talent and the quality of the photos!  I just knew that I had to document it on a page!


Ever since I saw the triangular Memo paper in the Memorandum collection, I just knew that I needed to use it on a layout.  I love triangles and I love color!  So, it is almost like this paper was designed just for me!  I knew that if I was using several pieces from this paper that I wouldn’t need too many other elements or embellishments on the design, or it might overwhelm the page.  So, I kept it simple!


I decided to hand cut around the Memo paper triangles to make several large and small triangles throughout the page.  The simple design of the paper made it easy to cut around.  I also added a handcut piece of journal paper (b side), to help balance out the design.

Collections used: MemorandumCedar Lane


Thursday, October 1, 2015

American Crafts | Watercolors

This is a personal blog. All editorial content and projects are intellectual property of http://americancrafts.typepad.com/.  I do receive financial compensation and material product from American Crafts to develop my craft posts, but all ideas and opinions are my own.


Last week on the American Crafts blog was watercolors week.  Flowers are a great way to combine several colors of watercolor paints on a page.  I combined watercolors along with patterned papers to create one of a kind flowers.


Supplies: Dear Lizzy Documentary (340295) - #Mondays, Dear Lizzy Documentary (340301) - Bear Hug, Dear Lizzy Documentary (340302) - Blossom, Dear Lizzy Documentary (340303) - Fresh Start, Dear Lizzy Documentary (340305) - Fancy Free, Dear Lizzy Documentary (340307) - Snail Mail, Dear Lizzy Documentary (340312) - Ever After, Dear Lizzy Documentary (340204) Ephemera W/ Gold Foil, Dear Lizzy Documentary
(340209) - Washi Tape Booklet W/ Gold Foil, Maggie Holmes Confetti (683718) - Dies Flowers, Cardstock (AM71-793) - White, Sticky Thumb (ST340261) - Permanent Solid


How To: Using a brush and watercolor paints, paint a light pink background against a white cardstock page, set aside to dry.  Use flower die to make six sets of flowers out of various patterned papers and white cardstock. Using a paint brush, paint the cut cardstock flowers with watercolor paints, set aside to dry.  Create flowers by grouping watercolor flowers and patterned paper flowers together, layer on the leaves and adhere to layout. Gather pieces of white thread and place behind two of the flowers before adhering down.  Flick black spray ink across the page.  Print an instagram photo, trim and adhere to center of layout.  Place a thin strip of ruler washi tape on the bottom left hand side of photo.  Finish by adhering die cuts to page.


Saturday, September 19, 2015

Pink Paislee | Today Grateful

This is a personal blog. All editorial content and projects are intellectual property of http://canoncreativegirl.blogspot.com/.  I do receive financial compensation and material product from Pink Paislee to develop my craft posts, but all ideas and opinions are my own.

The crisp change of Fall is in the air, and I am so excited for the seasons to change.  Fall is my favorite season!  Looking forward to cooler weather and everything pumpkin!

I'm sharing a fall layout today, made with the Pink Paislee Cedar Lane collection.  This collection has got to be one of my all time favorite Fall collections, I love the papers and the B sides are seriously amazing too!


I started this layout by cutting my background cut file out of white cardstock paper.  I splashed some white paint and black ink against my polka dot background paper and set aside to dry.


Then I cut out lots of fun patterned paper squares, printed and cut my photo, then added lots of embellies. 


The arrows in this collection are some of my all time favorite embellishments, just can't get enough!


Thanks for stopping by today,  I hope this layout has inspired you to get a head start on Fall crafting!


Monday, September 14, 2015

Pink Paislee | Pattern Piecing

This is a personal blog. All editorial content and projects are intellectual property of http://canoncreativegirl.blogspot.com/.  I do receive financial compensation and material product from Pink Paislee to develop my craft posts, but all ideas and opinions are my own.

Good morning!  Today on the Pink Paislee blog I am sharing  just one of the many ideas for using the Memorandum collection on a scrapbook page.  Memorandum is quickly becoming one of my new favorite collections to work with.  The patterns and embellishments go together so effortlessly.  I gathered together some of my favorite papers from the collection and embellishments.

I also added in some Mister Huey's black spray mist and some lovely gold foam Thickers from the Citrus Bliss collection.

One of my favorite techniques to do on a layout is pattern piecing.  To create this layout I first cut the Desktop Patterned Paper using a background cut file, then chose other papers from the collection to piece behind the open spaces before adhering it all down to a piece of white cardstock.

I get asked all the time what kind of adhesive I like to use when working with cut files and pattern piecing.  I like to use the American Crafts Sticky Thumb brand liquid pva glue.  It has a twist tip on it that allows me to place adhesive down in small areas.  Here is a closeup of my layout after I adhered everything down.


Collection used: Memorandum and Citrus Bliss