Monday, August 31, 2015

Pink Paislee | Clip It Up!

This is a personal blog. All editorial content and projects are intellectual property of http://canoncreativegirl.blogspot.com/.  I do receive financial compensation and material product from Pink Paislee to develop my craft posts, but all ideas and opinions are my own.


Hello Everyone!  This week we are sharing special ways to Clip it up, using the Memorandum collection on the Pink Paislee blog.  I am so excited about this collection!  Not only is it fun and super trendy, it is also perfect for keeping you organized!

When I saw the gold clipboard included in the Memorandum collection, I gasped!  I love gold, and knew that it would make the perfect addition to my office.  I decided to use the clipboard as a way to clip together notes and plans.
I used the "today" folder, included in the mini file pack, and adhered it to my clipboard as a way to keep track of things.  I cut several small cards from the Memorandum punch card patterned paper to fit inside my folder.
I created a simple banner for my clipboard by cutting out triangles from the Memorandum memo patterned paper and then used my sewing machine to stitch them together into a banner.

The washi tape strips included in the washi tape pack made the perfect simple embellishment to add to my note cards.
I hope that you enjoyed my post today, and that it inspires you to clip up your own ideas!!
Collection Used: Memorandum


Sunday, August 30, 2015

American Crafts | Meet Me In the Sunshine

This is a personal blog. All editorial content and projects are intellectual property of http://americancrafts.typepad.com/.  I do receive financial compensation and material product from American Crafts to develop my craft posts, but all ideas and opinions are my own.


I love scrapping fun in the sun photos!  We visit the beach each year
and we always take lots of pics.  The Amy Tangerine Rise and Shine 
collection is perfect for scrapping those sunny memories!


Supplies: Amy Tangerine Rise and Shine (RSTH-70027) - Grace Phrase/ Gold Foil Thickers, Amy Tangerine Rise and Shine (370025) - 6x6 Paper Pad, Amy Tangerine Rise and Shine (370039) - Wood Veneers, Amy Tangerine Rise and Shine (370044) - Gold Paper Clips, Amy Tangerine Rise and Shine (370034)- Epoxy Shapes, Amy Tangerine Rise and Shine (370035) - Stickers Phrase, Amy Tangerine Rise and Shine (370032) - Stickers Accent & Phrase, Cardstock (AM710-81) - White, This To That (AM617-13) - Adhesive, Studio Calico (SC1-31064) - Inky Black 

How To: Use a cut file to cut out octagon shapes with centers out of various papers from the 6x6 paper pad.  Against a white cardstock background create a grid design using the octagon shapes.  Drop droplets of black ink across the page.  Print a small wallet sized photo and adhere to center octagon shape, adhere down and fasten with a paper clip.  Adhere wood veneer pieces to three of the octagon shapes.  Spell out the title "Meet Me in The Sunshine" using Grace Phrase/ Gold Foil Thickers and adhere down to page.  Embellish page with heart sticker and X stickers from the Gold Foil Thickers.  Adhere epoxy "oh yes" shape and green and gold leaf to page.  Adhere accent and phrase triangle stickers and phrase word stickers to finish off the page.


Friday, August 28, 2015

American Crafts | Favorite Photo Keepsake

This is a personal blog. All editorial content and projects are intellectual property of http://americancrafts.typepad.com/.  I do receive financial compensation and material product from American Crafts to develop my craft posts, but all ideas and opinions are my own.


An altered frame is a great way to show off a favorite photo.  This frame would be perfect to give as a gift or a keepsake.


Supplies:  DIY Shop2 (369007) - Chalkboard Mason Jar, DIY Shop2 (369002) - Natural Burlap Pennant, DIY Shop2 (369005) - Large Chalkboard Clothespins, DIY Shop2 (369049) - Kraft W/ Chalkboard, DIY Shop2 (369051) - Glitter Stickers Gold Hearts, DIY Shop2 (369064) - Doilies White, DIY Shop2 (370059) - Printed Muslin Bags, DIYShop2 (368996) - Treat Bags w/ Gold Dots, Amy Tangerine Stitched (368980) - Cardstock Die Cut Shapes, Amy Tangerine Stitched (STCHTH-68966) - Today Accent Words/Black Foam, Heidi Swapp (HS370124) - Minc Foil Applicator & Starter Kit, Heidi Swapp (HSFOIL-69973) - Minc Reactive Foil Roll Gold, Heidi Swapp (HS70206) - Minc Jumbo Paper Alphabet, Heidi Swapp (HS370207) - MInc Die-Cut Jumbo Words, Heidi Swapp (HS370211) - Minc Binder Clips Gold, Heidi Swapp (HS30214) - Minc Jumbo Numbers, This To That (61754) - Double Sided Super Sticky Red Tape .5 In x 5yd, Other: Chicken Wire Frame

1.  Arrange the Jumbo Alpha, Jumbo Numbers and Jumbo Words that you would like to use in a Minc Folder (included in starter kit) with a piece of gold reactive foil and run through the Minc Foil applicator machine. 


2.  Gather Supplies.


3. Run burlap banner pieces through a sewing machine and sew a straight stitch across the top each banner.  Leave thread pieces long on the ends, trim off excess thread.


4.  Pin stitched burlap pieces to top of frame.  Adhere an ampersand, the word "love",
and a kraft/chalkboard tag with a gold heart sticker.


5.  Use Super Sticky Red Tape to adhere mason jar tag to doily.  Adhere heart gold glitter sticker on top.


6.  Use sewing machine to stitch "Hello" die cut tag to treat bag.  Adhere thicker "love" sticker to bottom of treat bag.  Print a small black and white photo and adhere to top right hand side of treat bag.


7. Adhere Jumbo number "2" to muslin bag using a gold binder clip.


Your frame is now ready to enjoy!  This can be given as a gift or used 
to brighten up a room!


Thanks!


Monday, August 24, 2015

The Cut Shoppe | Bon Apetit!

Hi Everyone,

I have a layout to share with you today using the Get To The Point 12x12 cut file from The Cut Shoppe!


To create my layout, I cut the background out of white cardstock paper.  I then placed the yellow patterned paper behind it.  I printed a small instagram photo and layered it on top of tabs and tags.  I splattered black ink across the page and then embellished with lots of bits and pieces.


Supplies: Elle's Studio: Let's Eat Collection: Patterned paper, bits and pieces, cutouts, tags, wood veneers; American Crafts: White cardstock; Studio Calico: Mister Huey's Inky Black; The Cut Shoppe: Get To The Point 12x12 cut file


Tuesday, August 18, 2015

The Cut Shoppe | Totally Seriously Summer Fun!

Hi Everyone,
I have a new layout for to share with you that I made for The Cut Shoppe using the new Sideways Chevron 12x12 cut file.


I cut my 12x12 Sideways Chevron Background out of white cardstock paper.  Not all of the cuts, cut all the way through.  This is because I need a new blade, but I loved the look.  I decided to leave a lot of the pieces that did not cut all the way through on this page, to give it a sense of white balance.  I popped out a few pieces and then layered a piece of Finder's Keepers Patterned Paper behind it.  I then printed my small photo and added embellishments, stitching, stamping and the title.


This layout came together quickly, and I love the look.  Here is the background cut file that I used:


Sideways Chevron 12x12 Cut File


Thanks for stopping by today, I hope you enjoyed my layout.  If you make a layout using cut files from the shop, we would love for you to share it with us on The Cut Shoppe's Facebook Page!


Monday, August 17, 2015

Pink Paislee | Back To School

This is a personal blog. All editorial content and projects are intellectual property of http://canoncreativegirl.blogspot.com/.  I do receive financial compensation and material product from Pink Paislee to develop my craft posts, but all ideas and opinions are my own.


I have a tutorial up on the Pink Paislee blog today, that I can't wait to share with you!

Is it really time for Back To School already?  The Summer went by so fast!  My kids actually head back to school this week!  This mason jar desk organizer will be perfect for getting organized this year.  Using the Memorandum collection you can turn a couple of jars into a desk organizer!


Supplies for this mason jar desk organizer:

  • Serving Tray
  • Two mason jars  (you need ones with at least one side that is smooth)
  • Acrylic paint in your choice of colors ( I used Martha Stewart Multi-Surface Satin Summer Haze)
  • Acrylic paint in your choice of colors (I used Martha Stewart Decor Paint in Matte Chalkboard Finish)
  • Painter's Tape or other tape (I used washi tape for mine)
  • Regular chalk
  • Paint brush

Start by painting the mason jars with your paint of choice.  I used the black Martha Stewart Vintage Decor Paint in Matte Chalkboard Finish and and  Martha Stewart Multi-Surface Satin Summer Haze acrylic paint.  Please wait for the paint to fully dry before adding any additional coats.  Then mask off a little over half of your jars for painting.  Keep your line straight at the top for this step.  To get the location of the line, be sure there will be plenty of chalk above your line when the jars are located in the tray.  As you can see below, my jars have one smooth side with no writing.  This is important for this project.  I specifically chose jars that had a smooth side.

Once the tops of your jars have been painted, remove the tape.  Allow the area to cure completely then add the tape so you can paint the bottom of the jar.   Add two coats of chalkboard paint to the jars.  Be sure you paint one vertical and one horizontal.  Allow to dry in between coats as well.  Remove the  tape at the end of this step.  Touch up the line in between colors if you need to.

Once everything is dry, be sure to let all of the products cure according to the package directions.  You will need to condition all chalkboard surfaces by rubbing them with the side of a piece of chalk and then erasing.  You can then write anything you wish with a chalk, a chalk marker or letter stickers. I started to write "pens" and "pencils with a chalk marker and then didn't like the way my writing looked, so I erased them and replaced them white letter stickers from the Memorandum collection.  I love how crisp and clean the letter stickers make them look.  Throw in some pens, pencils, markers, and more to help keep the kids organized or give as a gift to your favorite teacher.

I also made this small little easel for the desk area.  Using the paper clips from the Memorandum collection I can clip on a cute little message for my kids!


Supplies for the Art Easel:

  • Chalkboard Easel Album ( I purchased mine at Michael's)  4.7 "x 7"
  • Pink Paislee Memorandum Snapshots Paper
  • Pink Paislee Memorandum Cubicle Paper
  • Pink Paislee Memorandum Office Supplies Kit
  • Pink Paislee Memorandum Stickers
  • Pink Paislee Memorandum Washi Tape
  • Pink Paislee Memorandum Photo Frames
  • Adhesive
  • Sewing Machine and White Thread
Trim a piece of Memorandum Snapshots paper measuring 4.7"" x 7" and adhere to front side of easel album.  Run a white and gold polka dot frame (included in photo frames pack) through the sewing machine, and straight stitch with white thread.  Leave ends long for distressed look.  Adhere frame  to the center of easel album.  Fussy cut "Capture The Everyday" clipboard from Pink Paislee Memorandum Cubicle Paper, Adhere to center of easel album (just on top of frame) with a gold camera paper clip (include in the Office Supplies kit).  Apply a "Hello" gold sticker from the sticker pack to a black label included in the Office Supplies kit), set aside.  Tear a red polka dot with white strip (included in the Washi Tape kit) and adhere behind black "Hello" label.  Adhere label, with washi to the easel just below "Capture The Everyday" clipboard.  Enjoy!  I hope this post inspires you to create your own back to school organization items!

Thanks for stopping by today, I hope you enjoyed my tutorial!


Thursday, August 13, 2015

The Cut Shoppe Design Team!


The Cut Shoppe made their Design Team announcement on their blog today, and I am excited to share that I will be continuing on for their next term as their Social Media Director!  I will be taking a step back from designing for the term so that I can focus on a few other projects in the works!  
I'm looking forward to working with these lovely ladies this term and showcasing their talents on Social Media!


Congrats to the new team.  You can read the full announcement here.


Pink Paislee | Receipt Holder

This is a personal blog. All editorial content and projects are intellectual property of http://canoncreativegirl.blogspot.com/.  I do receive financial compensation and material product from Pink Paislee to develop my craft posts, but all ideas and opinions are my own.


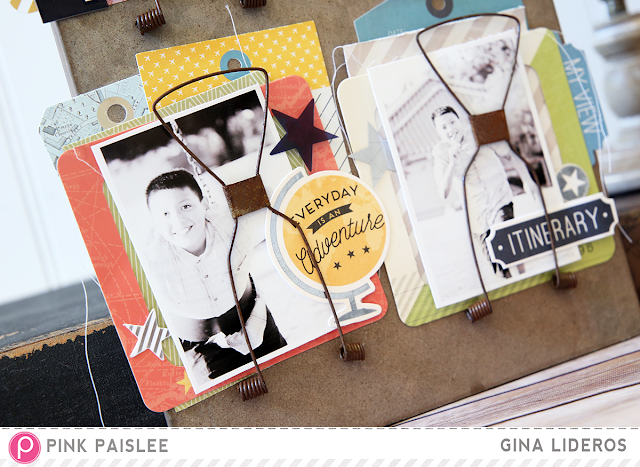
I recently put together this altered receipt holder using the Pink Paislee Atlas collection and wanted to share it with you!

This was such a fun project to put together!  And such a rare moment, to get great pictures of my son!  He hates to take photos and 90% 0f my projects are usually of my daughter because she is the total opposite of him, she loves to take photos, lol!


I simply printed four small black and white photos of my son Matthew and adhered to them to tags, frames, and bits and pieces from the Atlas collection.  I added some simple machine stitching with white thread, and left the ends long to add a homemade effect.


To complete my project I added some chipboard stickers and extra cardstock pieces, also from the Atlas collection.  


This project is sure to brighten up my office!  Thanks for looking today!


Wednesday, August 12, 2015

Scrapbook Circle | Fun Circles


I have a layout to share with you today that I made this month using the August Make It Happen kit and add-on's from Scrapbook Circle.  I love circles, and graphic shapes on my layouts!  So, I decided to combine the two on this layout.  I cut oblong pieces of paper using the 6x6 paper pad included in the You Shine Add-on, and papers from the main kit and then arranged them onto a circular format on my layout.


I used adhesive to adhere all the pieces down, and then stitched over them with a sewing machine and white thread.  Next, I printed an instagram photo and added lots of embellishments!


This was such a fun layout to make, it really plays off the fun photo.  How are you using the August kit and add-on's?  We would love for you to share your pages with on the Facebook page!


Tuesday, August 11, 2015

American Crafts | Finder's Keepers

This is a personal blog. All editorial content and projects are intellectual property of http://canoncreativegirl.blogspot.com/.  I do receive financial compensation and material product from American Crafts to develop my craft posts, but all ideas and opinions are my own.


The new Finder's Keeper's collection by American Craft's is so playful and happy.  The combination of sweet icons, bold patterned papers and embellishments bring a youthful look to my page.


Supplies: Finder's Keepers (340320) Field Trip, Finder's Keepers (340322) Pursuit, Finder's Keepers (340323) - Keen, Finder's Keepers (340324) - Bright Eyes, Finder's Keepers (340325) - Explore, Finder's Keepers (340326) - Roundabout, Finder's Keepers (340327) - Wild Goose Chase, Finder's Keepers (340329) - Token, Finder's Keepers (340330) - Ransack, Finder's Keepers (340332) - Expedition, Finder's Keepers (340334) - Clues, Finder's Keepers (340335) - Dreamcatcher, Finder's Keepers (340337) - Quest, Finder's Keepers (340339) - Treasure, Finder's Keepers (340340) - Meant To Be, Finder's Keepers (340341) - Magnify, Finder's Keepers (340342) - Compass, Finder's Keepers (340343) - Seeker, Finder's Keepers (340235) - Clear Sticker Sheet, Finder's Keepers (340234) - Thickers Today, Finder's Keepers (340237) - Puffy Stickers, Finder's Keepers (340242) - Rubber Words, Finder's Keepers (340243) - Die Cut Shapes, Finder's Keepers (340248) - Rubber Words/Shapes, Finder's Keepers (340251) - Washi Book, 


How To:

Cut patterned papers into 2 1/2" x 2 1/2" inch squares, Use a bone folder to fold in each end of the square.  Repeat this step until all of the squares are folded.  Arrange folded squares onto a 12x12 white cardstock sheet of paper.  Line them up in horizontal lines of four, use adhesive to adhere down.  Print a small black and white photo, trim into a diamond shape and adhere to page.  Adhere "We Are Better Together" die cut shape to page, right beside photo.  Adhere three more folded squares to the top left hand side of page to complete design.  Flick small drops of black spray mist across page, set aside to dry.  Adhere clear arrow sticker and two small strips of washi tape to top right hand side of page.  Use a sewing machine and white thread to stitch down.  Use the sewing machine to add a couple of stitches to a few of the folded squares.  Adhere "XO" foam thicker word to page on left hand side.  Adhere die cut arrow shape to page just below thicker word.  Adhere "hello" rubber word to bottom right hand side of page on top of folded squares.  Adhere a small blue triangle die cut and puffy sticker just below word. Adhere a small gray circle rubber embellishment to middle of design on top of a folded square.  Finish by adhering pink acetate star to the top right of design.


Thanks for looking today!