Showing posts with label the cut shoppe design team. Show all posts

Monday, August 24, 2015

The Cut Shoppe | Bon Apetit!

Hi Everyone,

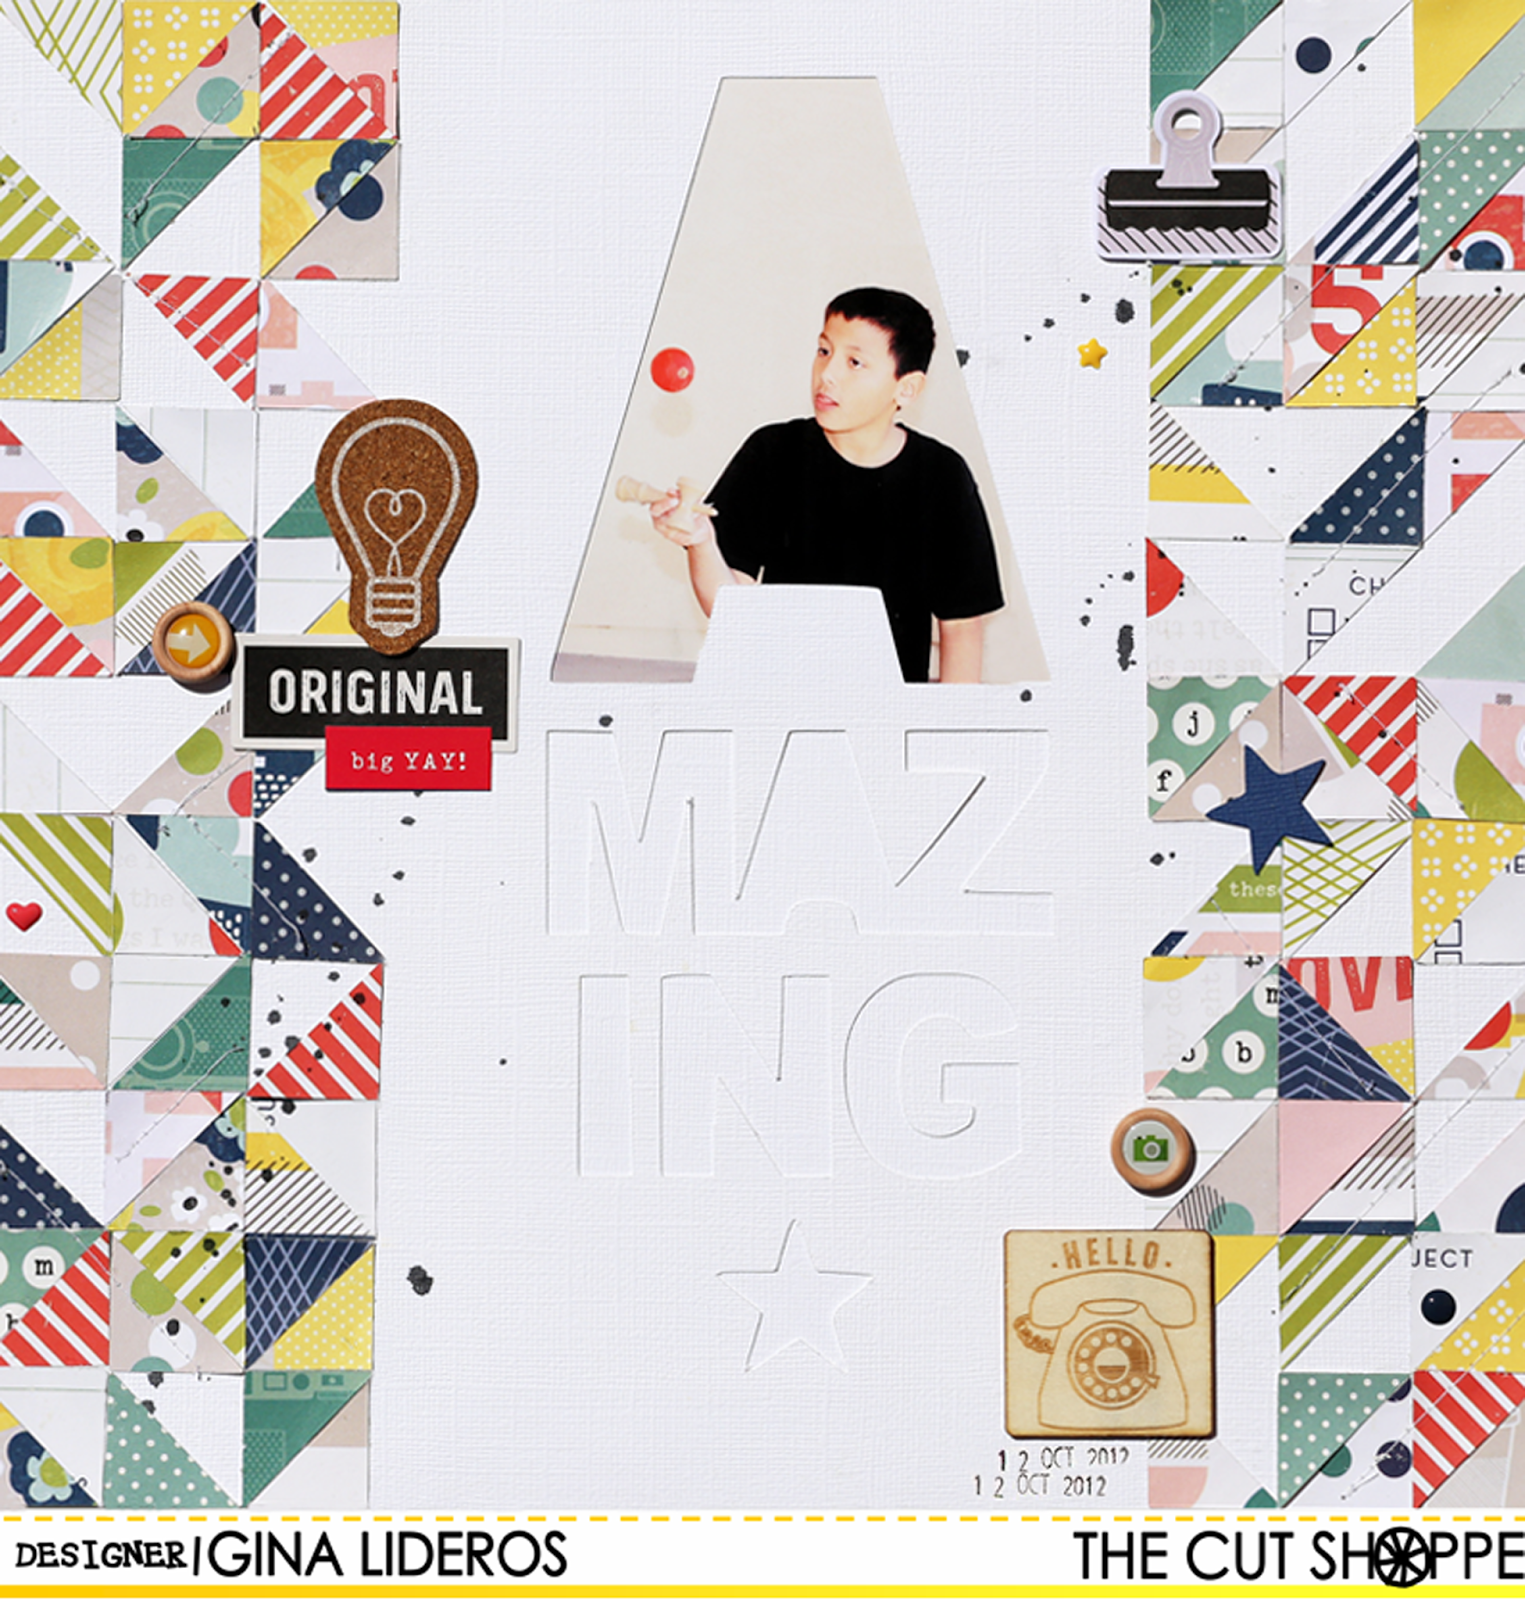
I have a layout to share with you today using the Get To The Point 12x12 cut file from The Cut Shoppe!


To create my layout, I cut the background out of white cardstock paper.  I then placed the yellow patterned paper behind it.  I printed a small instagram photo and layered it on top of tabs and tags.  I splattered black ink across the page and then embellished with lots of bits and pieces.


Supplies: Elle's Studio: Let's Eat Collection: Patterned paper, bits and pieces, cutouts, tags, wood veneers; American Crafts: White cardstock; Studio Calico: Mister Huey's Inky Black; The Cut Shoppe: Get To The Point 12x12 cut file


Thursday, August 13, 2015

The Cut Shoppe Design Team!


The Cut Shoppe made their Design Team announcement on their blog today, and I am excited to share that I will be continuing on for their next term as their Social Media Director!  I will be taking a step back from designing for the term so that I can focus on a few other projects in the works!  
I'm looking forward to working with these lovely ladies this term and showcasing their talents on Social Media!


Congrats to the new team.  You can read the full announcement here.


Sunday, July 19, 2015

The Cut Shoppe | Be Awesome

Hello!  I have a simple and fun layout to share with you today using the Trippy Triangles cut file and the Words To Live By cut file!  As soon as I saw the new Happy Things collection from Pinkfresh Studio, I knew I just had to use it along with the Trippy Triangles background!


How To:  I arranged a couple of triangles from the Trippy Triangles cut file and the "Be Awesome" title onto my workspace in Silhouette Studio and cut them out of 12x12 white cardstock.  After my cut was complete I adhered patterned paper to the backside of "awesome" and my triangle cuts.
I then printed a 4x6 photo and placed it behind the "Be" word.  I used a needle and black thread to hand stitch around my cut out triangles.  I then adhered acrylic triangle pieces (from the collection) and a couple of hand cut triangles around my design.  I flicked black spray mist across my page, and finished by adhering wood veneer pieces and puffy stickers.


I hope that you are inspired by my page today, and try to create your own triangular background, I'm sure it would be awesome!!


Tuesday, June 30, 2015

The Cut Shoppe | Hello Summer Love

This is a personal blog. All editorial content and projects are intellectual property of http://americancrafts.typepad.com/.  I do receive financial compensation and material product from American Crafts to develop my craft posts, but all ideas and opinions are my own.


Hi everyone!   I have a new layout to share with you today for The Cut Shoppe using the free Newsletter (Summer Love) cut file and the Bitty Borders cut file


Here's my layout:


I'm in love with that Summer Love cut file.  I knew right away when I saw it, that I just had to use it right away.  To create my layout, I actually cut the Summer Summer Summer Love title twice.  The first cut was the full title and then I trimmed off the bottom (love) piece.  The second cut I only cut the word "Love" from white cardstock paper.  I then placed the "Summer Summer Summer" title right above the love cut piece.  I placed my photo behind the love word.   To add color to my page I added watercolors on two of the Summer words and behind the title, before adhering down.  


The small circular hearts are from the Bitty Borders cut file, I simply ungrouped them and then cut them out individually and added watercolors to them.  To finish off my layout I added black spray mist, wood veneer pieces and machine stitching.


Summer Love


I hope this post has inspired you to try watercolors on a layout. It really adds a lot of color and interest!  Have a great day!


Saturday, June 27, 2015

The Cut Shoppe | Happy Together


Hi everyone!   I have a new layout to share with you today using the Tiny Triangles background from The Cut Shoppe.  Eye catching backgrounds are my groove.  I love pattern piecing and using lots of geometric shapes.  When I first saw the Tiny Triangles cut file, I fell in love!


When I started working on this layout, my original plan was to cut out the whole background from cardstock and then back the pieces with different pattern papers.  I accidentally had my cut settings on the wrong setting (I think I had it on patterned paper, when I really meant to have it on cardstock).  So, the Tiny Triangle design did not cut all the way through my cardstock.  I thought about starting over, but it was my last sheet of Navy cardstock.  So instead, I cut out individual triangles from various patterned papers and placed it on top of some of the background triangles.  It was a happy accident, I love that even though the background design did not cut all the way through, you can still see the design against the dark navy background.


Have you ever made a mistake on a layout and then turned it into a happy accident? If so, we would love for you to share it with The Cut Shoppe on their Facebook page!

Thursday, May 28, 2015

Happy Birthday To The Cut Shoppe! And A Giveaway!


The Cut Shoppe  is ONE YEAR OLD today!!!  To celebrate there is a 50% OFF coupon code for today and tomorrow!!  You can't beat that for stocking up on some awesome cut files!  Use the code TCSBDAY1


I love  all of the cut files Ashley creates for the shop!  There is such a wide range of  designs in the store and I find them so inspiring! ! I've created TONS of layouts using The Cut Shoppe files over the past year, and here are a few of my favorites:


Ashley is generously letting each of us give away a cut file! I I've chosen to giveaway one of my favorites!  To keep with that theme, I chose the Rosey Posey cut file to give away! Leave a comment on this post by 11:59 pm on May 31st, and I'll announce the winner the next day!


Wednesday, April 15, 2015

Neat & Tangled and The Cut Shoppe Inspiration Week


Hi everyone,
This week The Cut Shoppe and Neat & Tangled have teamed up for a fun inspiration week.  I'm up on The Cut Shoppe's blog today sharing a layout that I created using the Happy Circles cut file and Scrap Circles Stamp set.

Friends


I wanted to use one of the cut files, as a stitching template.  I chose the Happy Circles cut file, which is one of the free Cut files, that go out in the weekly Newsletter.  Once I finished stitching the design, I added some circles punched from patterned paper, to go along with the stamped phrases from the Scrap Circles stamp set in the Neat & Tangled shop.


Supplies: The Cut Shoppe: Happy Circles cut file; Neat & Tangled: 4x6 Scrap Circles Stamp; Crafts: patterned paper, stickers, die cuts, thicker word, paper clip, precision pen, date stamp; Mister Huey's: Inky Black Spray Mist; Ink: StazOn, Hero Arts Shadow Ink; Other: embroidery thread


The Cut Shoppe is giving away a $25 credit to the Neat & Tangled Shop! All you need to do, is comment on each post this on the blog this week. Stop by!!


Sunday, March 22, 2015

Hello Hello

Hi, I have a new layout to share with you today for The Cut Shoppe using The Love Club cut file.  I love using repeated patterns on my layouts.  I chose to use the "hello" word from this set to create a repeated pattern on my layout.


How To:  Flick white paint across a striped patterned paper background, set aside to dry.  Using Silhouette studio cut the "hello" word word five times from five different pieces of patterned paper.  Adhere notebook piece of paper to right side of a layout, use a tiny attacher to staple it down.  Print a small photo and adhere on top.  Trim a small strip from an overlay and adhere to right hand side of notebook paper.  Apply adhesive to wood veneer piece and adhere it to the bottom right hand side of layout just underneath the photo.  Adhere "focus on the happy" sticker on top.  Stamp the phrase "make it happen" in white ink across the page.  Adhere wood veneer clouds and die cut cloud to page.  Finish by adding machine stitching to a couple of the words.


Supplies: The Cut Shoppe: The Love Club cut file; American Crafts Shimelle True Stories: Patterned Papers, wood veneer pieces, overlay, die cut cardstock shapes, notebook pad, cardstock sticker, rotary stamp; Other: white paint, tiny attacher, sewing machine, thread


Friday, March 20, 2015

The Cut Shoppe | Dream Big


I'm super excited to share this new layout with you today for The Cut Shoppe.  Have you seen the brand new I Heart String Art cut file set in the shop?  The 5 files (cloud, house, star, heart and arrow) make great embellishments for your layouts, cut just the way they are.  But, you can also use them as templates to create your own string art, as I did on my layout today.


To create my string art layout I used the I Heart String Art cut file as a template.  I enlarged the arrow shape and then cut it out with my Silhouette.  I placed the template over my background paper and then used a hole piercer to poke holes.  After all of my holes had been pierced I began to string the design with black embroidery thread.  I used my template as a visual guide so I would know where to thread each string.  I used the same template to make three arrows.  After my string art design was complete, I finished my page, by adding my photo and embellishments.  I love the look of the three bold arrows.  Super easy and makes a great impact!


Supplies: The Cut Shoppe: cut file; Fancy Pants: Ephemera Pack, Insta Pack; Dear Lizzy Serendipity: Watercolor words, Thickers; Felicity Jane: Patterned Paper; Other: Embroidery Thread, watercolors, paint, spray mist


Friday, January 30, 2015

You & Me

Hello and Happy Friday!  I have a layout to share with you today that I created for  The Cut Shoppe using the brand new Sweet Hearts and Love Letters cut files!  I loved taking one of the hearts from the Sweet Hearts set and enlarging it to use on my layout.


To create my layout, I began by painting watercolors on a white cardstock background.  I also flicked white paint and gold spray mist across the page.  Next, I enlarged my heart and cut it out of white cardstock.  I backed a few of the open spaces with patterned papers.  Next, I cut out my title a small heart and a few + signs and added them to my page.  I added my photo and a few cardstock embellishments, thread and buttons.


Supplies: Sweet Hearts cut file, Love Letters cut file: The Cut Shoppe; cardstock, patterned papers, stickers : American Crafts; Other: paint, watercolors, spray mist


Friday, January 23, 2015

Pineapple Art Print | The Cut Shoppe

Hi everyone,

I hope your Friday is off to a great start!  I have a new project on The Cut Shoppe blog today that I would like to share with you using the Prickly Pineapple cut file.


To create my art print I cut out the Prickly Pineapples cut file using my Silhouette Cameo.  Then I used it as a mask.  I painted over it with watercolor paints onto watercolor paper using a water brush. Once it was dry I framed it.  This simple art print will make a sweet addition to any room.


Supplies: Prickly Pineapples Cut File: The Cut Shoppe; Other: watercolors, watercolor paper


Saturday, December 20, 2014

Make A Wish | The Cut Shoppe

Hi Everyone,

I have a new post up at The Cut Shoppe today, using their brand new Sew Loved cut file.


To create my layout I took the Sew Loved cut file and opened it in my Silhouette Studio software program.  I used a copy + paste option to repeat the pattern several times and then cut the file from patterned paper.  I also used the same method to cut the pattern several times from white cardstock.
I used watercolor paints on several of the hearts, and then grouped them all behind my photo!


Supplies: Sew Loved cut file: The Cut Shoppe; Patterned Papers & 
Embellishments: American Crafts