Showing posts with label the cut shoppe. Show all posts

Tuesday, February 2, 2016

American Crafts | Shimelle Starshine

This is a personal blog.  All editorial content and projects are intellectual property of http://americancrafts.typepad.com/.  I do receive financial compensation and material product from American Crafts to develop my craft posts, but all ideas and opinions are my own.


The new Shimelle Starshine collection by American Crafts is not just for boys.  There are many pieces that work well for the everyday as well as for girl projects.  I chose some of the floral pieces in the collection to help pretty up this page about my daughter.


Supplies: Shimelle Starshine (374057) - Acetate Ephemera, Shimelle Starshine (374054) - Acrylic Shapes, Shimelle Starshine (374061) - Epoxy Paper Clips, Shimelle Starshine (374059) - Flair Buttons, Shimelle Starshine (374039) - Apollo Patterned Paper, Shimelle Starshine (374035) - Artemis Patterned Paper, Shimelle Starshine (374021) - Astro Patterned Paper, Shimelle Starshine (374037) - Curiosity Patterned Paper, Shimelle Starshine (374038) - Galileo Patterned Paper, Shimelle Starshine (374026) - Horizon Patterned Paper, Shimelle Starshine (374025) - Hubble Patterned Paper, Shimelle Starshine (374031) - Juno Patterned Paper, Shimelle Starshine (374028) - Kepler Patterned Paper, Shimelle Starshine (374033) - Mercury Patterned Paper, Shimelle Starshine (374030) - Odyssey Patterned Paper, Shimelle Starshine (374040) - Phoenix Patterned Paper, Shimelle Starshine (374043) - Viking Patterned Paper, Shimelle Starshine (374055) - Phrase Stamp, Shimelle Starshine (374050) - Accent & Phrase Stickers, Shimelle Starshine (374051) - Accent & Phrase 6x12 2 Sheets, Shimelle Starshine (374052) - Chipboard

How To: Use a die cutting machine to cut out background from white cardstock paper.  Trim pieces of various patterned papers and place behind cut out background.  Use a paint brush to flick white paint across the page, set aside to dry.  Print a 6x4 black and white photo, adhere to center of page.  Adhere stickers behind and above photo.  Clip an epoxy paper clip onto the right side of photo.  Print out journaling, trim and adhere to page just below photo.  Use a sewing machine to stitch down journaling strips.  Adhere chipboard, acrylic and acetate stars to page.  Use a mini stapler to staple down a couple of the stars.  Place a floral chipboard sticker to left hand side of page just below photo.  Adhere acyrlic "Shine" sticker to bottom right hand side of page.  Place a small tag (from ephemera pack) to top right hand side of page.  Use a sewing machine to stitch down.  Place an acrylic star on top.  Stamp phrase stamp onto page using white dye based ink.  Finish page by using a sewing machine to add random stitching to page in a sporadic pattern.


Monday, August 24, 2015

The Cut Shoppe | Bon Apetit!

Hi Everyone,

I have a layout to share with you today using the Get To The Point 12x12 cut file from The Cut Shoppe!


To create my layout, I cut the background out of white cardstock paper.  I then placed the yellow patterned paper behind it.  I printed a small instagram photo and layered it on top of tabs and tags.  I splattered black ink across the page and then embellished with lots of bits and pieces.


Supplies: Elle's Studio: Let's Eat Collection: Patterned paper, bits and pieces, cutouts, tags, wood veneers; American Crafts: White cardstock; Studio Calico: Mister Huey's Inky Black; The Cut Shoppe: Get To The Point 12x12 cut file


Tuesday, August 18, 2015

The Cut Shoppe | Totally Seriously Summer Fun!

Hi Everyone,
I have a new layout for to share with you that I made for The Cut Shoppe using the new Sideways Chevron 12x12 cut file.


I cut my 12x12 Sideways Chevron Background out of white cardstock paper.  Not all of the cuts, cut all the way through.  This is because I need a new blade, but I loved the look.  I decided to leave a lot of the pieces that did not cut all the way through on this page, to give it a sense of white balance.  I popped out a few pieces and then layered a piece of Finder's Keepers Patterned Paper behind it.  I then printed my small photo and added embellishments, stitching, stamping and the title.


This layout came together quickly, and I love the look.  Here is the background cut file that I used:


Sideways Chevron 12x12 Cut File


Thanks for stopping by today, I hope you enjoyed my layout.  If you make a layout using cut files from the shop, we would love for you to share it with us on The Cut Shoppe's Facebook Page!


Thursday, August 13, 2015

The Cut Shoppe Design Team!


The Cut Shoppe made their Design Team announcement on their blog today, and I am excited to share that I will be continuing on for their next term as their Social Media Director!  I will be taking a step back from designing for the term so that I can focus on a few other projects in the works!  
I'm looking forward to working with these lovely ladies this term and showcasing their talents on Social Media!


Congrats to the new team.  You can read the full announcement here.


Sunday, July 19, 2015

The Cut Shoppe | Be Awesome

Hello!  I have a simple and fun layout to share with you today using the Trippy Triangles cut file and the Words To Live By cut file!  As soon as I saw the new Happy Things collection from Pinkfresh Studio, I knew I just had to use it along with the Trippy Triangles background!


How To:  I arranged a couple of triangles from the Trippy Triangles cut file and the "Be Awesome" title onto my workspace in Silhouette Studio and cut them out of 12x12 white cardstock.  After my cut was complete I adhered patterned paper to the backside of "awesome" and my triangle cuts.
I then printed a 4x6 photo and placed it behind the "Be" word.  I used a needle and black thread to hand stitch around my cut out triangles.  I then adhered acrylic triangle pieces (from the collection) and a couple of hand cut triangles around my design.  I flicked black spray mist across my page, and finished by adhering wood veneer pieces and puffy stickers.


I hope that you are inspired by my page today, and try to create your own triangular background, I'm sure it would be awesome!!


Friday, July 10, 2015

The Cut Shoppe & CSI | Embrace Today

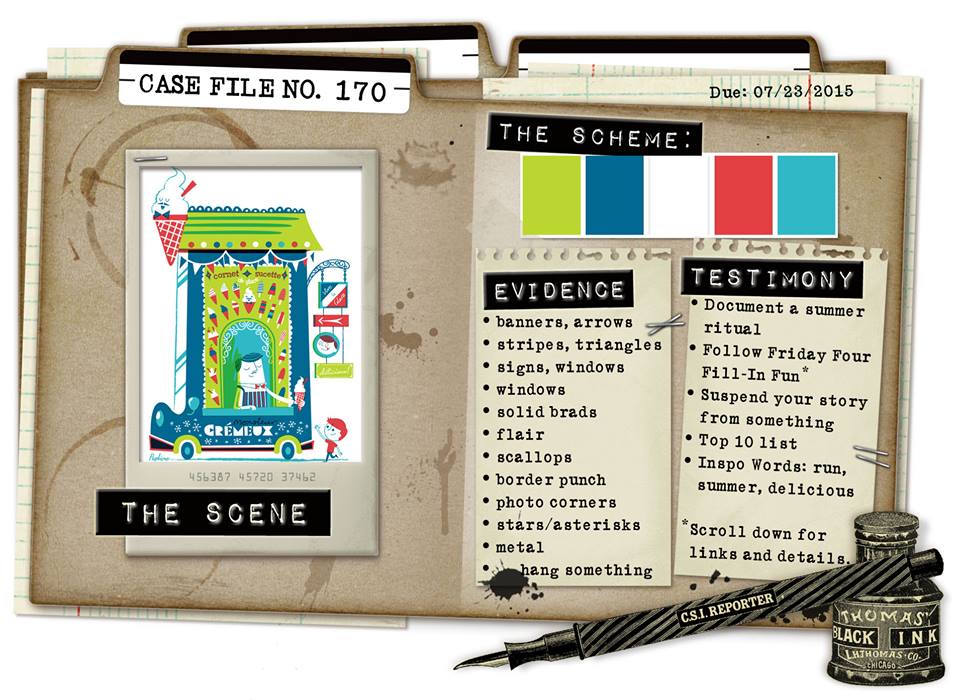
 I wanted to stop in today and share a layout, that I created for a Team Up with The Cut Shoppe and CSI: Color Stories Inspiration.  We are teaming up all month with CSI, and the designers are playing along with the Case Files, while the CSI Design Team is working with some of the cut files for The Cut Shoppe.  

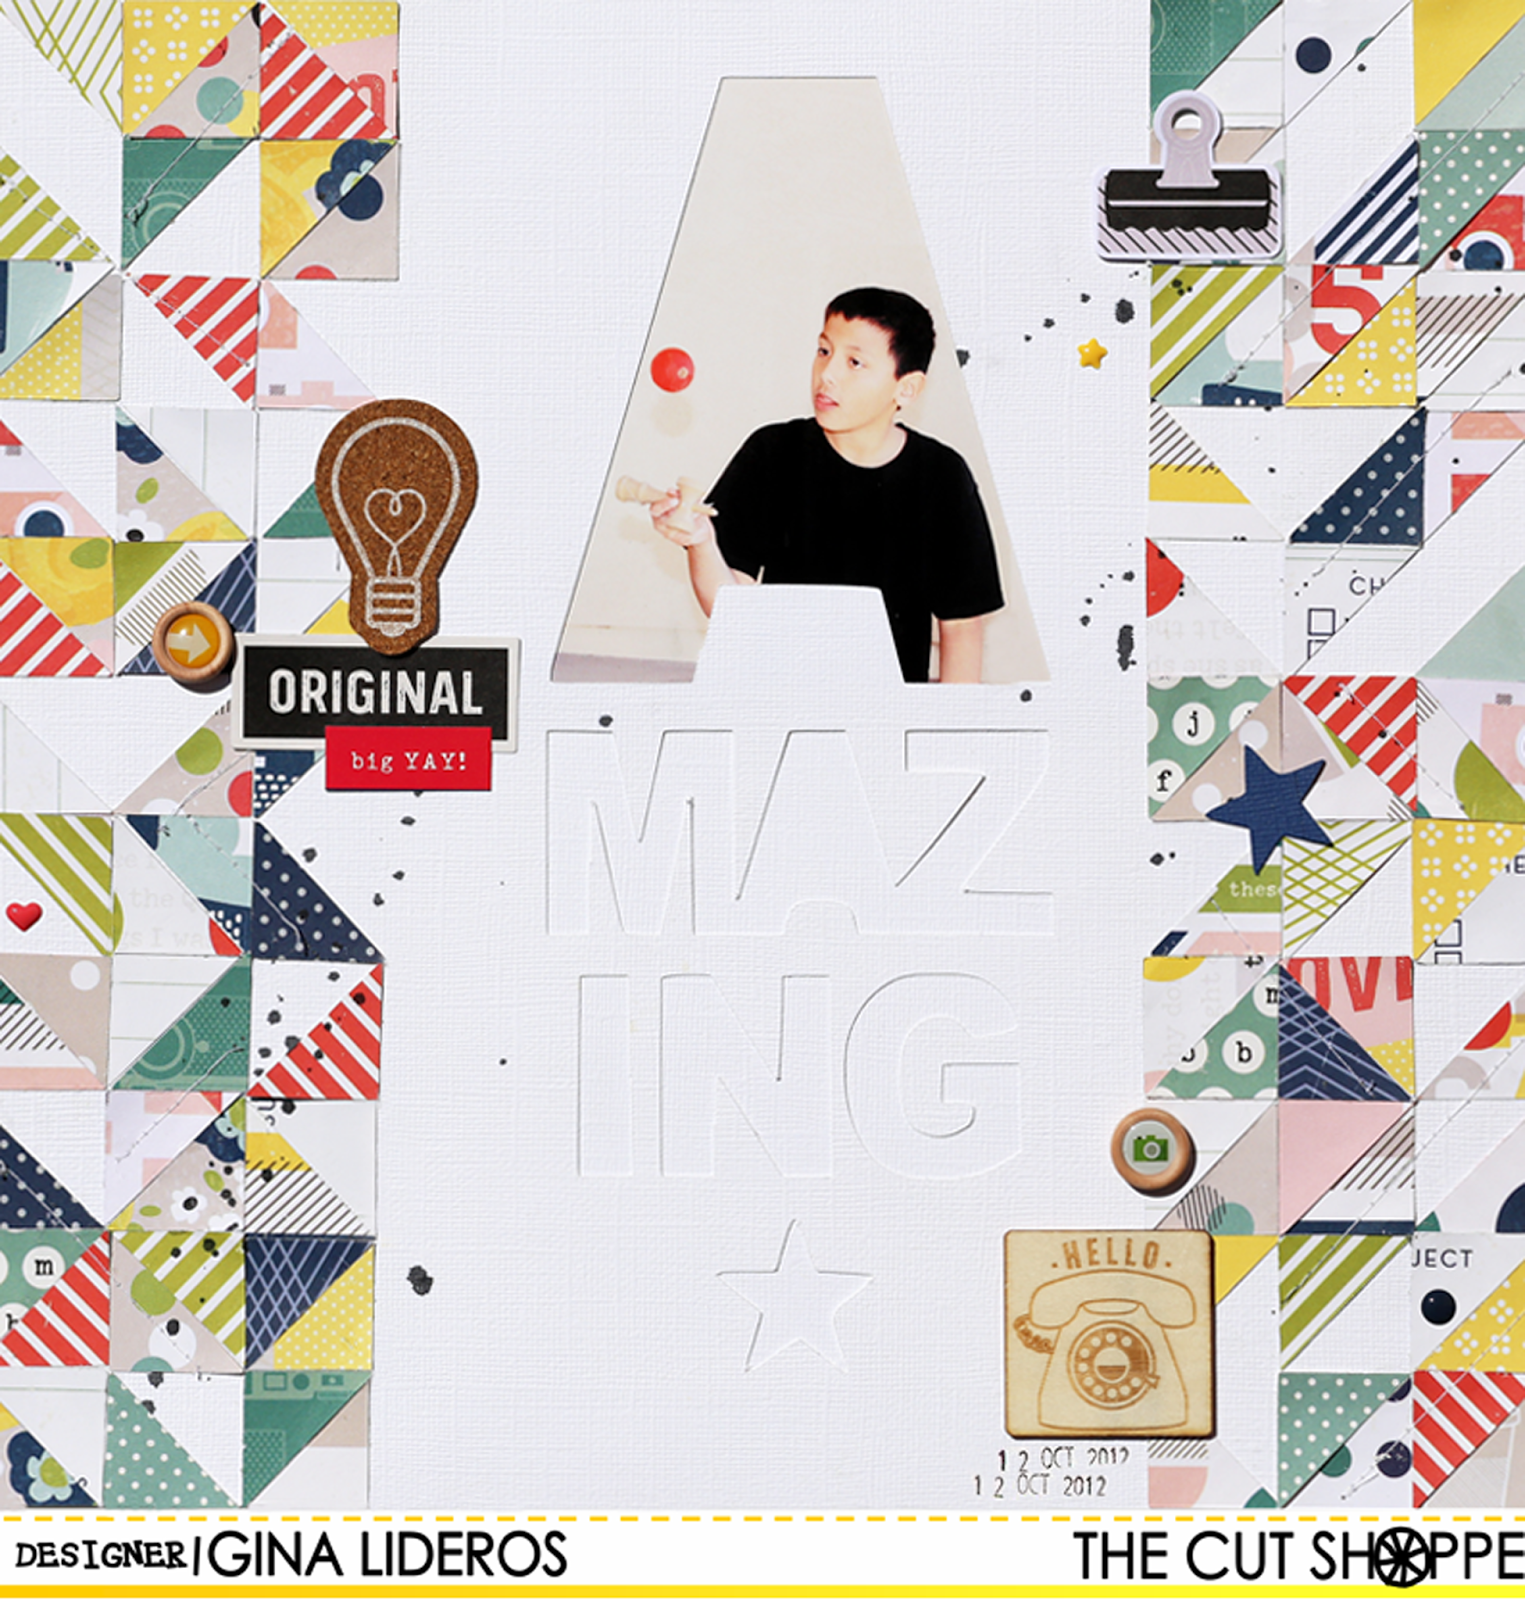
Here's a peek at what I created for Case File 170.


There are five sponsors working with CSI for the month of July, so make sure you play along for the chance to win some great prizes!  The Cut Shoppe is offering a $20 Gift Certificate!  You can visit the CSI website for all of the details, and here is a look at Case File 170.


And The Cut Shoppe is also offering a 30% discount all this week, through July 11th!  Just make sure you check out with the Coupon Code CSITCS30!


Supplies: The Cut Shoppe: Arrows with Attitude 12x12 cut file; American Crafts: White Cardstock, Kraft Cardstock, Patterned Papers, Embellishments, Stickers, Enamel Dots


Tuesday, June 30, 2015

The Cut Shoppe | Hello Summer Love

This is a personal blog. All editorial content and projects are intellectual property of http://americancrafts.typepad.com/.  I do receive financial compensation and material product from American Crafts to develop my craft posts, but all ideas and opinions are my own.


Hi everyone!   I have a new layout to share with you today for The Cut Shoppe using the free Newsletter (Summer Love) cut file and the Bitty Borders cut file


Here's my layout:


I'm in love with that Summer Love cut file.  I knew right away when I saw it, that I just had to use it right away.  To create my layout, I actually cut the Summer Summer Summer Love title twice.  The first cut was the full title and then I trimmed off the bottom (love) piece.  The second cut I only cut the word "Love" from white cardstock paper.  I then placed the "Summer Summer Summer" title right above the love cut piece.  I placed my photo behind the love word.   To add color to my page I added watercolors on two of the Summer words and behind the title, before adhering down.  


The small circular hearts are from the Bitty Borders cut file, I simply ungrouped them and then cut them out individually and added watercolors to them.  To finish off my layout I added black spray mist, wood veneer pieces and machine stitching.


Summer Love


I hope this post has inspired you to try watercolors on a layout. It really adds a lot of color and interest!  Have a great day!


Saturday, June 27, 2015

The Cut Shoppe | Happy Together


Hi everyone!   I have a new layout to share with you today using the Tiny Triangles background from The Cut Shoppe.  Eye catching backgrounds are my groove.  I love pattern piecing and using lots of geometric shapes.  When I first saw the Tiny Triangles cut file, I fell in love!


When I started working on this layout, my original plan was to cut out the whole background from cardstock and then back the pieces with different pattern papers.  I accidentally had my cut settings on the wrong setting (I think I had it on patterned paper, when I really meant to have it on cardstock).  So, the Tiny Triangle design did not cut all the way through my cardstock.  I thought about starting over, but it was my last sheet of Navy cardstock.  So instead, I cut out individual triangles from various patterned papers and placed it on top of some of the background triangles.  It was a happy accident, I love that even though the background design did not cut all the way through, you can still see the design against the dark navy background.


Have you ever made a mistake on a layout and then turned it into a happy accident? If so, we would love for you to share it with The Cut Shoppe on their Facebook page!

Sunday, June 7, 2015

Scrapbook Circle and The Cut Shoppe Blog Hop!!!


This week we are teaming up with The Cut Shoppe to bring you loads of inspiration using our June Have a Little Fun Kit plus our favorite cut files from The Cut Shoppe.

Hop along with our Scrapbook Circle team and comment as you go. We will be selecting a winner from all of the blog hop comments to receive $20 to The Cut Shoppe.  Be sure to stop by The Cut Shoppe blog and hop along to see what their team created with our June kit. Comment on The Cut Shoppe hop and you are entered to win one of our June Kits!

Hope you find loads of inspiration at our blog hop here at Scrapbook Circle and then over at The Cut Shoppe too!

Here is my layout that I created for the hop, using the June Have a Little Fun Today kit and


I combined the awesome products from the June Have a Little Fun Today kit, along with the two June add-ons to create this page!  I used a large circular icon from The Cut Shoppe's Give It a Whirl cut file set as a fun backdrop for the page.  I cut it in half and then backed some of the pieces with papers from the kit.


Thanks for hopping with us today!  Next on the hop is the super talented Valerie!


Friday, May 29, 2015

The Cut Shoppe | Epic

Hi everyone, I am here to share a layout that I made using the Stay Focused cut file set from The Cut Shoppe!  I love this set so much that I decided to use it twice this month.  To see the layout I created last week with this set, go here.


Supplies: The Cut Shoppe: Stay Focused cut file set; Scrapbook Circle: May Hello Sunshine kit: patterned papers, stickers, enamel dots, 


How To:  Enlarge the shutter image and cut out of white cardstock using the Silhouette Cameo.  Back pieces of the shutter with different pieces of patterned paper.  Adhere design to layout.  Brush watercolor paint around the image.  Flick splatters of black spray mist across the page.  Add photo and embellish with stickers, enamel dots, stamps and embellishments.


Before you head over to the Shop to get some shopping done, make sure you get our Coupon Code!  You can save 50% off of your entire purchase today, as our Birthday gift to you!


Thursday, May 28, 2015

Happy Birthday To The Cut Shoppe! And A Giveaway!


The Cut Shoppe  is ONE YEAR OLD today!!!  To celebrate there is a 50% OFF coupon code for today and tomorrow!!  You can't beat that for stocking up on some awesome cut files!  Use the code TCSBDAY1


I love  all of the cut files Ashley creates for the shop!  There is such a wide range of  designs in the store and I find them so inspiring! ! I've created TONS of layouts using The Cut Shoppe files over the past year, and here are a few of my favorites:


Ashley is generously letting each of us give away a cut file! I I've chosen to giveaway one of my favorites!  To keep with that theme, I chose the Rosey Posey cut file to give away! Leave a comment on this post by 11:59 pm on May 31st, and I'll announce the winner the next day!