I hope that you are having a great day so far. I wanted to let you know about this fabulous promotion that is going on
currently on the Bella Blvd. blog.... and wait for it..... they are doing a giveaway too!
Silhouette March Promotion
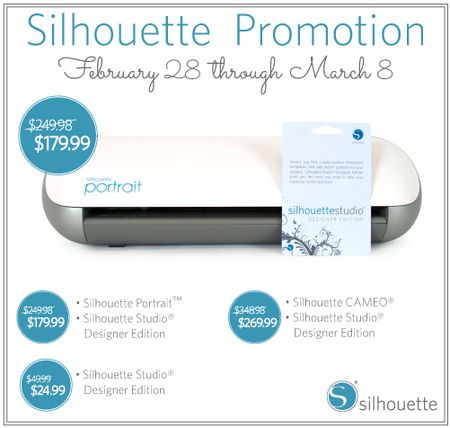
From now until March 8th Silhouette will be offering a discounted price on the Silhouette Portrait when you use the above link to purchase and enter the code "Bella"
As part of this wonderful promotion, I was one of the design team members selected to try out the designer edition software and
create a project with it.
Fashionista layout:
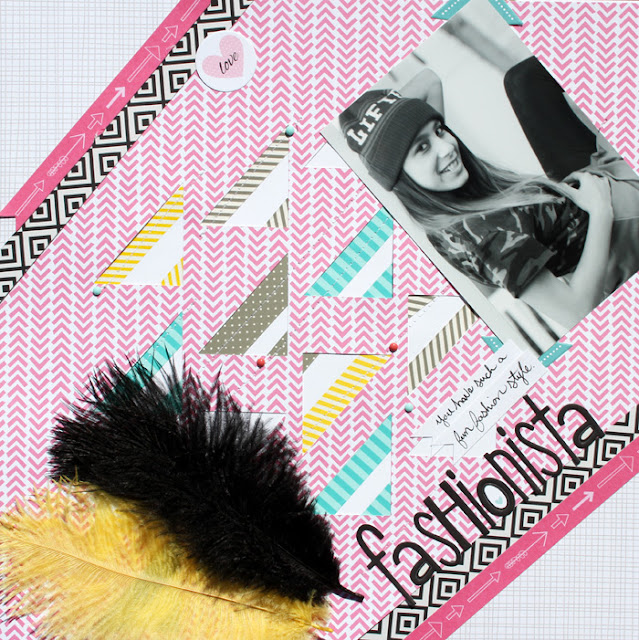
I wanted to create a layout that was as fun and fresh as my daughter's fashion sense. I started my layout by creating a
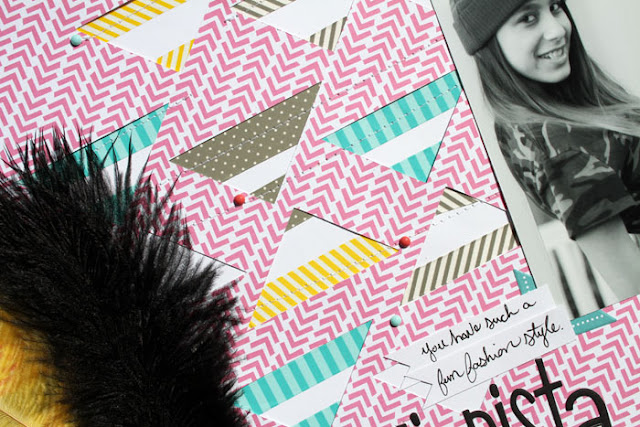
triangular file in Silhouette and using the designer edition software to modify it. After I cut my Freestyle Sophisticates paper
(Peep) I placed alternating strips of designer tape under my paper and then stitched on top. I added in pieces from the Engaged
At Last collection and finished off my layout with some fabulous Bella feathers.
First I created a triangular shaped background using the polygon tool. I used the copy and paste feature to repeat the pattern.
After I was done creating my triangle background I used the group feature to group my background together.
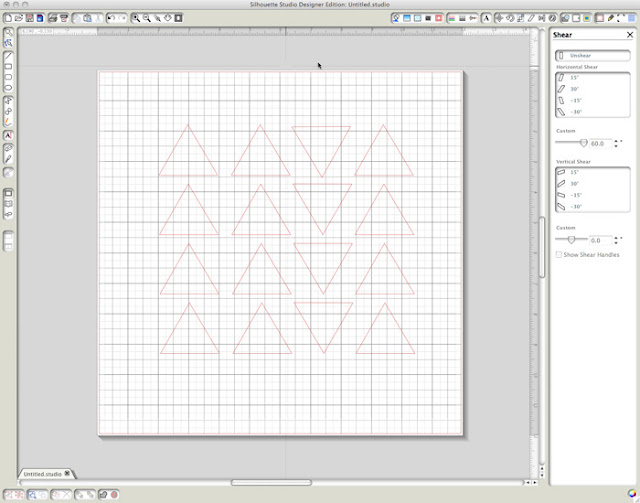
Next, I selected the Shear tool that comes with the designer edition software. I then selected the
Horizontal shear 30 degree angle from the box on the right side. This gave my triangles an elongated
look.

After getting the desired angle that I wanted I sent cut my file and then used it as a background for my layout.
supplies:
Engaged At Last Collection: Bachelor Extras
Cardstock Stickers: Alpha + Bits Bachelore/Ette
Sand & Surf Collection: Borders
Sophisticates: Freestyle Peep, Freestyle Scallop
Feathers: Bell Pepper, Oreo - Black
Designer Tape: Gray Chevron, Ice Stripe, Gray Dot, Combo
Dream Big by Gina Lideros
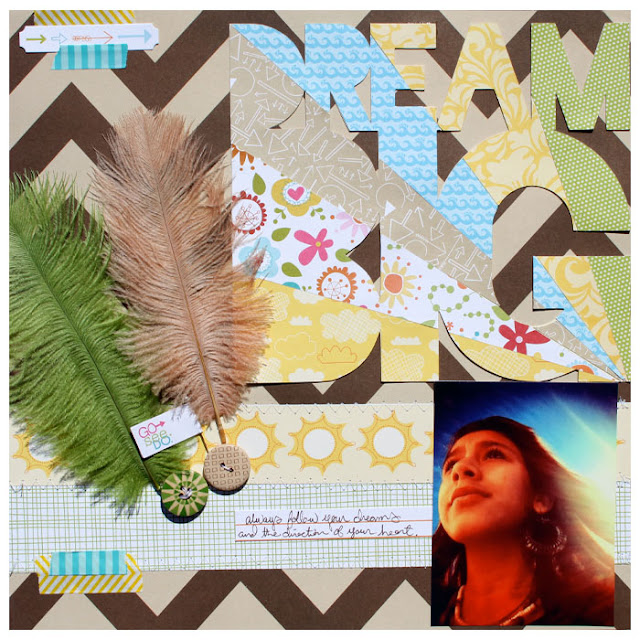
I had this self portrait of my daughter that she took using her camera phone. I just loved the way the sun rays reflected
on her in the background. I used that as my inspiration to create my title. I used the designer edition software for Silhouette
to modify a title "dream big" that I had purchased in the Silhouette online store.
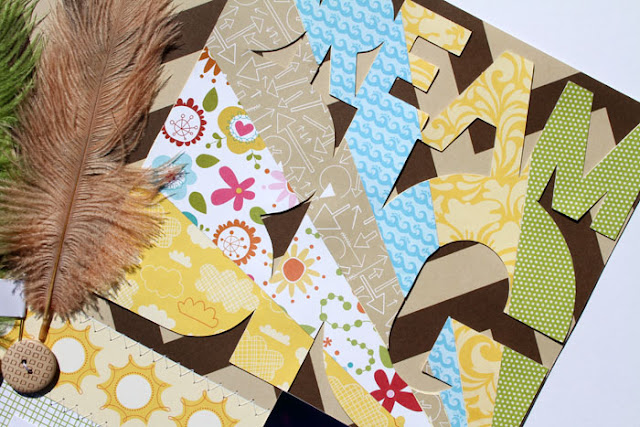
Bella Blvd's Sand & Surf collection was perfect for the theme of my layout. I kept the background of my layout simple so
that the focus could be on the title work and the photo. I finished off my layout by adding in a fun mix of Bella feathers,
buttons and designer tape.
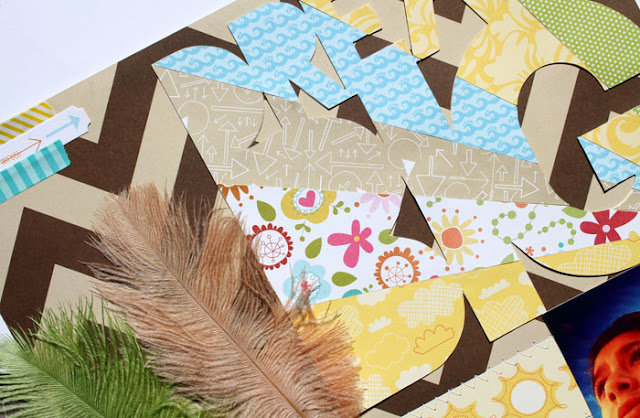
To get started, I opened up a file that I had purchased in the Silhouette online store (Dream big by KI Memories). I sized
my title to the dimensions that I wanted and then selected the advanced knife tool that comes with the designer edition software.
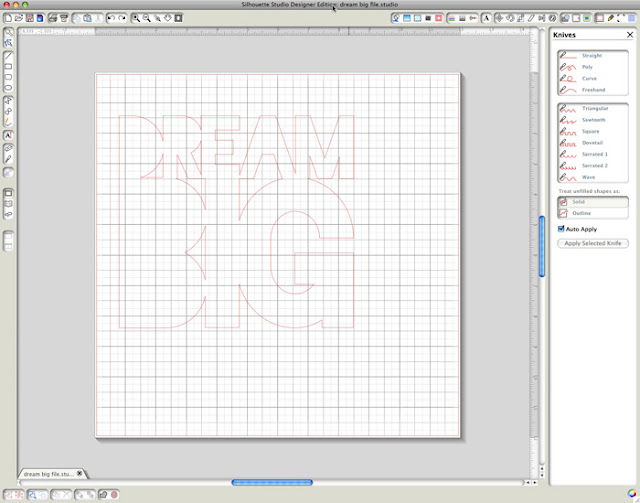
When selected the knife tool will open up a window on the right side. The advanced knife tool comes with 11 different
blades. This is a great feature of the designer edition. I selected the straight edge knife and positioned my blade in
the bottom right hand corner of my title. I then sliced into my title in an upwards angle.
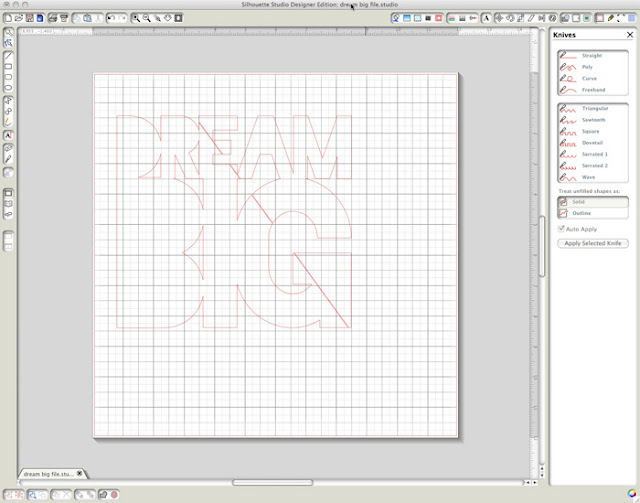
After I cut the first angle I continued making more cuts in an upward angle until it appeared to look like a sunburst.
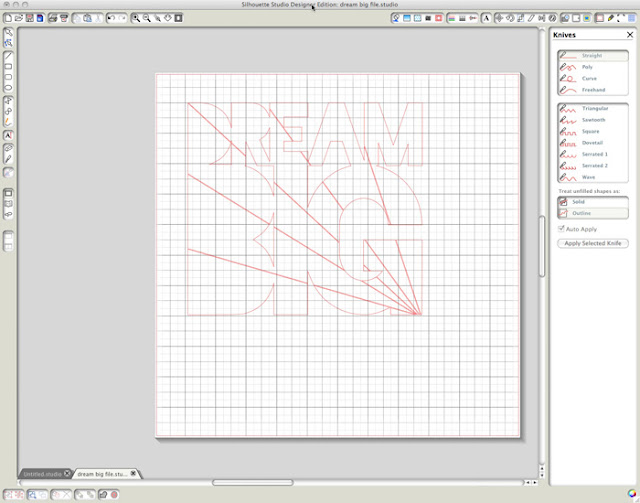
After I achieved the desired sunburst effect, I cut out my title out of different pieces of pattern paper from Bella's Sand & Surf collection. And then pieced them together on my layout.
supplies:
Sand & Surf Collection: Flying High, Paradise, Surf's Up, Borders, Under The Coconuts, Cute Cuts
Cardstock Stickers: Miniatures
Flags: Sand & Surf
Sophisticates: Freestyle Pickle Juice
Feathers: Pickle Juice, Pony
Designer Tape: Yellow Chevron, Ice Stripe
Button Market: Checkers, Bursts
Awesome stuff right? Wanna win a Silhouette Portrait? Then head on over to the Bella Blvd. Blog and leave a comment to be entered to win.
Good Luck!


so clever!! love both of them~beautiful work Gina!!
ReplyDeleteFantastic projects Gina, I love both of them! Great work :)
ReplyDeleteSo cute, I love the feathers! :)
ReplyDeleteI just love how you used the feathers. I am so crazy about them and must get some soon. :) also, thanks for sharing about this giveaway.
ReplyDeleteNeat! Well done!
ReplyDeleteI loved your tutorial......thanks for sharing.
ReplyDelete