Showing posts with label American Crafts design team. Show all posts

Wednesday, April 6, 2016

American Crafts | Hall Pass

This is a personal blog.  All editorial content and projects are intellectual property of http://americancrafts.typepad.com/.  I do receive financial compensation and material product from American Crafts to develop my craft posts, but all ideas and opinions are my own.


The new Hall Pass collection from American Crafts is a great way to express your own creativity.  I used the floral 3 ring binder and several pieces from the collection to create my own art binder, filled with lots of watercolor pieces.


Supplies: Hall Pass (373575) - Adult Coloring Folder Triangles, Hall Pass (373578) - 3 Ring Binder Floral W/Pink Spine, Hall Pass (373594) - Notebook W/Elastic Band Tribal, Hall Pass (373602) - Coloring Washi Tape Sketch Mark, Hall Pass (373604) - Paper Clips 2" Multicolor, Hall Pass (373605) - Paper Clips 4" Multicolor, Hall Pass (373617) - Magnetic Memo Pad, Dear Lizzy Happy Place (3733671) - Acetate & Cardstock Ephemera, Dear Lizzy Happy Place (3733672) - Die-Cuts Cardstock & Watercolor Phrases, Dear Lizzy Happy Place (3733675) - Suede Tassels


How To:
Use watercolor paints to paint the outside images of your binder, using pink, aqua, yellow and green with a fine tipped paint brush. Set aside to dry.  Next, use a 2" paper clip to hang a Dear Lizzy Happy Plce tag  and tassels from a magnetic paper pad.  Place inside art binder.  Use watercolors to hand paint outside of tribal notebook, set aside to dry.  Use watercolor paints to paint a Dear Lizy Happy Place "Be Daring" watercolor die-cut.  Set aside to dry and then clip onto the top of tribal notebook with a 2" paper clip.  Next, use watercolor paints to paint the front of a triangle coloring folder, set aside to dry.  Once dry, place 3 ringed folder into binder.  Clip in pieces of art work.  Use paper clips, watercolor word die-cuts, tassels and washi tape to decorate art work and folders throughout binder.


Friday, March 25, 2016

America Crafts | Spring Table Decor

This is a personal blog.  All editorial content and projects are intellectual property of http://americancrafts.typepad.com/.  I do receive financial compensation and material product from American Crafts to develop my craft posts, but all ideas and opinions are my own.


Spring Table Decor


Spring table decor is so much fun to create. Combine your decor pieces with papercrafting projects for a great centerpiece!


Supplies: Happy Place (373650)- Tropical Tango, Happy Place (373654) - Sun Kissed, Happy Place (373672) - Cardstock and Watercolor Phrases, Happy Place (373675) - Suede Tassels, Happy Place (373641) - Be Free, Happy Place (373660) - La La Land,Happy Place (373657) - Say Cheese,  Details (373831) - Paper Straws


How To:  Trim a small card measuring 3x4 from Tropical Tango patterned paper, leave the bottom tab on paper.  Fold in half to make card.  Use adhesive to adhere cardstock watercolor phrase "you are lovely", set aside.  Use jute twine to hang suede tassels from mason jars.  Place a small tealight candle inside two of the mason jars.  Place gold straws in the third jar.  Use a die cut machine to create layered paper flowers. Place on your table centerpiece along with card, mason jars and candles, decorate as desired.  You now have a beautiful spring centerpiece that works great for indoor or outdoor parties.


I hope this spring decor setting inspires you to create your own spring table decor!


Wednesday, March 23, 2016

American Crafts | Colorful Week

This is a personal blog.  All editorial content and projects are intellectual property of http://americancrafts.typepad.com/.  I do receive financial compensation and material product from American Crafts to develop my craft posts, but all ideas and opinions are my own.

Custom Clipboards

These colorful mini  clipboards are sure to brighten up any office space.  Use washi tape, tassels and ephemera pieces to embellish these in a snap.


How to: Cover mini clipboards with colorful patterned papers.  Trim a stack of notebook paper and clip on to each clipboard.  Hang tassels to each clipboard using twine.  Embellish the front of each notebook by adding stamps, washi tape, rub on pens and ephemera pieces


Supplies: Better Together (BTDS-73977) Knot + Bow, Better Together (BTDS-73978) - Ladies + Gentlemen, Better Together (BTDS-73981) - Salt + Pepper, Better Together (373993) - Acetate & Cardstock Ephemera, Better Together (373994) - Washi Tape Rolls Printed & Glittered, Better Together (373999) - Rub-on Pens Xo's & Donuts, Better Together (373996) - Rotary Phrase Stamp, Happy Place (373675) - Suede Tassels, Mini Clipboards (340223) - 5"x7", Mini Clipboards (340224) - 5"x7",Mini Clipboards (340225) - 5"x7", Sticky Thumb (ST340261) -  Adhesive Runner & Refill Permanent Soliid


Wednesday, March 2, 2016

American Crafts | Small Tags

This is a personal blog.  All editorial content and projects are intellectual property of http://americancrafts.typepad.com/.  I do receive financial compensation and material product from American Crafts to develop my craft posts, but all ideas and opinions are my own.


I like to keep an assortment of tags on hand that can be used for all occasions.  They also come in handy to use as gift tags.  I created these small tags using the Better Together collection from American Crafts.

Supplies: Better Together (BTDS-73962) - Each + Every, Better Together (BTDS-73961) - Sun + Moon, Better Together (BTDS-73973) - Mom + Dad, Better Together (BTDS-73976) - Yin + Yang, Better Together (BTDS-73981) - Salt + Pepper, Better Together (373984) - Black + White, Better Together (373990) - Accents & Phrases W/Gold, Better Together (373989) -  You + Me Words/Black Foam, Better Together (373994) - Washi Tape Rolls Printed & Glittered, Better Together (373993) - Ephemera, Better Together (373992) - Sticker Book, Better Together (374000) - Rub Ons W/Gold Foil, Sticky Thumb (ST340273) - White Tabs, Designer Desktop Essentials (370819) - Heart Paper Clips, Designer Desktop Essentials (370820) - Bowtie Paper Clips, Designer Desktop Essentials (370821) - Arrow Paper Clips, Designer Desktop Essentials (370823) - Jumbo Paper Clips

How to: Trim tags from patterned paper and black + white acetate paper, use string to tie each patterned paper tag to an acetate tag.  Add stickers and die cuts with foam tabs.  Add rub-ons and foam thickers to tags.  Adhere washi tape to each tag.  Use a sewing machine to add white stitching to each tag.  Finish tags by adding a paper clip to each tag.


Tuesday, February 23, 2016

American Crafts | DIY

This is a personal blog.  All editorial content and projects are intellectual property of http://americancrafts.typepad.com/.  I do receive financial compensation and material product from American Crafts to develop my craft posts, but all ideas and opinions are my own.


It's Home Decor week on the American Crafts blog!  I'm sharing a DIY project today sharing how I used rolled paper flowers to create this ampersand decoration.


Supplies:  Dear Lizzy Happy Place (373651) - Aruba, Dear Lizzy Happy Place (373661) - B-A-N-A-N-A-S, Dear Lizzy Happy Place (373652) - Bahama Mama, Dear Lizzy Happy Place (373641) - Be Free, Dear Lizzy Happy Place (373649) - Beachy Betsy, Dear Lizzy Happy Place (373639) - Bermuda, Dear Lizzy Happy Place (373645) - Bubblicious, Dear Lizzy Happy Place (373656) - Darling Daisy, Dear Lizzy Happy Place (373660) - La La Land, Dear Lizzy Happy Place (373644) - Lemon Berry, Dear Lizzy Happy Place (373657) - Say Cheese, Dear Lizzy Happy Place (373648) - Sunshine State, Dear Lizzy Happy Place (373642) - Swan Dive, Dear Lizzy Happy Place (373650) - Tropical Tango, Dear Lizzy Happy Place (373653) - Watermelon, Sticky Thumb (ST340275) - .5" Flat adhesive Dots, Sticky Thumb (ST340273) - Dimensional Adhesive Foam Tabs

How To: Use a die cut machine to but 3d rolled flowers out of various patterned papers.


Place rolled paper flowers into a 3d cardboard ampersand.  Use 3d foam adhesive to adhere flowers.


Finish adhering rolled flowers till ampersand is filled up.  Display and enjoy!


Sunday, February 21, 2016

American Crafts | Party Pieces


This is a personal blog.  All editorial content and projects are intellectual property of http://americancrafts.typepad.com/.  I do receive financial compensation and material product from American Crafts to develop my craft posts, but all ideas and opinions are my own.


Create a stunning backdrop out of paper plates.  This backdrop works great
for weddings and birthday parties.


Supplies: DIY Shop 3 (370861) Acetate Gold Foil Triangles, DIY Shop 3
(370878) Cards W/ Envelopes, Cardstock (AM71-766) Black, Sticky Thumb (ST340261) Adhesive Runner and Refill Permanent Solid, Valentines (373478) Gold Glitter/Love Washi 

Backdrop How To:
Gather about 50 paper plates, spray paint the back side of each plate with gold spray paint. Set aside to dry.  Use tape to adhere plates to your wall or background surface.  Adhere plates in a staggered overlapping pattern.  Repeat this step until you have covered your desired background area.  

Vintage Banner How To: 
Tear out pages from an old book.  Take a stack of about 4-5 pages at a time and trim into an oblong triangle shape, repeat until you have trimmed all of your pages.  Adhere glitter washi tape to the top of each banner piece.  Run the banner through the sewing
machine to stitch all pieces together.  Use scissors to trim slits into each of the banner pieces.  Each piece should look like fringe when you are finished.  Hang banner across your backdrop.

Frame How To:  Use your die cut machine to cut out a very saying to be displayed, cut title out of black cardstock and set aside.  Trim a piece of gold triangle acetate paper to the size of your desired frame.  Use adhesive to add title to acetate paper.  Set inside frame and display.


Thanks for stopping by today, I hope this has inspired you to create your own party pieces!


Wednesday, February 10, 2016

American Crafts | Love Notes

This is a personal blog.  All editorial content and projects are intellectual property of http://americancrafts.typepad.com/.  I do receive financial compensation and material product from American Crafts to develop my craft posts, but all ideas and opinions are my own.


These treat bags are fun and simple to make!  Fill them with love notes and special 
treats for your friends and loved ones!


Supplies: XOXO (373457) - 6X6 Paper Pad, Valentines (373455) - 6X6 Paper Pad, Whittles (373482) - Glitter And Foil Clothespins, Valentines Cards (373721) - Cards and Envelopes Kraft W/ Gold Foil, Valentines Collection (373478) - Washi Tape, Valentines Collection (373468) - Washi Tape,Valentines Collection (373474) - Washi Tape, Valentine (373502) - Rub - On Transfer Sheet, Maggie Holmes Confetti Party Kit (683715) - Crocheted Doily Garland Kit


How To: Use a paper punch to punch several hearts out of 6x6 paper pads.  Write love notes on the back of punched hearts.  Fill glassine bags with punched hearts, filler and treats.  Use a mini stapler to staple shut.  Cut four doilies in half.  Adhere half a doily to the top of each glassine bag.  Apply rub-ons to scrap pieces of white cardstock, trim around each word.  Adhere cardstock rub on pieces to top of each glassine bag.  Embellish with washi tape, and buttons.  Use a sewing machine to sew pieces down.  Finish each glassine treat bag by adhering clothespins to the top of each bag.  Trim Valentine card and adhere to the front of clip on frame.  Finish set upby hanging crocheted doily from frame using clothespins.


Saturday, January 23, 2016

American Crafts | Happy Together

This is a personal blog.  All editorial content and projects are intellectual property of http://americancrafts.typepad.com/.  I do receive financial compensation and material product from American Crafts to develop my craft posts, but all ideas and opinions are my own.


The colors and patterns in the new Happy Together collection by Amy Tangerine are so vibrant and upbeat, they coordinate beautifully together.


Supplies:  Amy Tangerine Better Together (373999) Rub on Pens, Amy Tangerine Better Together (3739900) Clear Stickers, Amy Tangerine Better Together (373992) Sticker Book, Amy Tangerine Better Together (373993) Die Cut Shapes,  Amy Tangerine Better Together (373975) Him + Her Paper, Amy Tangerine Better Together (373976) Yin + Yang Paper, Amy Tangerine Better Together (373963) Stars + Stripes Paper, Amy Tangerine Better Together (373966) Push + Pull Paper, Amy Tangerine Better Together (373971) Soap + Water Paper, Amy Tangerine Better Together (373964) Sweet + Sour Paper, Amy Tangerine Better Together (373974) Cloud + Sunshine Paper, Amy Tangerine Better Together (373983) Peanut Butter + Jelly Paper, Amy Tangerine Better Together (373982) Bow + Arrow, Amy Tangerine Better Together (373980) Blogs + Coffee Paper, Amy Tangerine Better Together (373979) Fact + Fiction Paper, Amy Tangerine Better Together (373978) Ladies + Gentlemen Paper, Amy Tangerine Better Together (373977) Knot + Bow Paper, Amy Tangerine Better Together (373973) Mom + Dad Paper, Amy Tangerine Better Together (373972) Jack + Jill Paper, Amy Tangerine Better Together (373962) Each + Every Paper, Amy Tangerine Better Together (373969) Back + Forth Paper, Amy Tangerine Better Together (373967) Near + Far Paper, Amy Tangerine Better Together (373960) Hugs + Kisses Paper, Thumb (ST340276) Sticky Dots 0.5


How To: Cut heart background out of background paper using free cut file from Paige Evans available here http://americancrafts.typepad.com/studio/2015/09/instagram-layout-by-paige-evans.html  Fold each heart over and secure with sticky dots.  Cut small pieces of pattern papers and adhere behind each folded heart.  Use a paint brush and white paint
to flick paint across the page.  Set aside to dry.  Print a small black and white photo and trim into a circle.  Adhere circular photo to center of the layout.  Adhere die cut pieces and stickers throughout the page.  Finish page by adding rub on pen to the bottom 
right of page.


Friday, January 15, 2016

American Crafts | Happy Place

This is a personal blog.  All editorial content and projects are intellectual property of http://americancrafts.typepad.com/.  I do receive financial compensation and material product from American Crafts to develop my craft posts, but all ideas and opinions are my own.


This week on the American Crafts blog is Happy Place week!  We are sharing projects using Dear Lizzy's new collection!

I love the tropical designs mixed with bold and pastel patterns in the Happy Place collection.  They brought this design together in a snap.


Supplies: Dear Lizzy Happy Place (373670) - Accent & Phrase Stickers, Dear Lizzy Happy Place (373676) - Rub On Pens, Dear Lizzy Happy Place (373671) - Die-Cut Shapes, Dear Lizzy Happy Place (3736688) - Accent & Phrase Stickers, Dear Lizzy Happy Place (373675) - Tassels, Dear Lizzy Happy Place (373652) - Patterned Paper Bahama Mama, Dear Lizzy Happy Place (373641) - Patterned Paper Be Free, Dear Lizzy Happy Place (373649) - Patterned Paper Beachy Betsy, Dear Lizzy Happy Place (373640) - Patterned Paper Kokomo, Dear Lizzy Happy Place (373644) - Patterned Paper Lemon Berry, Dear Lizzy Happy Place (3736500) - Patterned Paper Tropical Tango, Dear Lizzy Happy Place (373653) - Patterned Paper Wild Watermelon, Bazzill (BCS12) - White Smooth Cardstock, American Crafts (AM71-766) - Black Cardstock


How To: Use scissors to fussy cut around Kokomo patterned paper.  Cut around some of the hexagons and leave some open, use adhesive to adhere design to white cardstock paper.  Handcut some hexagons from various patterned papers and adhere to background design in a sporadic pattern.  Handcut hexagons from black cardstock and adhere to background design.  Use a sewing machine with white thread to stitch some of the pieces down.  Use a dropper to splash black ink across the page.  Print a small 3" x 3" black and white photo and adhere to the center of page.  Thread a paper clip with tassels and clip on to photos.  Adhere die cuts to page.  Spell out the title "Noteworthy Yes" using accent & phrase stickers.  Adhere phrase stickers underneath photo.  Finish layout by embellishing with rub on pens.


Thanks for stopping by today!


Sunday, January 10, 2016

American Crafts | Winter

This is a personal blog.  All editorial content and projects are intellectual property of http://americancrafts.typepad.com/.  I do receive financial compensation and material product from American Crafts to develop my craft posts, but all ideas and opinions are my own.

This hot cocoa bar will keep you warm during the winter. You could also give these treats out as gifts to friends, neighbors and teachers.


Supplies: DIY Shop 3 (370879) - Tacks Gold Hearts, DIY Shop 3 (370887) - Metal Word Bobbies Gold & Silver, DIY Shop 3 (370890) - Gift Tags & String, DIY Shop 3 (370894) - Muslin Treat bags, DIY Shop 3 (98698) - Chalk Markers, DIY Shop 3 (370898) - Banner Kit, Maggie Holmes Confetti Party Kit (683715) - Crocheted Doily Garland Kit


How To:  Fill three jars with hot cocoa and marshmallows. Take gold twine from banner kit and wrap around each jar, tying on a gift tag to each. Embellish each tag with gold heart tacks. Fill muslin treat bags with sweets and adhere a metal word bobbie to each bag.  Enjoy!


Tuesday, December 29, 2015

American Crafts | New Years Eve Party Pieces

This is a personal blog.  All editorial content and projects are intellectual property of http://americancrafts.typepad.com/.  I do receive financial compensation and material product from American Crafts to develop my craft posts, but all ideas and opinions are my own.


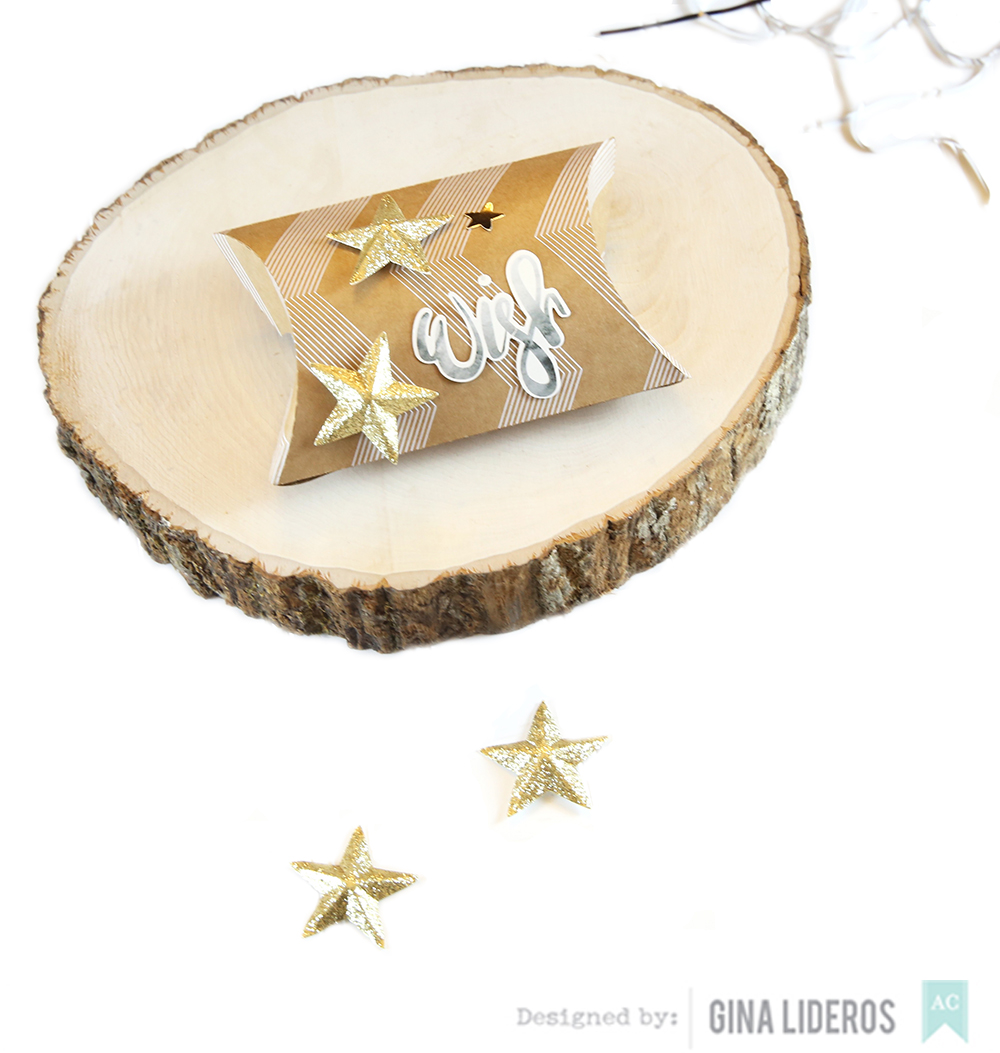
Hi everyone!  It's New Years Eve party pieces week on the American Crafts blog.  I'm sharing festive treat boxes that I created using their DIY Shop 3 and Dear Lizzy Documentary collections.


You can create quick New Years Eve party pieces in a flash by using supplies that you
already have on hand.  These came together in a snap using cardstock, and stickers.


supplies: Deck The Halls (DTHSTAR-40415) - Details Dimensional Stars Silver & Gold, DIY Shop 3 (370857) - Kraft Cardstock White Chevron, DIY Shop 3 (370862) - Varnish Carstock Black Triangles,  DIY Shop 3 (370868) - Alphabet Stickers Silver Foil, Dear Lizzy Documentary (340200) -Foiled Stickers Accents & Phrases


How To:  Use cut files to create pillow boxes in Silhouette Studio.  Assemble boxes and fill with New Years Eve treats.  Embellish boxes with dimensional stars.  Finish boxes by adding accents & phrases stickers and adding silver foil numbers to spell out "2016".