Showing posts with label Dear Lizzy documentary. Show all posts

Tuesday, December 29, 2015

American Crafts | New Years Eve Party Pieces

This is a personal blog.  All editorial content and projects are intellectual property of http://americancrafts.typepad.com/.  I do receive financial compensation and material product from American Crafts to develop my craft posts, but all ideas and opinions are my own.


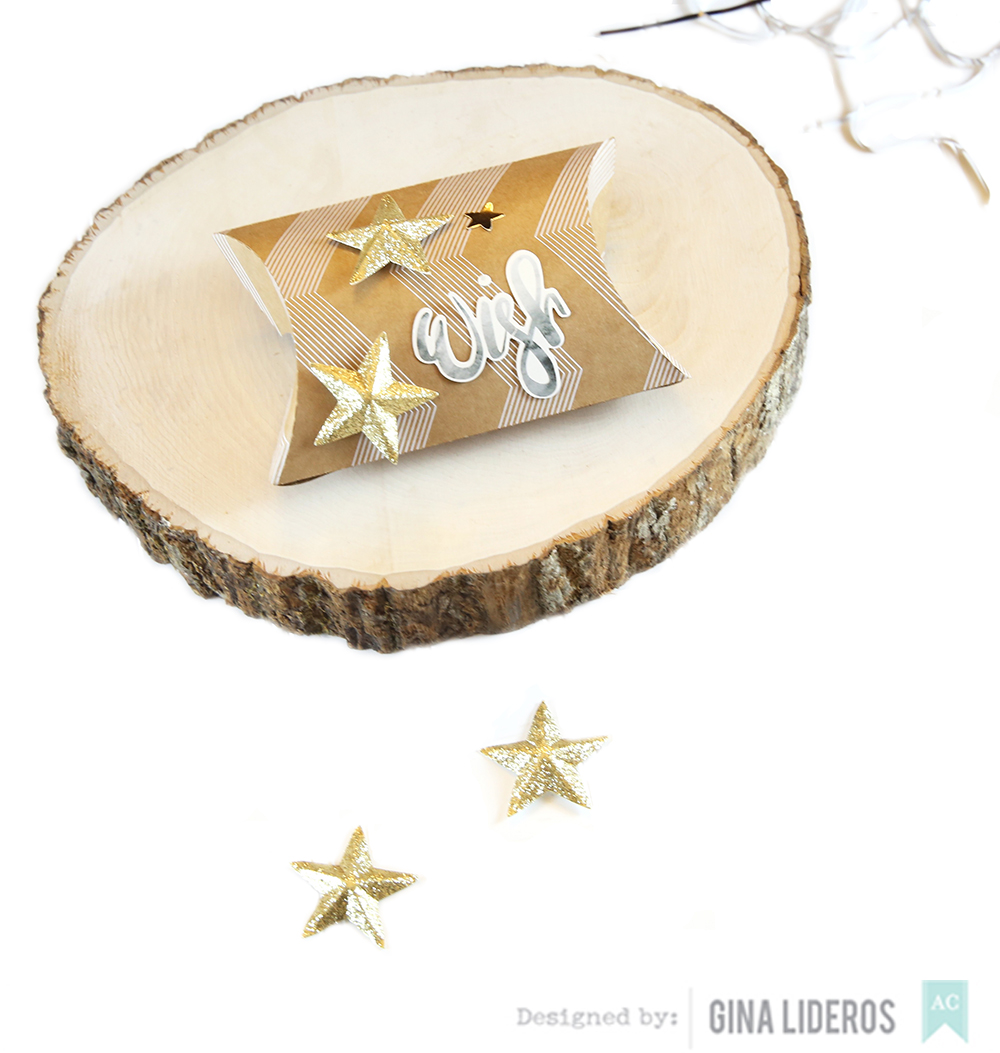
Hi everyone!  It's New Years Eve party pieces week on the American Crafts blog.  I'm sharing festive treat boxes that I created using their DIY Shop 3 and Dear Lizzy Documentary collections.


You can create quick New Years Eve party pieces in a flash by using supplies that you
already have on hand.  These came together in a snap using cardstock, and stickers.


supplies: Deck The Halls (DTHSTAR-40415) - Details Dimensional Stars Silver & Gold, DIY Shop 3 (370857) - Kraft Cardstock White Chevron, DIY Shop 3 (370862) - Varnish Carstock Black Triangles,  DIY Shop 3 (370868) - Alphabet Stickers Silver Foil, Dear Lizzy Documentary (340200) -Foiled Stickers Accents & Phrases


How To:  Use cut files to create pillow boxes in Silhouette Studio.  Assemble boxes and fill with New Years Eve treats.  Embellish boxes with dimensional stars.  Finish boxes by adding accents & phrases stickers and adding silver foil numbers to spell out "2016".


Wednesday, December 16, 2015

American Crafts | Year In Review


This is a personal blog.  All editorial content and projects are intellectual property of http://americancrafts.typepad.com/.  I do receive financial compensation and material product from American Crafts to develop my craft posts, but all ideas and opinions are my own.


Hi everyone!  It's Year In Review week on the American Crafts blog.  I'm sharing a clip it up frame that I created using the Dear Lizzy Documentary and Jen Hadfield DIY Home collections.


Supplies:  Dear Lizzy Documentary (340200) - Foiled Stickers Accents & Phrases, Dear Lizzy Documentary (340204) - Ephemera W/Gold Foil,Dear Lizzy Documentary (340205) - Dimensional Cork Bows, Dear Lizzy Documentary (HS340217) - Watercolor Tags, Dear Lizzy Documentary (340293) -Foiled Acetate Heart Of Gold, Jen Hadfield DIY Home (JH732941) - Minc Cards


1.  Print out some of your favorite photographs from the past year and clip them to your desired frame.


2. Choose your favorite embellishments and add them to your frame in between your photos.


3.  Once you get all of your desired photos and embellishments sorted and clipped to your 
frame, move them around as needed until you get your desired look.


4.  Display your frame in your home and enjoy!


How are you documenting your photos from the past year?


Saturday, October 17, 2015

Scrapbook Circle | Design Team Choice


Hi there!  I have another new layout to share with you today using the Scrapbook Circle's October Mix Tape kit and Add-ons.


September 27th, was a memorable night.  We experienced a blood moon and solar eclipse.  I took my trusty Canon 6D out for a walk and decided to shoot the moon.  I chose my favorite photo from the shoot and decided to document it on my layout using the Mix Tape kit and add-ons.  


I love using geometric shapes on layouts.  To create the background for this layout I trimmed several pieces of the patterned papers included in the main kit into squares and rectangle shapes and then adhered them to a white cardstock background.  I used my sewing machine to stitch down a few of pieces.  Then I added in extra embellishments from both of the add-on kits.


Monday, October 12, 2015

Scrapbook Circle | Take Two

Hi everyone!  I am sharing a post on the Scrapbook Circle blog today called: Take Two.  I am sharing my take on a previous layout made from Creative Team member Rebecca.  Here is her layout:

rk-sc-sept-1-931x1024

I loved the white background that Rebecca used on her layout.  I loved the mix of patterned papers and the geometric triangle shapes.

and here is my take on Rebecca's layout:


I still kept the white background and I used several triangles, just like in Rebecca's original layout.  But I moved my triangles around on my page.  I also, splattered black ink across my page and added stitching.  Like Rebecca's I added lots of little embellishments across my page using the October Mix Tape main kit and add-ons

Thank you for stopping by today, to see the full post,  please visit the Scrapbook Circle blog.


Thursday, October 1, 2015

American Crafts | Watercolors

This is a personal blog. All editorial content and projects are intellectual property of http://americancrafts.typepad.com/.  I do receive financial compensation and material product from American Crafts to develop my craft posts, but all ideas and opinions are my own.


Last week on the American Crafts blog was watercolors week.  Flowers are a great way to combine several colors of watercolor paints on a page.  I combined watercolors along with patterned papers to create one of a kind flowers.


Supplies: Dear Lizzy Documentary (340295) - #Mondays, Dear Lizzy Documentary (340301) - Bear Hug, Dear Lizzy Documentary (340302) - Blossom, Dear Lizzy Documentary (340303) - Fresh Start, Dear Lizzy Documentary (340305) - Fancy Free, Dear Lizzy Documentary (340307) - Snail Mail, Dear Lizzy Documentary (340312) - Ever After, Dear Lizzy Documentary (340204) Ephemera W/ Gold Foil, Dear Lizzy Documentary
(340209) - Washi Tape Booklet W/ Gold Foil, Maggie Holmes Confetti (683718) - Dies Flowers, Cardstock (AM71-793) - White, Sticky Thumb (ST340261) - Permanent Solid


How To: Using a brush and watercolor paints, paint a light pink background against a white cardstock page, set aside to dry.  Use flower die to make six sets of flowers out of various patterned papers and white cardstock. Using a paint brush, paint the cut cardstock flowers with watercolor paints, set aside to dry.  Create flowers by grouping watercolor flowers and patterned paper flowers together, layer on the leaves and adhere to layout. Gather pieces of white thread and place behind two of the flowers before adhering down.  Flick black spray ink across the page.  Print an instagram photo, trim and adhere to center of layout.  Place a thin strip of ruler washi tape on the bottom left hand side of photo.  Finish by adhering die cuts to page.


Wednesday, September 16, 2015

American Crafts | Instagram Album Tutorial

This is a personal blog. All editorial content and projects are intellectual property of http://americancrafts.typepad.com/.  I do receive financial compensation and material product from American Crafts to develop my craft posts, but all ideas and opinions are my own.


I love Instagram because it encompasses everyday snippets of our lives.
I put together this Instagram album for my daughter to help document
her summer memories.


Supplies: Finders Keepers (HS340259) - Minc Postcard Kit, Documentary (340198) - Thickers Noted/Cork, Documentary (340202) - Thickers Desktop/Gold Foil Puffy, Documentary (340196) - Paper Pad, Documentary (340247) - Wooden Button Shapes Assorted W/Gold Foil Accents, Documentary (340249) - Washi Tape Booklet W/Gold Foil, Documentary (340310) -Foiled Vellum Stargaze W/Gold, Documentary (340293) - Foiled Acetate 12"x12" Heart Of Gold W/Gold, Sticky Thumb (ST340275) - Flat Adhesive Dots .5", Pink Paislee Citrus Bliss (PP70661) - Instagram Chipboard Album 4"x4"

1. Gather your mini album and supplies.


2. Trim "On An Adventure" title from acetate paper, attach to album 
cover with adhesive.  Finish by adding a strip of washi tape.


3. Measure the inserts of your album.  The inserts in the Pink Paislee
Citrus Bliss Album that I'm using measure exactly 4"x4", so I trimmed
my patterned papers 4"x4".


4. Add paper and Instagram photos to album.  Embellish photo by adding
rub ons. 


5. Use the Heidi Swapp Minc Machine to add gold foil to Finders Keepers
postcards.  After foiling, trim postcards to 4"x4".


6. Add postcards to album.  Embellish photo by adding washi tape.


7. Use a tab punch to punch out tabs from various patterned papers.
Adhere tabs to each page of the album.


8. Use Sticky Thumb adhesive to adhere rub ons and wooden buttons
throughout album.


Thanks for stopping by today, I hope that my tutorial, inspires you to create your own Instagram album!




Tuesday, September 8, 2015

American Crafts | Back To School

This is a personal blog. All editorial content and projects are intellectual property of http://americancrafts.typepad.com/.  I do receive financial compensation and material product from American Crafts to develop my craft posts, but all ideas and opinions are my own.


Last week on The American Crafts blog, was back to school week.  I created this layout using the new Dear Lizzy Documentary collection.


Supplies: Documentary (340294) - Me & You, Documentary (340295) - #Mondays, Documentary (340296) - Confetti, Documentary (340299) - Hello Love, Documentary (340301) - Bear Hug, Documentary (340302) - Blossom, Documentary (340303) - Fresh Start, Documentary (340304) - New Day, Documentary (340305) - Fancy Free, Documentary (340307) - Snail Mail, Documentary (340309) - Happy Dance, Documentary (340311) - Love This, Documentary (340312) - Ever Ever, Documentary (340313) - Happy Happy, Documentary (340314) - On My Desk, Documentary (340314) - Party Animal, Documentary (340316) - Dreamer, Documentary (340200) - Accent & Phrases Stickers, Documentary (340198) - Thickers Noted Cork, Documentary (340203) - Rubons, Documentary (340204) - Cardstock Shapes, Documentary (340207) - Painted Wood Buttons, Documentary (340217) - Watercolor Tags,  Documentary (340211) - Phrase Stamp, Cardstock (AM71-563) - Kraft, This To That (AM617-13) - Adhesive, Precision Pen (PP03-621) - .03 Black
How To:

Cut background from 12x12 Kraft cardstock using a Silhouette Cameo, set aside.  Use a 2 1/2" square punch to punch out different patterned paper pieces (you will need about 30 squares).  Use scissors or a paper trimmer to cut each square in half diagonally to make two triangles.  Repeat this step until all the squares are cut.  Fill in the empty spaces by arranging squares inside the pattern in a up and down fashion, do this until all the spaces are filled.  Use a sewing machine and white thread to add straight stitching to your page.  Print a 4"x6" photo and trim into the shape of a diamond, adhere to top of design.  Spell out the words "Back To School" using cork thickers in the middle of the page diagonally.
Place a "The Future Is Bright" cardstock sticker, and rub-on's just below title.  Use date stamp and black precision pen to add journaling to page.  Run the "hello" watercolor Minc tag through the Minc using gold foil, adhere to page with two wood buttons just below photo.  Finish by adhering "Live" cardstock die cut piece just above title.


Thanks for stopping by today.  Enjoy your day!