Showing posts with label dear lizzy serendipity. Show all posts

Saturday, May 23, 2015

American Crafts | Mix and Match


This week on the American Crafts blog is Mix and Match week.  You can effortlessly mix and match American Crafts collections, by picking pieces that match the same color scheme.


Supplies: Amy Tangerine Rise and Shine (RSDS-70011) - Lucy Paper, Amy Tangerine Rise and Shine (370034) -Epoxy Stickers, Amy Tangerine Rise and Shine (370038) - Shapes & Phrases W/ Foil Accents, Dear Lizzy Serendipity (369184) - XOXO Paper, Dear Lizzy Serendipity (369186) - Summer Breeze Paper, Dear Lizzy Serendipity (369187) - One Fine Day Paper, Dear Lizzy Serendipity (369191) - Good Vibes Paper, Dear Lizzy Serendipity (369197) - Smitten Paper, Dear Lizzy Serendipity (369210) - Gold Foil Mini Alpha, Dear Lizzy Serendipity (369214) - Stickers Roll, Dear Lizzy Serendipity (369215) - Enamel Dots, Dear Lizzy Serendipity (369217) - Pleather Bows, Dear Lizzy Serendipity (369220) - Watercolor Paper Die-Cuts Words, Dear Lizzy Fine and Dandy (370069) - Make A Wish Paper, Dear Lizzy Fine and Dandy (370065) - Shenanigans, Dear Lizzy Fine and Dandy (370062) - Love Fest Paper, Dear Lizzy Fine and Dandy (370073) - Bright Bows Paper, Dear Lizzy Fine and Dandy (370082) - Gleeful Paper, Dear Lizzy Fine and Dandy (370087) - Accents & Phrases/ Gold Foiled Chipboard, Shimelle (368170) - Roller Date Stamp, Cardstock (AM71-563) - Smooth Kraft, Cardstock (AM710-81) - White


How To: Use Silhouette Studio to cut design background from white cardstock.  Back white cardstock design with different pieces of patterned papers from the Serendipity, Fine And Dandy and Rise And Shine collections, leaving some spaces open.  Back patterned pieced design with kraft cardstock.  Flick black spray mist across the page.  Stamp date stamp on the bottom right hand side of page. Print a small photo and adhere to center of design.  Adhere chipboard "Beautiful Day" sticker directly under photo.  Trim ampersand from Serendipity "Smitten" paper.  Layer ampersand and pleather bow under right side of photo.  Tuck "Happy" sticker from sticker roll under bow.  Spell out the word day with Serendipity mini alpha and tuck under "Happy" sticker.  Adhere camera die-cut shape and Smile word to left hand side of photo.  Finish by adhering epoxy sticker and enamel dots.


Thanks for stopping by today, hope you enjoyed my layout!


Wednesday, May 13, 2015

American Crafts | Altered Clipboard Tutorial


This week on the American Crafts blog is all about Mom's.  I have a tutorial that went up yesterday that would be the perfect to celebrate Mom.

An altered clipboard picture frame makes a great gift for Mother's day.  
All you need is supplies on hand from the Serendipity collection to
create this one of a kind gift.


1. To make this Clipboard Picture Frame,  place a Dear Lizzy Serendipity plastic stencil over the clipboard and spray it with a white coat of spray mist.  


2. Print a small photo and mat it with a piece of pattern paper from the 6x6 Paper pad.  Embellish with Accents & Phrases Gold Foil Stickers and Thickers. 


3. Use the metal dies to cut flowers from various papers from the 6x6 Paper Pad.  Roll the pieces up and secure with adhesive to finish the flowers.


4. Finish clipboard by adding an addition flower sticker, and rolled flowers.  Create a bow out of ribbon and adhere to top of clipboard.  


 Your clipboard is finished and ready to gift to that special someone on Mother's Day!


Supplies: Dear Lizzy Serendipity (369228) - Stencil, Dear Lizzy Serendipity (369206) - 6x6 Paper Pad, Dear Lizzy Serendipity (369209) - Royal/Foil Thickers, Dear Lizzy Serendipity (369211) - Accents & Phrases W/ Gold Foil, Dear Lizzy Serendipity (369224) - Dies, Studio Calico Mister Huey's (SC1-001) - Opaque White Misting Spray


Thanks for stopping by today!


Monday, February 2, 2015

American Crafts | Winter

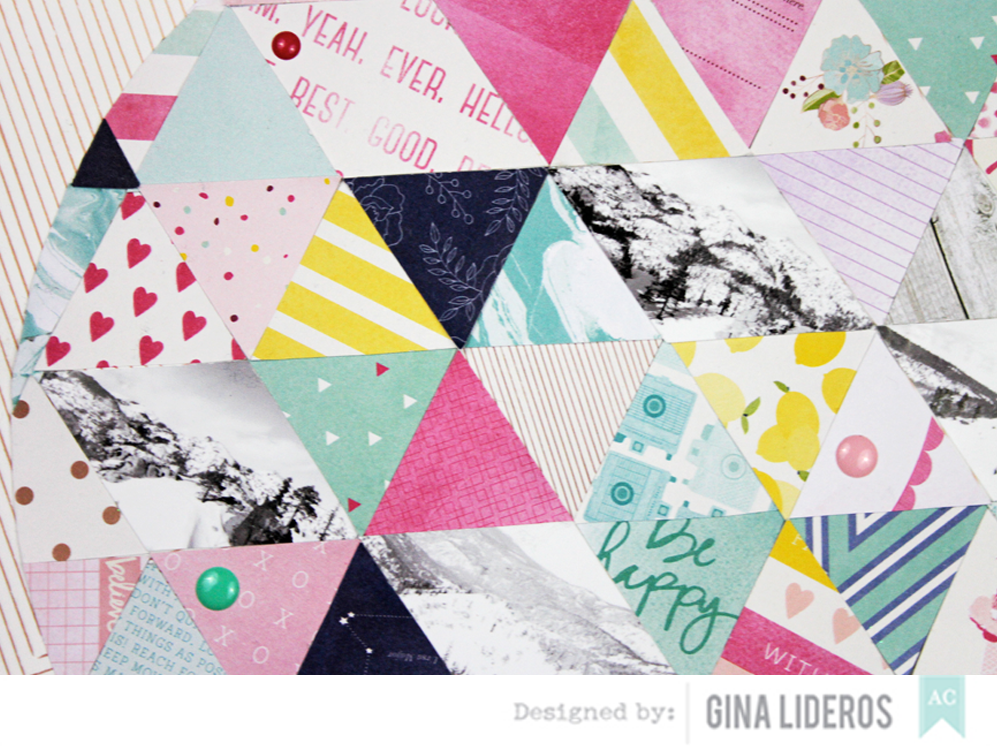
It's winter week on the American Crafts blog!  I hope all of my friends on the East coast are staying warm and dry right now!

I wanted to document these recent photos that we took on a trip to Lake Tahoe last Winter.  
I kept the embellishments at a minimum to focus on the photos and the overall graphic 
design of the layout.


Supplies: Dear Lizzy (369206) - Serendipity 6x6 Paper Pad, Dear Lizzy (369188) - Sugar Sugar Paper, Dear Lizzy (369208)
- Soar/Woodgrain Print Chipboard Thickers, Dear Lizzy (369215) - Serendipity Enamel Dots, This To That (AM617-13) - Adhesive


How To:  Use a die cutting machine to cut triangles from different pieces of pattern paper.  Use a printer to print 5 small photos and trim them into a diamond design.  Piece together your background on a scrap piece of cardstock using repositionable adhesive (in case you need to re-align any of the pieces).  Trace around a large bowl or use a die cutting machine to trim your design into a large circle.  Adhere design to background patterned paper.  Spell out title "Winter" using thickers.  Finish by embellishing with enamel dots.


I hope you enjoyed my winter layout!  Thanks for looking!


Sunday, January 25, 2015

American Crafts | Metal Dies Week

Hi everyone,

It is metal dies week on the American Crafts Blog this week and I have a card to share with you today using the Dear Lizzy Serendipity die set.

You can layer dies to create one of a kind embellishments.  I layered the flower dies, included in the Dear Lizzy Serendipity die set, to create a 3d flower for my card.

Supplies: Dear Lizzy (369198) - Very Vanilla Paper, Dear Lizzy (369185) - Hello Beautiful Paper, Dear Lizzy (369186) - Summer Breeze Paper, Dear Lizzy (369224) - Serendipity Dies, Dear Lizzy (369213) - Serendipity Puffy Stickers, This To That (AM617-13) - Adhesive, Cardstock (AM710-81) - White


How To: Use an electronic die cutting machine to cut bow card design.  Trim a piece of Very Vanilla paper and adhere to card front.  Use a manual die cutting machine to cut flower pieces from Serendipity Die set.  Layer flower pieces and adhere to center of card design.  Finish by adhering "hooray" puffy sticker.


Thanks for stopping by today!  I hope you enjoyed my card!


Wednesday, January 14, 2015

American Crafts | 10+ Patterned Papers

Hello all!

I had a tutorial up on the American Crafts blog yesterday that I would like to share with you!  For this weeks assignment we were challenged to use 10+ patterned papers.  I decided to make a home decor piece for my project.

I like to switch out the frames and art deco pieces in my home every so often, to give it a fresh look. Using a selection of patterned papers to create new art is a simple and cost effective way to achieve this look.

Supplies: Dear Lizzy (369181) - Little Things Paper, Dear Lizzy (369185) - Hello Beautiful Paper, Dear Lizzy (369186) - Summer Breeze Paper, Dear Lizzy (369187) - One Fine Day Paper, Dear Lizzy (369191) - Good Vibes Paper, Dear Lizzy (369192) - Bloom Paper, Dear Lizzy (369195) - Razzleberry Paper, Dear Lizzy (369196) - Liz Lemon Paper, Dear Lizzy (369200) - Blueberry Paper, HomeMade (732610) - Foil Cardstock Gold, This To That (61707) - Double Sided Tape

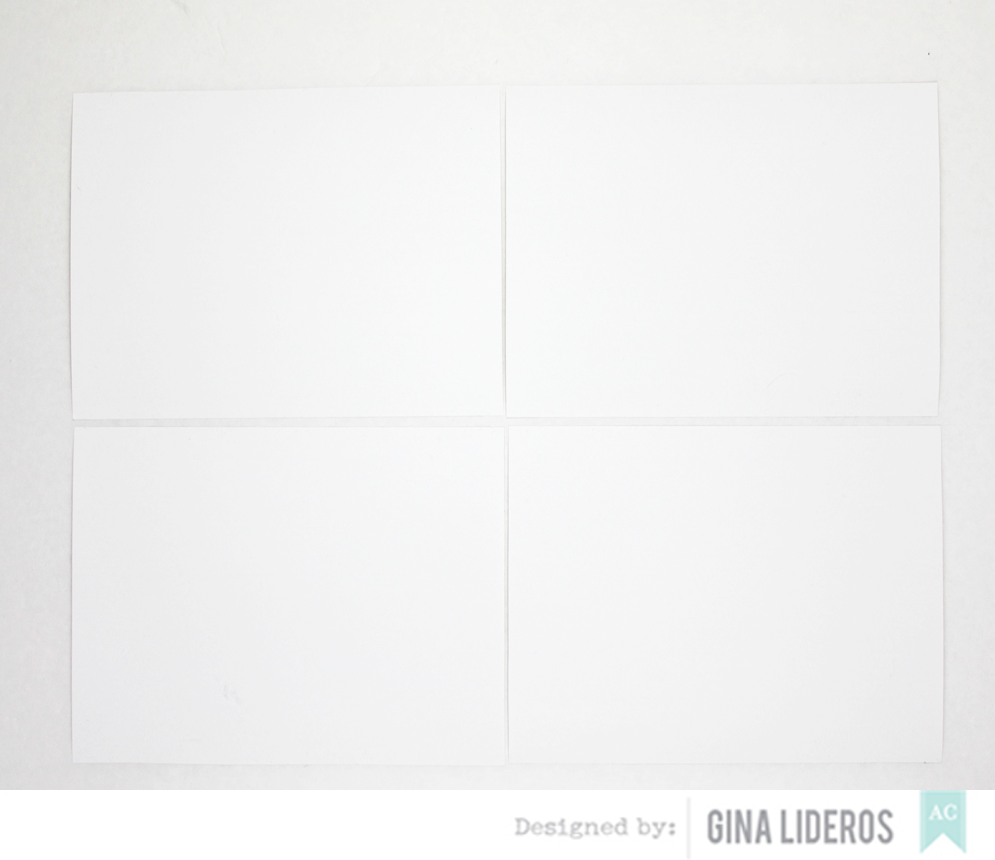
1.  Begin by selecting a frame that you would like to display your artwork.  Take out the matte from inside the picture frame and trace it onto white poster board.  Measure it onto four identical pieces and cut them out, like so:


2.  Next, Trim out several pieces of patterned paper each measuring 5/8" x 12" long.


3.  Next, take one of the patterned paper strips and lie it diagonally across the center of each of the four pieces.  Use double sided tape to adhere it down.  Trim off the excess ends with scissors.  Do this for each individual piece.

4.  Now, begin to build your pattern, by filling each pattern piece with diagonal patterned paper strips (each measuring about 5/8" apart).


When you are finished filling up each of the four pieces, adhere them to the inside matting of the frame, and enjoy!


I hope you enjoyed my tutorial today, for more inspiring ideas visit the American Crafts Design Team Gallery here.


Thursday, January 8, 2015

American Crafts | Serendipity Cards

Hi everyone,

I had a couple of cards up on the American Crafts blog that I would like to share with you.  The delightful designs and adorable embellishments in the Serendipity collection make card making easy.  I made a couple of simple all occasion cards to keep on hand to send to friends and family.


Supplies: Dear Lizzy (369195) Razzleberry Paper, Dear Lizzy (369209) Royal/Foil Thickers Alpha Stickers, Dear Lizzy (369218) - Ephemera W/ Gold Foil, Dear Lizzy (369217) - Pleather Bows, Dear Lizzy (369225) - Embossin Folder Words, This To That (AM617-13) - Adhesive, Cardstock (AM710-81) - White

How to:  Trim a piece of Razzleberry paper to 4x6 and adhere to card face.  Trim a piece of white cardstock to 3x5 and emboss with embossing template, adhere to center of card.  Adhere gold frame sticker to center of card, slightly off centered.  Adhere "Smile" gold foil thicker word to top center of card.  Adhere "hello darling" die to bottom of gold frame sticker.  Finish by adhering pink pleather bow and thread to card.

Supplies: Dear Lizzy (369196) - Liz Lemon Paper, Dear Lizzy (369197) - Smitten Paper, Dear Lizzy (369217) - Pleather Bows, Dear Lizzy (369216) - Fabric Embellishments Shapes, Dear Lizzy (3692c11) - Accents & Phrases W/ Gold Foil, Dear Lizzy (369225) - Embossing Folder Words, This To That (AM617-13) - Adhesive, Cardstock (AM710-81) - White

How to: Trim a piece of Liz Lemon paper to 4x6 and adhere to card face.  Trim a piece of white cardstock to 3x5 and emboss with embossing template, adhere to center of card.  Adhere "Shine" sticker to top left hand side of card.  Adhere "XO" fabric embellishments to center of card.  Finish by adhering pink pleather bow and thread to card card.


Friday, December 26, 2014

New Year's | American Crafts


Hi there, I had a post up on the American Crafts blog the other day, that I would like to share with you!  I was inspired this month by this fun pin that I found on Pinterest.... When I first saw this picture, I thought that all the gold and glitz reminded reminded me of New Year's and I couldn't wait to use it on a layout.

DIY wall hanging


The soft pretty colors of the Serendipity collection paired with gold and glitter were perfect for these
photos of my daughter making her New Year's wish.  I added some watercolors and pennants to carry
the theme of a New Year's party.  Happy New Year!


Supplies: Dear Lizzy (369181) - Little Things Paper, Dear Lizzy (369184) - XOXO Paper, Dear Lizzy (369187) - One Fine Day Paper, Dear Lizzy (369186) - Summer Breeze Paper, Dear Lizzy (369189) Lucky Love Paper, Dear Lizzy (369191) - Good Vibes Paper, Dear Lizzy (369195) - Razzleberry Paper, Dear Lizzy (369200) - Bright Blueberry Paper, Dear Lizzy (369209) - Royal/Foil Thickers Alpha Stickers, Dear Lizzy (369210) - Gold Mini Alpha, Dear Lizzy (369213) - Puffy Stickers, Dear Lizzy (369216) - Fabric Embellishments Shapes, Dear Lizzy (369222) - Date Stamp Phrase, Cardstock (AM710-81) - White, Cardstock (AM714-17) - Glitter Gold, This To That (AM617-13) - Adhesive, Heidi Swapp (HS00791) - Gold Lame

How To: Use a die-cutting machine to cut pennants from patterned paper, glitter paper and watercolor paper.  Use a paint brush to apply watercolor paints to watercolor pennants, set aside to dry.  Print two small photos and cut them into a pennant shape.  Line up pennants in a graduated fashion and adhere down with repositionable tape (repositionable works best for this because if you make a mistake or need to adjust, you can realign your pieces before permanently gluing them down).  With a sewing machine, add machine stitching to the top layer of pennants.  Embellish with stickers.  Drop a couple drops of gold color shine spray mist down on the bottom left hand and top right hand side corners.  Finish by adding date stamp.


I hope you enjoyed my layout today!  Thanks for looking!


Monday, December 22, 2014

American Crafts | Be Merry Cards


I love the cheerful colors and designs in the Be Merry collection, they helped me create these fun Christmas cards for friends and family.

Supplies: Be Merry (368920) - Candy Cane Lane paper, Be Merry (368919) - Holiday Cheer Paper, Be Merry (368927) - Decorative Cardstock Tags, Be Merry (368931) - Cardstock Die-Cuts Cookies, Be Merry (368929) - Wood Veneer Shapes Snow, Serendipity (369217) - Pleather Bows, This To That (368185) - Adhesive Foam Dots


How to: Trim Candy Cane Lane paper to 4x6 and adhere to card front.  Trim a strip of Holiday Cheer paper and adhere to bottom of card.  Use a white journaling pen to add stitches to bottom of die cut "cheer" tag.  Apply adhesive foam dots to back of die cut tag and adhere to card, slightly off centered.  Adhere snowflake die cuts and wood veneer shapes to card slightly tucked in behind tag.  Embellish with sequins and gold tinsel.  Finish by adhering pleather bow to top of tag.

Supplies: Be Merry (368919) - Holiday Cheer Paper, Be Merry (368917) - Let it Snow Paper, Be Merry (368927) - Decorative Cardstock Tags, Be Merry (368931) - Cardstock Die-Cuts Cookies, Be Merry (368929) - Wood Veneer Shapes Snow, This To That (368185) - Adhesive Foam Dots, Cardstock (AM714-17) - Glitter Cardstock Gold, Styleboard (683445) - Maggie Holmes Dies


How to: Trim Holiday Cheer paper to 4x6 and adhere to card front.  Trim a piece of Let it Snow paper and adhere to back of die cut star tag.  Apply adhesive foam dots to back of die cut tag and adhere to card.  Adhere snowflake die cuts and wood veneer shapes to card slightly tucked in behind tag.  Embellish with gold tinsel.  Adhere white sequins to center of star die cut tag.  Use a white journaling pen to add stitches to bottom of "merry and Bright" tag, adhere to card.  Die cut bow from gold glitter paper, finish by adhering bow to top of tag.