Showing posts with label pattern piecing. Show all posts

Monday, September 14, 2015

Pink Paislee | Pattern Piecing

This is a personal blog. All editorial content and projects are intellectual property of http://canoncreativegirl.blogspot.com/.  I do receive financial compensation and material product from Pink Paislee to develop my craft posts, but all ideas and opinions are my own.

Good morning!  Today on the Pink Paislee blog I am sharing  just one of the many ideas for using the Memorandum collection on a scrapbook page.  Memorandum is quickly becoming one of my new favorite collections to work with.  The patterns and embellishments go together so effortlessly.  I gathered together some of my favorite papers from the collection and embellishments.

I also added in some Mister Huey's black spray mist and some lovely gold foam Thickers from the Citrus Bliss collection.

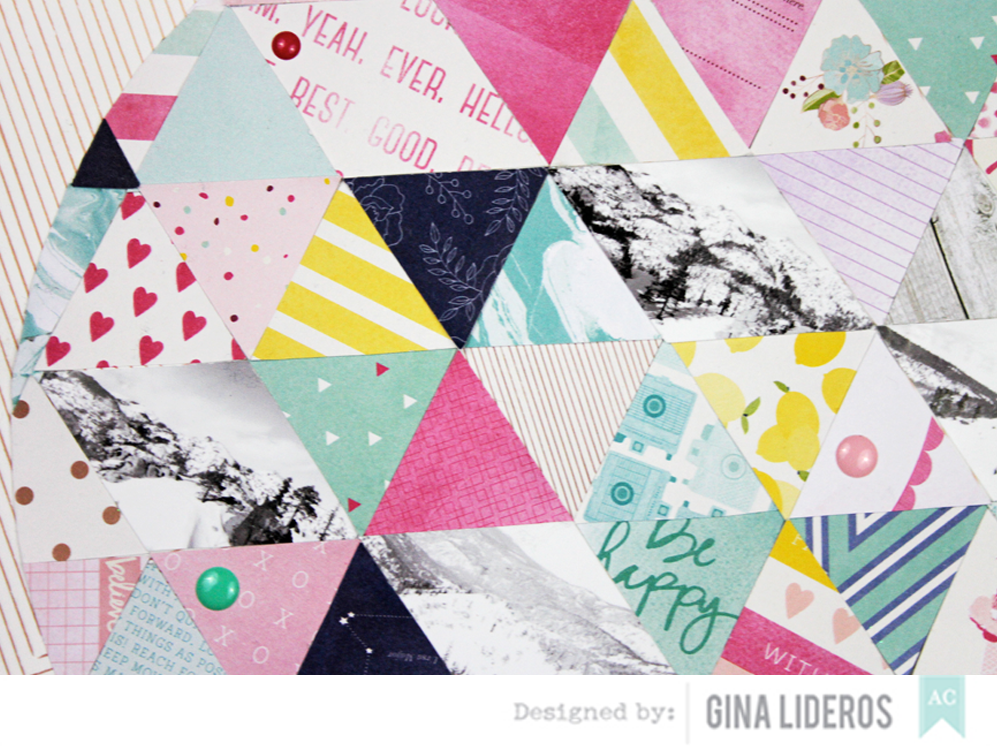
One of my favorite techniques to do on a layout is pattern piecing.  To create this layout I first cut the Desktop Patterned Paper using a background cut file, then chose other papers from the collection to piece behind the open spaces before adhering it all down to a piece of white cardstock.

I get asked all the time what kind of adhesive I like to use when working with cut files and pattern piecing.  I like to use the American Crafts Sticky Thumb brand liquid pva glue.  It has a twist tip on it that allows me to place adhesive down in small areas.  Here is a closeup of my layout after I adhered everything down.


Collection used: Memorandum and Citrus Bliss


Tuesday, September 8, 2015

American Crafts | Favorite Creation

This is a personal blog. All editorial content and projects are intellectual property of http://americancrafts.typepad.com/.  I do receive financial compensation and material product from American Crafts to develop my craft posts, but all ideas and opinions are my own.

I chose this layout as my favorite creation because it combines two of my favorite things - watercolors and pattern piecing.  I love the way the watercolors pair so nicely with the Rise and Shine collection.


Supplies: Amy Tangerine Rise And Shine: (370013) - Claire Paper; Amy Tangerine Rise And Shine: (370004) - Ella Paper; Amy Tangerine Rise And Shine: (370006) - Emery Paper; Amy Tangerine Rise And Shine: (370009) - Emma Paper; Amy Tangerine Rise And Shine: (370002) - Kylie Paper; Amy Tangerine Rise And Shine: (370011) - Lucy Paper; Amy Tangerine Rise And Shine: (370016) - Madison Paper, Amy Tangerine Rise And Shine: (370012) - Olivia Paper; Amy Tangerine Rise And Shine: (370000) - Rachel Paper; Amy Tangerine Rise And Shine: (370017) - Samantha Paper; Amy Tangerine Rise And Shine: (370008) - Stella Paper; Amy Tangerine Rise And Shine: (370018) - Sophia Paper; Amy Tangerine Rise And Shine: (370034) - Epoxy Stickers; Amy Tangerine Rise And Shine: (370039) - Wood Veneer Tags; Amy Tangerine Rise And Shine: (3700450) - Memo Pad; Amy Tangerine Rise And Shine: (370035) - Phrase Stickers; Cardstock: (7104) - Vanilla 
How to: Use a 1" square punch to punch out pieces of assorted patterned papers and white cardstock. Use watercolor paints to apply watercolors to the punched pieces of white cardstock, set aside. Arrange punched pieces in a diamond format, use a ruler to line pieces up and adhere down. Flick drops of white paint across the page. Print a small photo and adhere to top left hand side of page and back with die cuts, note pad page, paper clip and stickers. Fussy cut a flower from overlay sheet and tuck in behind photo. Finish page by adhering wood veneer and stickers.


Thanks for checking out my favorite creation today, do you have a favorite creation that you love?


Tuesday, April 14, 2015

American Crafts | Pastels

It's Pastels week on the American Crafts blog, I'm sharing a fun layout with you today incorporating pastels on my layout.

Pairing watercolor paints along with light colored pieces of patterned papers are a great way to achieve a pastel look on your layout.


Supplies:  Rise And Shine (RSDS-70000) - Rachel Paper, Rise And Shine (RSDS-70001) - Chloe Paper, Rise And Shine (RSDS-70002) - Kylie Paper, Rise And Shine (RSDS-70003) - Nicole Paper, Rise And Shine (RSDS-70004) - Ella Paper, Rise And Shine (RSDS-70006) - Emery Paper, Rise And Shine (RSDS-70009) - Emma Paper, Rise And Shine (RSDS-70011) - Lucy Paper, Rise And Shine (RSDS-70012) - Olivia Paper, Rise And Shine (RSDS-70016) - Madison Paper, Rise And Shine (RSDS-70021) - Pink Foil Paper, Rise And Shine (RSTH-70027) - Thickers Grace Phrase Gold Foil , Rise And Shine (370032) - Accent & Phrase Stickers, Rise And Shine (370034) - Epoxy Stickers, Rise And Shine (370035) - Phrase Stickers, Rise And Shine (370054) - Chipboard Frames, Cardstock (Am710-81) White Textured, Precision (PP03-62311) - Pen Black, This To That (AM617-12) - Adhesive


How to: Handcut triangles from patterned papers and white cardstock papers.  Use a paintbrush to paint cardstock pieces with pastel watercolor paints, set aside to dry.  On a white cardstock background arrange triangle pieces in a scattered pattern and adhere down.  Print a small photo and adhere on top of chipboard frame, adhere to left hand side of layout.  Spell out the title "Always fun" using gold foil thickers and adhere to right hand side of page.  Use a precision black pen to add journaling to bottom left hand side of page.  Flick drops of black spray mist against the background.  Finish by adding stickers and date stamp.


Monday, February 2, 2015

American Crafts | Winter

It's winter week on the American Crafts blog!  I hope all of my friends on the East coast are staying warm and dry right now!

I wanted to document these recent photos that we took on a trip to Lake Tahoe last Winter.  
I kept the embellishments at a minimum to focus on the photos and the overall graphic 
design of the layout.


Supplies: Dear Lizzy (369206) - Serendipity 6x6 Paper Pad, Dear Lizzy (369188) - Sugar Sugar Paper, Dear Lizzy (369208)
- Soar/Woodgrain Print Chipboard Thickers, Dear Lizzy (369215) - Serendipity Enamel Dots, This To That (AM617-13) - Adhesive


How To:  Use a die cutting machine to cut triangles from different pieces of pattern paper.  Use a printer to print 5 small photos and trim them into a diamond design.  Piece together your background on a scrap piece of cardstock using repositionable adhesive (in case you need to re-align any of the pieces).  Trace around a large bowl or use a die cutting machine to trim your design into a large circle.  Adhere design to background patterned paper.  Spell out title "Winter" using thickers.  Finish by embellishing with enamel dots.


I hope you enjoyed my winter layout!  Thanks for looking!