Friday, July 17, 2015

American Crafts | Eat Cake

This is a personal blog. All editorial content and projects are intellectual property of http://canoncreativegirl.blogspot.com/.  I do receive financial compensation and material product from American Crafts to develop my craft posts, but all ideas and opinions are my own.


Die cuts are a fun way to add interest to your page.  I used die cuts on my page to help tell
the story of my niece celebrating her birthday.


Supplies: Dear Lizzy Fine and Dandy (370085) - 6x6 Paper Pad, Dear Lizzy Fine and Dandy (370099) - Ephemera W/ Gold Foil, Dear Lizzy Fine and Dandy (370103) - Gold Numbers Paper Clips, Cardstock (AM710-81) - White Textured, This To ThatAM617-13) - Adhesive, Studio Calico (SC1-31064) - Inky Black


How To:  Cut background from White 12x12 Cardstock using the Silhouette Cameo.  Cut pieces of patterned paper to fit background using the Dear Lizzy 6x6 Paper Pad.  Back White 12x12 background cut with a piece of white 12x12 white background paper.  Adhere cut pieces from 6x6 paper pad in negative pieces.  Adhere all pieces down.  Sprinkle black spray mist across the page. Print an Instagram photo measuring 3.5x3.5" adhere to center bottom of page.  Embellish with die cuts, and paperclip.


Thanks for stopping by today!


Tuesday, July 14, 2015

Pink Paislee Summer Adventure Series: Let's Go

This is a personal blog. All editorial content and projects are intellectual property of http://canoncreativegirl.blogspot.com.  I do receive financial compensation and material product from Pink Paislee to develop my craft posts, but all ideas and opinions are my own. 
Summer Adventure Series! @pinkpaislee @gina_lideros pinkpaislee ppAtlas Scrapbooking
We usually go somewhere where we can hike, camp or see the beach during our summer vacation.  These photos are from a trip to  Valley of Fire, that we took in 2012.  We were so taken back by the scenery and areas to hike.  I brought my camera phone and my DSLR, so that we could be sure to capture photos on our trip.

Summer Adventure Series! @pinkpaislee @gina_lideros pinkpaislee ppAtlas ScrapbookingTo create my layout, I cut the background from a background cut file using the Silhouette Cameo and then backed each circular piece with various pieces of patterned papers from the Atlas 12x12 paper pad.  The inspiration came to me when I was thinking about a countdown to Summer, and loved the numbers and icons on this cut file.

Summer Adventure Series! @pinkpaislee @gina_lideros pinkpaislee ppAtlas Scrapbooking
I splattered white paint across the navy side of the Latitude paper (included in the 12x12 paper pad), before adhering it to some of the circular pieces.  I also hand cut a tag from Altitude paper (yellow stars) and tucked it behind the number 5 circle before adhering down.
Summer Adventure Series! @pinkpaislee @gina_lideros pinkpaislee ppAtlas Scrapbooking
To add a handmade feel to the page, I used a needle and white embroidery floss to hand stitch around the heart and ampersand circles.

Summer Adventure Series! @pinkpaislee @gina_lideros pinkpaislee ppAtlas Scrapbooking
To finish off my layout, I sprinkled Navy color shine spray mist across the page and embellished with stickers, tags and ephemera pieces.  I hope you use the Atlas collection to document some of your favorite summer memories.  The colors and theme of the collection is perfect for documenting those memories!


Pink Paislee Collection Used:  Atlas

Monday, July 13, 2015

Scrapbook Circle | Take 2


Hi everyone, For this month's Take 2 post at Scrapbook Circle, I was challenged to take a previous layout from a past kit and re-do it.  For my post this month I decided to re-do this layout by the awesome Audrey Yeager.  When I first saw this layout, I was so intrigued by the overlapped design.


I kept the overall design the same.  I used my July You Are My Favorite kit to recreate my own design.  I used a triangle punch, and layered the pieces along my page.  I loved the light and blue background with brown that Audrey used in her original page.  I worked the light blue and white background onto my page by using the Jubilee paper by Crate paper.  I trimmed a strip of patterned paper and adhered it to the top of my page. 


I incorporated the brown from the original design by adding the cork word "today" (included in the main kit).  To embellish my page I used a tassel from the That Was Fun Add-on, and wood veneer pieces.


I hope you enjoyed my take on the Take 2 challenge.  If you create a layout using one of the Scrapbook Circle kits, we would love for you to share it with us on the Scrapbook Circle Facebook page!


Friday, July 10, 2015

The Cut Shoppe & CSI | Embrace Today

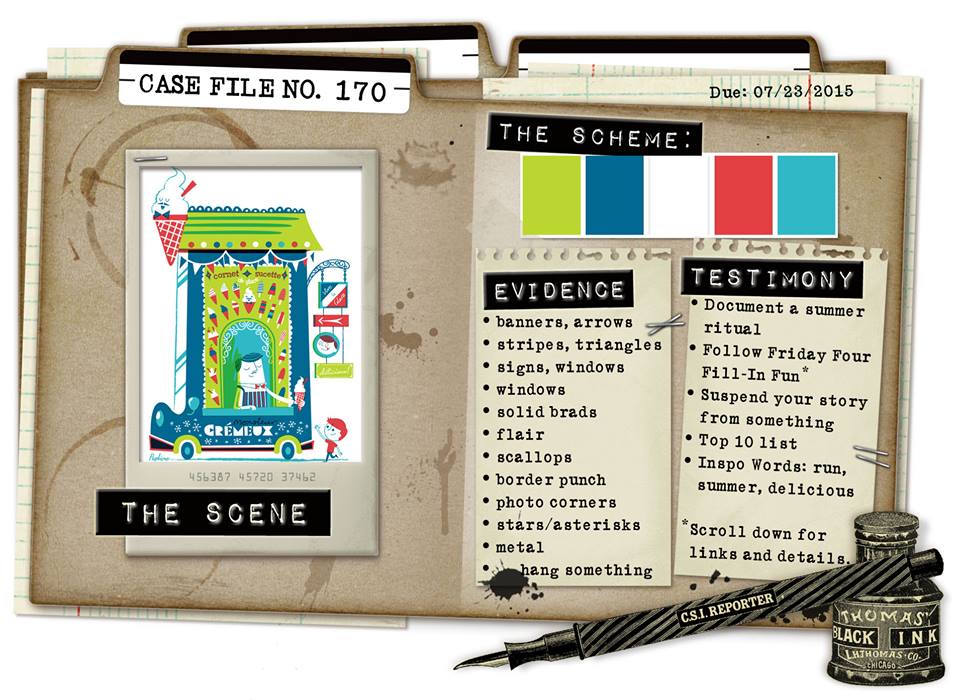
 I wanted to stop in today and share a layout, that I created for a Team Up with The Cut Shoppe and CSI: Color Stories Inspiration.  We are teaming up all month with CSI, and the designers are playing along with the Case Files, while the CSI Design Team is working with some of the cut files for The Cut Shoppe.  

Here's a peek at what I created for Case File 170.


There are five sponsors working with CSI for the month of July, so make sure you play along for the chance to win some great prizes!  The Cut Shoppe is offering a $20 Gift Certificate!  You can visit the CSI website for all of the details, and here is a look at Case File 170.


And The Cut Shoppe is also offering a 30% discount all this week, through July 11th!  Just make sure you check out with the Coupon Code CSITCS30!


Supplies: The Cut Shoppe: Arrows with Attitude 12x12 cut file; American Crafts: White Cardstock, Kraft Cardstock, Patterned Papers, Embellishments, Stickers, Enamel Dots


Tuesday, July 7, 2015

American Crafts | Focus On The Happy

This is a personal blog. All editorial content and projects are intellectual property of http://americancrafts.typepad.com/.  I do receive financial compensation and material product from American Crafts to develop my craft posts, but all ideas and opinions are my own.


It's Circles Week on the American Crafts blog, here is a look at my layout I created using circles!

Circles are such a versatile shape.  I love using circles on layouts
because they are so pleasing to the eye, and help to draw the eye in.


Supplies: Shimelle True Stories (370703) - English Breakfast Paper, Shimelle True Stories (370704) - Grey Floral Paper, Shimelle True Stories (370704) - Espresso Paper, Shimelle True Stories (370708) - Green Tea Paper, Shimelle True Stories (370710) - Cappucino Paper, Shimelle True Stories (370711) - Decaf Paper, Shimelle True Stories (370712) - Salted Caramel Paper,Shimelle True Stories (370713) - Americano Paper, Shimelle True Stories (370714) - Darjeeling, Shimelle True Stories (370717) - Frappe Paper, Shimelle True Stories (37018) - Mocha Paper, Shimelle True Stories (370719) - Berry Infusion Paper, Shimelle True Stories (370721) - Orange Pekoe Paper, Shimelle True Stories (370722) Cinnamon Roll Paper, Shimelle True Stories (370723) - Croissant Paper, Shimelle True Stories (370724) Macchiato Paper, Shimelle True Stories (370741) - Wood Veneer Shapes, Shimelle True Stories (370745) - Wooden Buttons, Shimelle True Stories (370743) - Ephemera Shapes & Icons, Textured Cardstock (AM710-81) - White, Studio Calico Circles 12x12 cut file by Paige Evans
How To:  Cut background from White 12x12 Cardstock using the Silhouette Cameo.  Cut pieces of patterned paper to fit background using Shimelle True Stories collection.  Back White 12x12 background cut with a piece of white 12x12 white background paper.  Adhere cut pieces from Shimelle True Stories collection in negative pieces.  Adhere all pieces down.  Print a small photo measuring 4x2 and back with Shimelle True Stories sunray overlay.  Adhere to left hand side of page.  Adhere die cuts, wood veneer and cardstock stickers to page.  Finish by adding date stamp and cork sticker to page.


Thanks for stopping by today, I hope you enjoyed my layout!


Wednesday, July 1, 2015

American Crafts | Summer Daybook

This is a personal blog. All editorial content and projects are intellectual property of http://americancrafts.typepad.com/.  I do receive financial compensation and material product from American Crafts to develop my craft posts, but all ideas and opinions are my own.


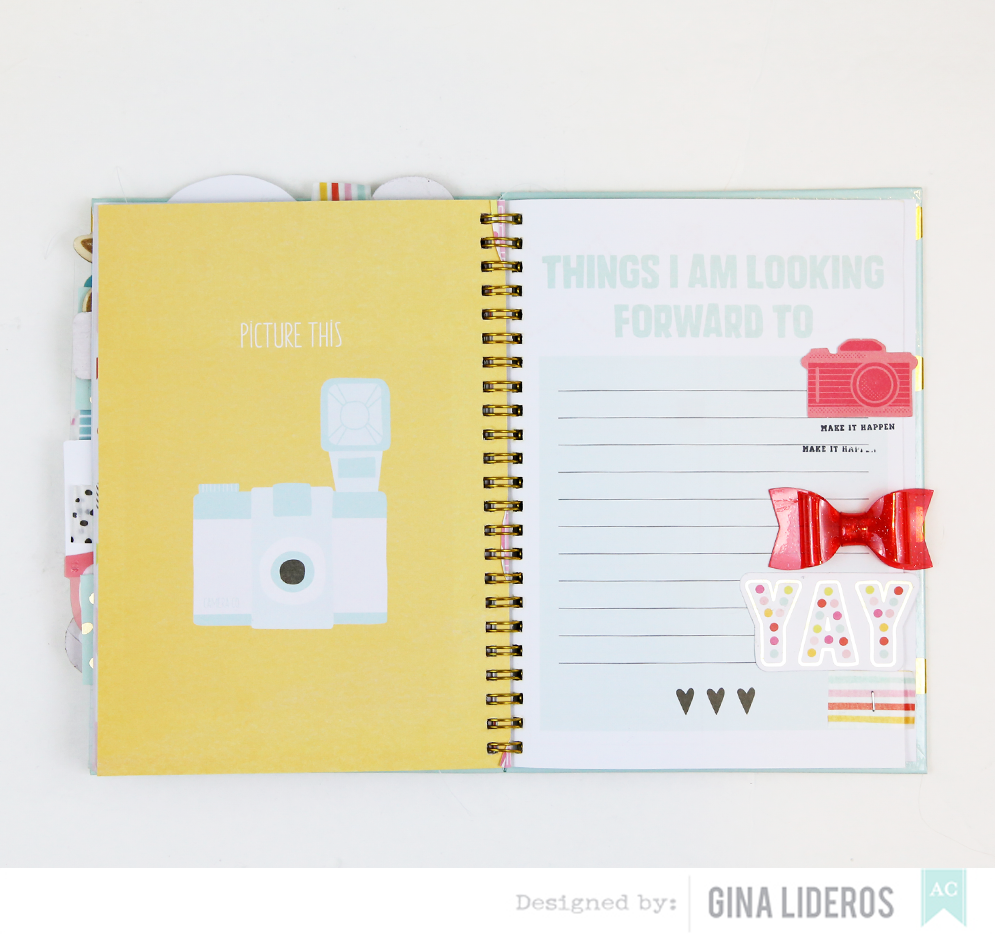
Summer is a busy time for our family, this summer daybook from the Dear Lizzy Fine and Dandy collection is perfect for helping us check off our "to do list" and staying organized. 


Summer Daybook 


Supplies: Dear Lizzy Fine And Dandy (370134) - Spiral Bound 52 Week Journal, Dear Lizzy Fine And Dandy (370108) - Washi Tape Book, Dear Lizzy Fine And Dandy (370109) Metal Rimmed Tags, Dear Lizzy Fine And Dandy (370091) - Accents & Phrases W/ Glossy Accents, Dear Lizzy Fine And Dandy (370096) - Plastic Glitter Bows, Dear Lizzy Fine And Dandy (370099) - Ephemera W/ Gold Foil, Dear Lizzy Fine And Dandy (370077) - Acetate Transparency Darling, Dear Lizzy Fine And Dandy (370087) - Accents & Phrases Foiled Chipboard, Dear Lizzy Fine And Dandy (370088) - Confetti Hearts Colorful Chipboard Thickers, Dear Lizzy Fine And Dandy (370089) - Woodland Gold Foiled Foam, #Summer (366963) - Journaling & Phrases, #Summer (366968) - Acrylic Shapes Ice Cream, 


1.  Begin by choosing the products you would like to use in the album.  I used the Fine and Dandy collection and #Summer collections.  I start by getting everything ready and laying out my supplies before adhering them down. Adhere two strips of washi tape down and then layer the title on top.  Use a sewing machine to stitch down the title.


2.  Create a tab with washi tape on the "Today I Will" page, and staple down.  Lay out title before gluing down.  Add stickers, acrylic camera shape and phrase stamp to pages.


3.  Next, I put together a page for Summer Birthday's.  I thought the "currently Makes Me Happy" page and the calendar next to it was perfect for Birthday's.  Adhere chipboard pieces to page and staple down.  Adhere a small envelop and tuck in a small metal rimmed tag.


4.  Staple on a pair of acrylic sunglasses to the "Best Days Ever" page, stamp a phrase underneath.  Adhere a square photo overlay to adjoining page.  Decorate with chipboard piece and stickers.


5.  Next, adhere a 4x6 photo overlay frame to "favorite books" page with a strip of washi tape.  Adhere cherry wood veneer sticker piece.  Staple typewriter ephemera piece to adjoining page.  Tear a strip of washi, and adhere underneath.  Add cork sticker and star sticker to page.


6.  Create a tab with washi tape and staple down on "Places I want to Travel to" page.  Stamp phrase stamp just below title.  Embellish by adding road trip wood veneer piece and acrylic sunglasses.  Trim a piece of acetate transparency and adhere to adjoining page with washi tape.  Use a sewing machine to stitch in place.  Layer title and ephemera pieces.


7. Last, adhere ephemera to page, stamp page with phrase stamp.  Adhere a small strip
of washi tape across the bottom of the page and staple down with mini stapler.  
Finish by adhering plastic bow.


I hope this tutorial has inspired you to create your own Summer daybook.  I still have some
empty pages to fill and will fill them as we check off things on our Summer to do list!


Scrapbook Circle | Explore

This is a personal blog. All editorial content and projects are intellectual property of  http://www.scrapbookcircle.com/blog.  I do receive  material product from Scrapbook Circle to develop my craft posts, but all ideas and opinions are my own.

One of my favorite pieces included in the Scrapbook Circle Have a Little Fun Today kit is the acrylic word "explore".


I created my background using a cut file made by the fabulous Paige Evans for Studio Calico.  I backed my cut file with different pieces of patterned papers included in the main kit.  I specifically chose papers from the Pink Paislee Atlas collection because they work so well together.  


I placed the acrylic "explore" word underneath my photo.  Because the word is translucent you can still see the design behind the word.

If you haven't already, make sure that you pick up this fun kit today!