Saturday, October 31, 2015

American Crafts | Halloween

This is a personal blog. All editorial content and projects are intellectual property of http://americancrafts.typepad.com/.  I do receive financial compensation and material product from American Crafts to develop my craft posts, but all ideas and opinions are my own.


Halloween is my favorite holiday to document!  I love the spooky theme, colors, photos
and of course the candy!


Supplies: Crate Paper After Dark (ADPPR-80251) - Fright & Fun Paper, After Dark (AD680267) - Paper Pad 6"x6", After Dark (AD680269) -Thickers Shape Stickers Spooky/Glittered Foam, After Dark (AD680272) - Chipboard Stickers Glittered Accents, After Dark (AD680274) - Ephemera Die-Cuts W/Black & Gold Foil, After Dark (AD680277) - Wood Veneer Shapes, After Dark (AD680279) - Adhesive Enamel Dots, Heidi Swapp Minc (HSFOIL6-12113) - Reactive Foil 6"x5" Roll Orange, Minc (HS370124) - Foil Applicator & Starter Kit, Minc (Minc6-80284) - Paper 6"x6" Halloween, Sticky Thumb (ST340261) - Adhesive Runner and Refill Permanent Solid 

How To: Use a scratch piece of printer paper and a pencil to measure the size of the chevron shape that runs across the Fright & Fun paper.  Trace chevron shape and trim, use your trimmed piece as a template to create other chevron shapes out of 6"x6" pattern paper pad.  Trim out about 18 chevron shapes, each out of different pattern papers.  Adhere
to background paper in a pattern moving to every other chevron.  Use a sewing machine and black thread to stitch down shapes.  Splatter black spray mist across the page, set aside to dry.  Print a 4"x6" photo and adhere to center right side of layout. Place a "Happy Halloween" chipboard sticker piece overlapping the top right hand side of photo.  Overlap the "Happy Halloween To You" and "Admit One" chipboard sticker pieces and adhere under photo.  Place "Admit One 31" and "Halloween" ephemera pieces just above chipboard pieces overlapping the bottom right hand side of photo.  Spell out title "EEK" using thickers shaped stickers on the middle left hand side of layout.  Run the "Spooky Fun" ephemera
arrow die-cut through the Minc machine using orange reactive foil. Adhere to page just below title.  Adhere chipboard "31" sticker piece right below "Spooky Fun" arrow piece. Arrange bat ephemera piece, bat wood veneer piece and bat shaped thicker shaped sticker just above title in a sporadic fashion.  Adhere two glitter chipboard chevron pieces just
above photo.  Adhere chipboard spider web and "31" ephemera piece to right side of photo. Apply enamel dots to chipboard star piece and wood veneer star and adhere to top right hand side of layout.  Finish by adding two black ephemera star pieces to page.


Thanks for stopping by today!


Thursday, October 29, 2015

Pink Paislee | Halloween Cards

This is a personal blog. All editorial content and projects are intellectual property of http://canoncreativegirl.blogspot.com/.  I do receive financial compensation and material product from Pink Paislee to develop my craft posts, but all ideas and opinions are my own.


Hello there!  Happy Halloween week Pink Paislee fans!  I have a couple of fun Halloween cards to share with you to set the mood!
Halloween is my all time favorite holiday!  I love the fall weather, the decorating, the colors, the costumes and of course the candy!!  I would like to share with you today a couple of cards that I made for the occasion!
@pinkpaislee #pinkpaislee @gina_lideros #ppcedarlane #ppMemorandum # ppBellaRouge #halloweencards

The first card that I created is a house shaped card, that I cut using my Silhouette cameo.  I used paper from the Bella Rouge collection.  To add detail to my card, I cut a couple of bats out of black cardstock and added them to card.  I then sprinkled white spray mist across the card.  I added a couple of loose threads and some enamel dots from the Crate Paper After Dark collection.  The gold puffy stars are from the Memorandum collection.
@pinkpaislee #pinkpaislee @gina_lideros #ppcedarlane #ppMemorandum # ppBellaRouge #halloweencards
I hand painted the letter "H" with white paint and added it to my card, with a bit of black tulle behind it.  I will show you how I did this in the steps below.  I handpicked the letter "H" and the numbers "31" from the Bella Rouge collection. I used a foam paint brush and some white folk art paint to transform them.  I thought the initial colors and design of the letter/numbers would have been perfect for Halloween, but I wanted them to stand out against my chosen striped background papers.
@pinkpaislee #pinkpaislee @gina_lideros #ppcedarlane #ppMemorandum # ppBellaRouge #halloweencards

To do this, I first dabbed a little bit of white paint on to my foam brush and then lightly stroked on white paint to my letter H and numbers 31.  I purposely did not cover them completely, because I wanted to give them a little bit of a distressed look.  Set aside your chosen letters/numbers to dry and then adhere to your cards!  This is a great way to customize them and give them a "homemade" look!
@pinkpaislee #pinkpaislee @gina_lideros #ppcedarlane #ppMemorandum # ppBellaRouge #halloweencards
I hope you have a Happy Halloween!


SIGGIES_Small_GINA LIDEROS

Wednesday, October 28, 2015

Autumn Splendor Party


Fall is my absolute favorite season!  I love the crisp cool weather, the fall colors, leaves, pumpkins, and staying in and bundling up.  To kick off the new fall season, I decided to throw a party for close family and friends.  The new craft party kit from Pink Paislee, helped to bring my whole party together.  The craft party kit is so pretty already by itself, so I did not need to add a lot to it.  I loved these gold glittered place cards (included in the kit), I used a gold medium point chalk marker made by American Crafts to add messages to my cards.


We picked up a strawberry pound cake from our local bakery for the party,  It was so pretty and picture perfect!!  I wish I could take all the credit for it, but I'm not a baker, so store bought it is! Behind the cake is this beautiful gold banner included in the party craft kit and gold confetti, which is a must have for any party.


Also in the Party Craft Kit were these sweet treat bags.  I filled these babies with Halloween candy, it is a fall party after all, and what is a party without candy?


I love chalk art, and happened to have these two chalkboards on hand to decorate.  My handwriting is not pretty, and I have no clue how to do pretty chalk art designs free hand, so I'm going to let you in on a little secret of mine.  It's kind of cheating actually.... 


When I am looking for pretty chalk art titles to display, I always check the Silhouette Design store for pre-made design titles or create my own.  The two titles that you see above, I happened to find in the Silhouette store.  I measure the size that I need (for the smaller chalkboard, my title measured about 5"x5" for the larger chalkboard my design measured about 12"x12").  Next I cut the design out of spare cardstock (any cardstock or patterned paper that you have lying around will work for this).  I then used the cut as a template to fill in my chalk art.  I used American Crafts permanent chalk marker pens to then fill in the design.   


Also, included in the party kit are some really beautiful table settings that read "Bon Appetit",  I love how simple and pretty they are.  The simple gold confetti design matched my decorations and completed the table settings.


Here is a look at the full party setup and how everything goes together!  A fall party to remember for sure!  The cake was a big hit!  I wish I had more photos of it, but it went pretty fast!


Thanks for stopping by today, I hope you enjoyed my post, and have gathered information to create your own fall party!


Tuesday, October 20, 2015

American Crafts | Fall Week


This is a personal blog. All
 editorial content and projects are intellectual property of http://americancrafts.typepad.com/.  I do receive financial compensation and material product from American Crafts to develop my craft posts, but all ideas and opinions are my own.


It's Fall week on the American Crafts blog!! I have a couple of pages that I documented our Fall memories in using the Pink Paislee Memorandum Memory Notebook.  My full post can be seen on the American Crafts blog here.

Document your fall memories in your planner.  Add in fall leaves and colors to play on the theme.


Supplies: Finders Keepers (FKTH-40232) - Memento Alpha/Green Puffy Thickers, Finders Keepers (340246) - Mylar Flair Embossed Gold, Finders Keepers (340249) Kraft Tags Embroidered, Finders Keepers (340250) - Mini Washi Tape Rolls, Finders Keepers (340251) - Washi Tape Booklet W/Gold Foil,Finders Keepers (340256) - Grab Bag Assorted Embellishments, Finders Keepers (340235) -  Accents & Phrases Transparent Stickers, Finders Keepers (340243) - Die-Cuts Cardstock & Acetate Shapes W/Foil, Finders Keepers (FKDS-40327) - Wild Goose Chase Paper, Finders Keepers (FKDS-40340) - Meant To Be Paper, DIY Shop Mini Stapler (366900) - Stapler, Precision Pen (PP05-62321) - .05 Open Stock Black , Designer Desktop Essentials (370819) - Paper Clips Heart, Designer Desktop Essentials (370821) - Paper Clips Arrow, Designer Desktop Essentials (370825) - Bowtie Jumbo Paper Clips, Pink Paislee Memorandum (310033) Memory Notebook, Pink Paislee Memorandum (310027) - Shapes Clear Sticker Book, Dear Lizzy Neopolitan (59160) - Roller Date Stamp
 
How To:  On pages 1 and 2 use the Memorandum clear sticker numbers to fill out the calendar for the month of October.  Use precision pen to document important dates and activities.  Use the alpha green puffy thickers to spell out "October" on the top left hand side.  Trim a piece of pink ikat paper (included in the grab bag) and adhere to the left side column.  Add a strip of washi to the bottom of paper.  Clip on a jumbo bowtie paper clip.  Use a die cut machine to trim a leaf die-cut out from B side of Wild Goose Chase paper.  Layer embroidered tag and die cut leaf to left hand side column.  Fussy cut leaves from Meant To Be paper.  Adhere to top of right page.  Add triangle stickers (included in the grab bag) to both calendar pages.  Add a strip of washi to the right hand side of calendar page.  Clip on a arrow paperclip to bottom right hand side of page.  On page 3, print three small square photos and adhere to page.  Add "lovely" sticker to top of first photo, spell out the words "Fall Days" using alpha green puffy stickers next to first photo.  Adhere "xoxo" banner die-cut piece using mini stapler just below first photo.  Add date stamp and journaling to center of page.  Adhere a strip of washi tape to bottom photo.  Add date stamp, journaling and mylar flair embossed sticker to bottom right hand side of page.  On page 4, adhere a photo to top left hand side of page, and a photo to bottom ride hand side of page.  Trim a piece of wood paper (included in the grab bag) and slip behind bottom photo.  Add "brilliant sticker) just below top photo.  Adhere a camera die-cut to right side of top photo.  Add date stamp just above die-cut.  Adhere heart paper clip to top right hand side of page.  Use precision pen to journal on today card (included in the die-cut pack), trim off bottom of die-cut and adhere to bottom left hand side of page.  Finish page by adding two strips of mini washi tape.


Thanks for stopping by today!  If you are documenting your fall memories in a planner, I would love to see them!


Saturday, October 17, 2015

Scrapbook Circle | Design Team Choice


Hi there!  I have another new layout to share with you today using the Scrapbook Circle's October Mix Tape kit and Add-ons.


September 27th, was a memorable night.  We experienced a blood moon and solar eclipse.  I took my trusty Canon 6D out for a walk and decided to shoot the moon.  I chose my favorite photo from the shoot and decided to document it on my layout using the Mix Tape kit and add-ons.  


I love using geometric shapes on layouts.  To create the background for this layout I trimmed several pieces of the patterned papers included in the main kit into squares and rectangle shapes and then adhered them to a white cardstock background.  I used my sewing machine to stitch down a few of pieces.  Then I added in extra embellishments from both of the add-on kits.


Friday, October 16, 2015

Pink Paislee | Memory Dex

This is a personal blog. All editorial content and projects are intellectual property of http://canoncreativegirl.blogspot.com/.  I do receive financial compensation and material product from Pink Paislee to develop my craft posts, but all ideas and opinions are my own.


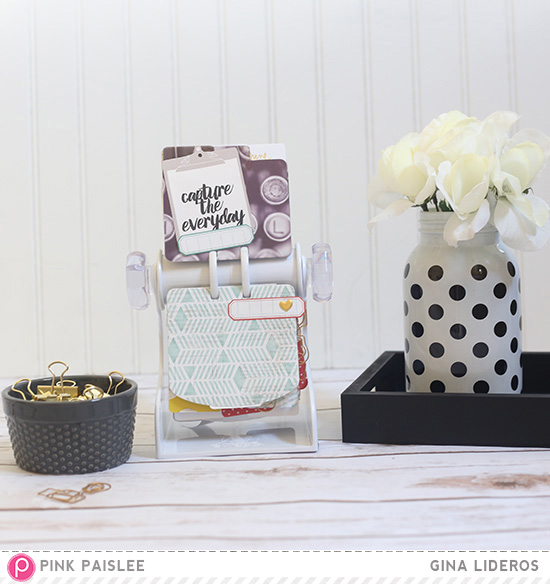
Hi there!  I don't know about you, but the Heidi Swapp Memorydex has quickly become a staple in our household for documenting every day photos and events!


I love the Heidi Swapp Memorydex dies,  they make it easy to trim your own photos and designs to fit the Memorydex.


I used pieces from the Heidi Swapp Wanderlust collection and the Memorydex collection to help my own personal cards come to life.


I added in new cards from the Pink Paislee Memorandum collection, and added in a few thickers from the from the Citrus Bliss and Atlas collections to help me tell my story.


I hand trimmed several papers from the Memorandum collection and used the HS Memorydex dies to punch my cards.  I love that there are so many Thickers and Puffy stickers for me to choose from to help bring my cards to life. I also embellished my cards with washi tape.


I used the Heidi Swapp Memorydex punch to trim my photos to fit within the display, and tell my story.  I love the camera shaped paper clips included in the office supply set.  I also used labels from the set to embellish my cards.


I hand trimmed a couple of papers from the Memorandum collection to become cards for my display.  I used the Heidi Swapp Memorydex  punch to turn these photos into one of a kind memories.

 I finished up my last card  by using a Heidi Swapp die "happy" and thickers from the Pink Paislee Atlas collection, I love how the card came out.  I left the frame below empty so that I could add a photo in later on.


Collection used: Memorandum


Wednesday, October 14, 2015

American Crafts | Under 30 Minutes


This is a personal blog. All editorial content and projects are intellectual property of http://americancrafts.typepad.com/.  I do receive financial compensation and material product from American Crafts to develop my craft posts, but all ideas and opinions are my own.


Halloween is my favorite holiday!  Learn how to create this too cute to spook marquee pumpkin in less than 30 minutes!


Supplies: Dear Lizzy Documentary (340315) - Party Animal Paper, Halloween (340369) - Pom Pom Flowers Kit,
Halloween (340375) - Cluster Party Decor Kit, Heidi Swapp Marquee (HS314884) - Love Halloween Kit Pumpkin, Crate Paper After Dark (AD680269) - Spooky Glitter Foam Thickers Shape Stickers, Crate Paper After Dark (AD680272) - Chipboard Stickers Glitter Accents, Heidi Swapp Minc (HSFOIL12-100) - Orange Reactive Foil, Heidi Swapp Minc (HS680288) - Ephemera Crate Paper Die Cuts, Heidi Swapp Minc (HS370124) - Applicator & Starter Kit, Crate Paper After Dark (AD680277) - Wood Veneer Shapes


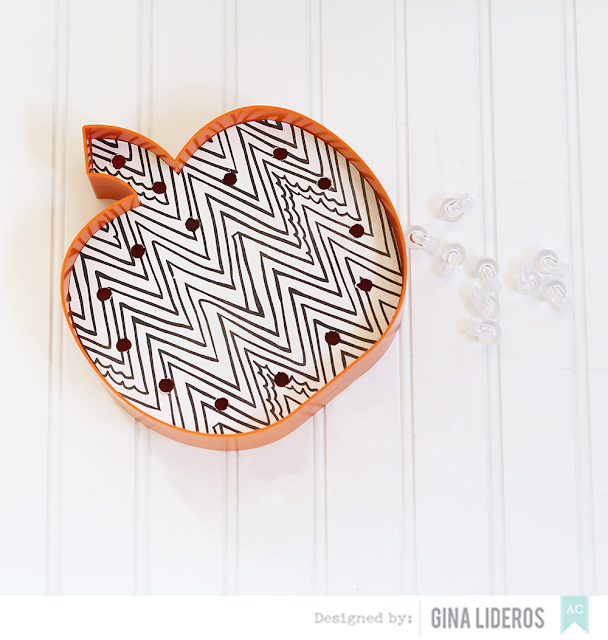
1. Take out the template included in the Heidi Swapp Marquee Love Halloween Pumpkin Kit, and trace onto Dear Lizzy Documentary Party Animal paper using a pencil.  Use scissors to cut out.issors to cut out.

2.  Use a hole punch to cut out holes for marquee lights.


3. Place cut paper on top of marquee pumpkin.  Place include marquee bulb lights
inside cut holes.


4. Screw on plastic backs, and place lights in each hole.  Work in a step by step
fashion, starting in the bottom middle and going right to left.


5. Next, place Thicker letters onto  pumpkin surface spelling out the word "Boo".  
Run "Fun This Way" die cut piece through Minc machine using orange reactive 
foil and adhere just above title.


6. Add chipboard, wood veneer and thicker shapes to complete design. 


Once your marquee pumpkin is done, enjoy!  Set up with other pieces to complete
the look!