Showing posts with label plus one. Show all posts

Friday, July 25, 2014

Sushi Love *The Cut Shoppe

Hi Everyone,
I have a layout up on The Cut Shoppe blog today using a couple of really fun cut files.


Sushi Love Layout


To create the fun background I used the It Adds Up 8.5x11 cut file and added some fun pattern papers and hand stitching to accentuate the plus signs.


To create my title, I used the Sushi Love cut from the Food For Thought cut file.


To pick up these fun files, stop by The Cut Shoppe Etsy store.


Thursday, June 26, 2014

American Crafts Fabric Yo-Yo Circles Tutorial

Hi there,
Today I am sharing a tutorial for American Crafts that went up on their blog yesterday.
One of my favorite circular embellishment to make are fabric yo-yo's. Combined with the cute binder clips from the Amy Tangerine collection they help keep me organized around the office and home.

Supplies: Duet Patterned Paper (PLUDS -66817) - ,Combo Patterned Paper (PLUDS -66804) - , Amy Tan Plus One Adhesive Metal Badges (366906) - Flair, Binder Clips (366851) - Details, Mini DayBooks (366644) - DIY Shop, Narrow Wooden Tags (DIY-TAG-66643) - DIY Shop, Cutup Crafts Scissors (AC64201) - CUTUP, To That (AM617-13) - Adhesive
To create these fun fabric yo-yo's first gather up your supplies. To make these you will need fabric, scissors, needle, thread, and buttons or other embellishments.

First, cut a couple of circles out of different patterns of fabric. Don't worry about your circle pieces being perfect, once you sew them you won't notice any imperfections. Depending on how big or small you want your yo-yo to be, you can tweak the measurement of the width of the circle a little bit. The wider it is the bigger the yo-yo will be.

Now take a needle and thread and make a stitch along the open edge lengthwise. Just one simple stitch is all you need to do. It doesn't even have to be perfect. Just be sure that you do not have a whole lot of length between the stitches or your stitches aren't too long and try to have them somewhat evenly spaced.

Continue stitching around the outer edge and scrunch your fabric as you go. When finished, take the needle and thread left over and pull up while pushing down the material making it gather into sort of a ruffle, scrunching it down.

Now that it is all gathered and tight, sew the ends together starting from the gathered end working up toward the edge and then back along the edge to the middle. This forms your ruffled round yo-yo. Knot it and cut the thread and voila! You have a yo-yo!

Your yo-yo is done and now all you have to do is add your embellishment to the center. Some ideas to use for your embellishment are buttons or brads.  

For my finished yo-yo's I added flair from the Amy Tangerine Plus One collection. These are so cute finished and can be added to a card or scrapbook layout for a 'homemade' feel. For my project I decided to make magnets out of them to use on a magnet board in my office so I continued adding to them.

Next, I adhered my finished fabric yoyo's to some fun wooden tags from the DIY Shop collection.

Then, I adhered some magnets to the back of my embellishments. 

I then embellished these cute little daybooks from the DIY Shop collection by adding some cut patterned paper and binder clips. 

These cute little daybooks and magnet board will help keep me organized in the office and around the home!

What a fun way to spruce up a magnet board!


I hope you enjoyed my fabric yo-yo circles tutorial!  I'll be back on with some new projects for the American Crafts Gallery later this week!


Wednesday, April 30, 2014

Run Dog Run - American Crafts April Gallery Layout

Hi everyone,

As promised I am back again today to share another gallery layout that I made for American Crafts this month.


The second layout that I created this month is of my dog Kona.  We took her to some open land where we could let her run free off the leash.  I love her expression as she is running wildly free.

Run Dog Run Layout


To begin my layout, I punched several stars (using the 2" star punch by American Crafts) out of Amy Tangerine Plus One papers.  I also cut several larger stars using my Silhouette Cameo.  I then adhered them onto white cardstock in a diagonal fashion.

I added lots of fun embellishments (rub ons, wood veneers, vellum stickers, puffy stickers, enamel dots and some spray mist too.


Thanks for stopping by again today!  Join us for the American Crafts National Scrapbook Day blog hop this Saturday May 3rd.


Monday, April 28, 2014

You & Me - American Crafts April Gallery Layout

Hi everyone,
Good afternoon!  Wow, the month of April sure flew by fast.  I can't believe it is going to be May this week.  I have a layout to share with you today for the American Crafts April gallery.

The first layout that I made for the gallery is of my two adorable nieces.  Sophia is 5 and baby Olivia is 8 weeks.  They make the perfect subjects to scrap!


You and Me Layout


To create my layout, I started by cutting a 12x12 background with my Silhouette Cameo, then I used it as a mask to spray mist the background.  I also cut a few additional pieces (the same size as the drops in the mask) out of Amy Tangerine Plus One paper, and used a sewing machine to sew them down.

 I used a mix of Amy Tangerine Plus One, Cut and Paste, Dear Lizzy 5th & Frolic, SC Printshop, SC Lemon Lush and Crate Paper Oh Darling on my layout.  I love being able to mix and match the lines that AC and their sub companies make.


Thanks for stopping by today!  I will be back tomorrow with another new layout :)  Have a good one!


Thursday, April 3, 2014

Nesting dies with American Crafts

Hello all!  Yesterday I had a post up at American Crafts with a couple of layouts featuring the new nesting dies that came out at winter CHA.

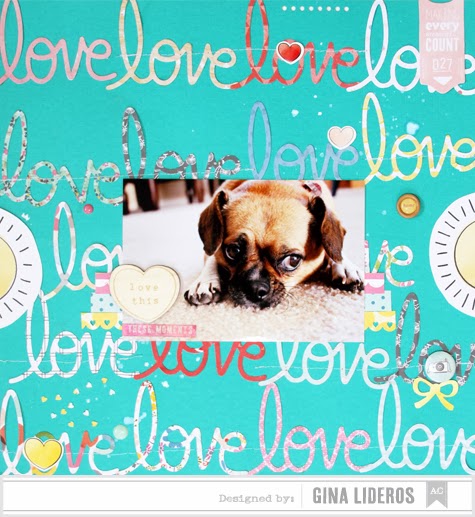
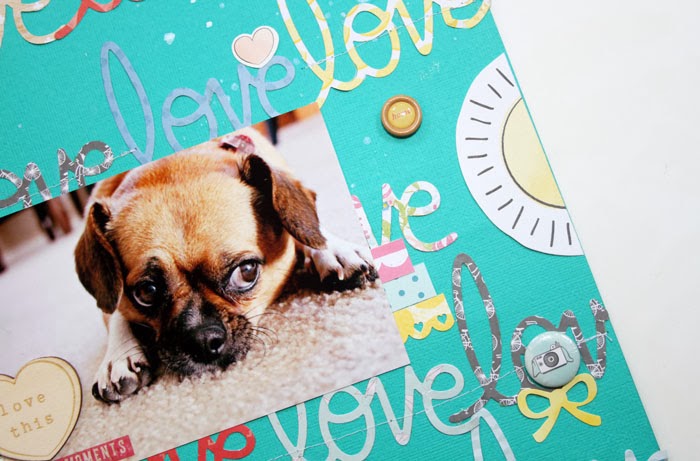
Love This Layout


I had fun with this layout.  I had this sweet photo of my dog Lilo and I just had to use it on a
layout!  Nesting dies are a great way to jazz up your layouts.  I use them to create fun titles and embellishments.  I also love that they are small and convenient so that I can take them along with me when I go to crops.


supplies: Dear Lizzy Daydreamer dies (366731) - Dies,  Daydreamer 6x6 Paper Pad (366767) - Cardstock,
Puffy Matte Stickers- Hearts (366777) - Dear Lizzy, Daydreamer Wood Veneer Shapes (366781) - Accents & Phrases,
Adhesive Back Enamel Dots (366785) - Dear Lizzy, Daydreamer Chipboard Shapes (366789) - Bits, Daydreamer Cardstock
Stickers (366776) - Accents & Phrases, Daydreamer Adhesive Metal Badges (366795) - Flair, Scallop Heart Border Punch 
(KOP-63000) - Knock Outs, Spiral Notebook Border Punch (KOP-63054) - Knock Outs, Tiny Alpha Cardstock Stickers - Typed
Transparent (366065) - Remarks, Wood Buttons & Epoxy Accents (85598) - Buttons, Textured Cardstock (AM710-468) - 
Cardstock


To create this layout I started off by using watercolor paints on a white cardstock background.  I then used the nesting die hearts (that come in two sizes) to make my fun colorful background.  I placed the smaller heart inside the larger heart before die cutting to get the double heart cut.  I loved playing with these shapes, so cute!

Happy Place Layout


I also die cut the love and xoxo words and the small camera.  Photo is of my two children featured right with their two cousins.


supplies: Buddy (PLUDS-66812) - Cardstock, Assistant (PLUDS-66806) - Cardstock,
Pair (PLUDS-66821) - Cardstock, Counterpart (PLUDS-66807) - Cardstock, Doubles (PLUDS-66808) - Cardstock,
Party of Two (PLUDS-66815) - Cardstock, Match (PLUDS-66819) - Cardstock, Twosome (PLUDS-66820) - Cardstock, 
Friend (PLUDS-66825) - Cardstock,Peer (PLUDS-66826) - Cardstock, Puffy Matte Stickers (366842) - Remarks, Die-Cut 
Shapes (366849) - Bits,Fabric Brads (366852) - Elements, Plus One Associate (366860) - Dies, Plus One Adhesive Metal 
Badges (366906) - Flair,Typed Transparent Tiny Alpha Cardstock Stickers (366065) - Remarks, Polka Dot Party Epoxy 
Stickers (366198) - Accent & Phrase, White Textured Cardstock (AM710-81) - Cardstock, Wood Buttons & Epoxy Accents 
(85598) - Buttons, Dear Lizzy Daydreamer dies (366731) - Dies,

I hope you enjoyed my nesting dies post.  Thanks for stopping by today!


Tuesday, March 4, 2014

Remember This Forever...

Hi everyone,

Sharing a new layout that I made today for the American Crafts March Layout Gallery.  I do layouts all the time about some of my favorite subjects - my dogs, husband, friends and my children.  I Finally decided to do a layout about something else that is very dear to me - my Canon 7D.  I have been a loyal Canon fan since early 2000 when I started photography.  I have been blessed enough to work along with Canon in 2 of their creative programs (can you say best day job ever) and have learned a lot and met a lot of amazing people in the photography industry as well as the scrapbooking industry.  I guess you could say that my 7D is my baby.


Remember This Forever Layout


I started out my layout by punching out a lot of pieces using a square punch and then folding them to make them look distressed.  Art is so much more fun when you are not trying to be perfect.  I never measure, I just eyeball it all the time.  And this is the result - creative and carefree:


supplies: Pool Cardstock (AM710-69) - Cardstock, Combo Paper (PLUDS-66804) - Plus One, Tandem Paper (PLUDS-66805) - Plus One, Assistant Paper (PLUDS-66806) - Plus One, Counterpart Paper ( Paper (PLUDS-66807) - Plus One, Doubles Paper (PLUDS-66808) - Plus One, Pal  Paper (PLUDS-66809) - Plus One, Copilot  Paper (PLUDS-66810) - Plus One, Date Paper (PLUDS-66811) - Plus One, Buddy Paper (PLUDS-66812) - Plus One, Sidekick  Paper (PLUDS-66813) - Plus One, Partner  Paper (PLUDS-66814) - Plus One, Party Of Two Paper (PLUDS-66815) - Plus One, Couple Paper (PLUDS-66816) - Plus One, Soul Mate  Paper (PLUDS-66818) - Plus One, Match Paper (PLUDS-66819) - Plus One, Twosome Paper (PLUDS-66820) - Plus One, Pair Paper (PLUDS-66821) - Plus One, Duo Paper (PLUDS-66823) - Plus One, Companion Paper (PLUDS-66824) - Plus One, Friend Paper (PLUDS-66825) - Plus One, Ensemble Paper (PLUDS-66827) - Plus One, Plus One Cardstock Die Cuts (366849) - Bits, Plus One Fabric Brads (366852) - Elements, Plus One Acrylic Stamps - Accompany (366856) - Stamps, Plus One Associate Dies (366860) - Dies, Plus One Flair Adhesive Badges (366906), Plus One Thread Kit (366864) - Thread, Polka Dot Party Epoxy Stickers (366198) - Accent & Phrase, Punch Star 1.5 (KOP63102) - Knockouts


 Thanks for letting me share!  Have a good one!


Tuesday, February 25, 2014

Love You 7 Days a Week

Hi everyone,

Good morning!  We are celebrating Bits week on the American Crafts Blog this week.  I have a couple of layouts using Bits that went up on their blog yesterday.

The Bits pieces in the Plus One collection are so happy and fun that I decided to plan my two pages around them.  

Love You 7 Days A Week


supplies: Accomplice Paper (36822) - Plus One, Tiny Matte Puffy Accents (366842) - Remarks, 
Accompany (366856) - Stamp, Match Aqua (366833) - Thickers, Thread Kit (366864) - Thread, 
Die Cut Cardstock Shapes (366849) - Bits, Penpal Lettter and Number Sticker Book (366841) - Remarks,
Twins Foam Stickers (366837) - Thickers, Screenprinted Clothespins (366907) - Whittles, Kal Barteski 
Taffy (366832) - Thickers, Kal Barteski Black (366830) - Thickers


Seriously Busted


Supplies: Counterpart Paper (366807) - Plus One, Associate Dies (366860) - Dies,
Twins Foam Stickers (366837) - Thickers,  Penpal Lettter and Number Sticker Book (366841) - Remarks,
Die Cut Cardstock Shapes (366849) - Bits, Star Punch (63102) - Knockouts


Thanks for stopping by today, head on over to the American Crafts Blog and leave a comment for your chance to win a collection of Bits. 


Wednesday, February 12, 2014

American Crafts February Gallery Layout \ This Happened

Hi there,

I have a a layout to share today for the American Crafts February gallery using the brand new Plus One collection from Amy Tangerine

If you know me, you know that I love bold colors, and this collction is all about the bold colors and patterns.

I was inspired by a picture that I saw on pinterest to create this layout.  Here is the photo:


and here is my take on it:

This Happened layout


I kept the hexagons and split them into 6 parts, just like the photo then I stitched them down.  They remind me of cute little pie charts.  All of the papers and embellishments in this collection are so fun to create with.


supplies: American Crafts: Amy Tangerine (Plus One) flair adhesive badges, companion paper, couple paper, match paper, date paper, co-pilot paper, sidekick paper, ensemble paper, friend paper, twosome paper, buddy paper, black foam phase thickers, matte puffy accent stickers, Bits, sticker roll; Polka Dot party collection: epoxy stickers, fringe flowers; Yes, Please: simplify yes vellum shapes; Printshop: heart veneers; Cut and Paste collection: Cut Out accents chipboard thickers


Thanks for stopping by!  I will be back next week with another gallery layout using the Plus One collection, and be sure to visit this Friday for the American Crafts Valentine's day blog hop.