Tuesday, June 30, 2015

The Cut Shoppe | Hello Summer Love

This is a personal blog. All editorial content and projects are intellectual property of http://americancrafts.typepad.com/.  I do receive financial compensation and material product from American Crafts to develop my craft posts, but all ideas and opinions are my own.


Hi everyone!   I have a new layout to share with you today for The Cut Shoppe using the free Newsletter (Summer Love) cut file and the Bitty Borders cut file


Here's my layout:


I'm in love with that Summer Love cut file.  I knew right away when I saw it, that I just had to use it right away.  To create my layout, I actually cut the Summer Summer Summer Love title twice.  The first cut was the full title and then I trimmed off the bottom (love) piece.  The second cut I only cut the word "Love" from white cardstock paper.  I then placed the "Summer Summer Summer" title right above the love cut piece.  I placed my photo behind the love word.   To add color to my page I added watercolors on two of the Summer words and behind the title, before adhering down.  


The small circular hearts are from the Bitty Borders cut file, I simply ungrouped them and then cut them out individually and added watercolors to them.  To finish off my layout I added black spray mist, wood veneer pieces and machine stitching.


Summer Love


I hope this post has inspired you to try watercolors on a layout. It really adds a lot of color and interest!  Have a great day!


Monday, June 29, 2015

American Crafts | So Happy Together


This is a personal blog. All editorial content and projects are intellectual property of http://americancrafts.typepad.com/.  I do receive financial compensation and material product from American Crafts to develop my craft posts, but all ideas and opinions are my own.


For a twist on a traditional grid, try scrapping it at an angle.  It's a unique way to scrap those Father's Day photos.


Supplies: Shimelle True Stories (370703) - English Breakfast, Shimelle True Stories (370704) - Grey Floral, Shimelle True Stories (370707) - Espresso, Shimelle True Stories (370710) - Cappuccino, Shimelle True Stories (370711) - Decaf, Shimelle True Stories (370713) - Americano, Shimelle True Stories (370714) - Darjeeling, Shimelle True Stories (370714) - Frappe, Shimelle True Stories (370719) - Berry Infusion, Shimelle True Stories (370722) - Cinnamon Roll, Shimelle True Stories (370723) - Croissant, Shimelle True Stories (370724) - Macchiato, Shimelle True Stories (370730) - Hipster/ Black Chipboard Thickers, Shimelle True Stories (370733) - Stickers Phrase & Alpha, Shimelle True Stories (370734) - Sticker Book Icons W/ Silver Foil, Shimelle True Stories (370735) - Cork Stickers Icons, Shimelle True Stories (370740) - Wooden Borders, Shimelle True Stories (370741) - Wood Veneer Shapes, Shimelle True Stories (370745) - Wooden Buttons

How to: Trim about 35 patterned paper squares with a paper trimmer, each measuring about 2.5". Using a ruler and a pencil, line them up on a white cardstock background in a grid design at an angle. Print three small photos each measuring 2.5" square and place them inside the grid in a few of the spaces. Trim a couple of squares at a diagonal angle and place within the grid design. Leave one grid space blank to allow for journaling. Adhere all pieces down. Using a sewing machine, sew a border around the whole design and stitch diagonal pieces down. Journal in the blank grid space with a pen. Flick drops of navy blue spray mist across the page. Using Hipster Black Chipboard Thickers spell out the title " So Happy Together" along the sides of the design. Finish by embellishing with stickers, wooden buttons, wood veneer, and a wooden border. 


Thanks for stopping by today!


Saturday, June 27, 2015

The Cut Shoppe | Happy Together


Hi everyone!   I have a new layout to share with you today using the Tiny Triangles background from The Cut Shoppe.  Eye catching backgrounds are my groove.  I love pattern piecing and using lots of geometric shapes.  When I first saw the Tiny Triangles cut file, I fell in love!


When I started working on this layout, my original plan was to cut out the whole background from cardstock and then back the pieces with different pattern papers.  I accidentally had my cut settings on the wrong setting (I think I had it on patterned paper, when I really meant to have it on cardstock).  So, the Tiny Triangle design did not cut all the way through my cardstock.  I thought about starting over, but it was my last sheet of Navy cardstock.  So instead, I cut out individual triangles from various patterned papers and placed it on top of some of the background triangles.  It was a happy accident, I love that even though the background design did not cut all the way through, you can still see the design against the dark navy background.


Have you ever made a mistake on a layout and then turned it into a happy accident? If so, we would love for you to share it with The Cut Shoppe on their Facebook page!

Thursday, June 18, 2015

Heidi Swapp Minc project


Hi everyone!  I recently picked up the new Minc machine by Heidi Swapp and couldn't wait to dive in!  


 I instantly started playing and fell in love right away with this machine!  I found it to be very user friendly and fun to play with!  


Once I started playing, I found it  hard to stop.  I just wanted to foil all the things!


I recently picked up this antique looking burlap frame and thought that the Minc embellishments would look awesome pinned to it!


I absolutely adore the 3D Minc butterflies, I foiled them in gold, mint, and light pink, and then stitched them together using my sewing machine!


I added a photo of my daughter and foiled the letter "K" for her initial using gold foil.


I even managed to sneak in a xoxo clear frame from the Pink Paislee Citrus Bliss Insta Kit, behind her photo.


I layered some of the pieces, added an antique flower and pinned my pieces onto my frame using pearl stick pins.  


This frame will make a great addition to her room, or I might just keep it for myself because I love it that much!  If you haven't picked up a Heidi Swapp Minc machine yet, run don't walk.  Joann's has them on sale right now for 25% off!  


Tuesday, June 16, 2015

American Crafts | Scrap Room Tour

Last week on the American Crafts blog, the design team shared where they create.  Today, I would like to share photos of my studio with you!

My scrap room is my happy place.  I call it my "creative cave".  I love that I have my own space and can relax and create here.


My large Expedit bookcase from Ikea holds a lot of my scrapbooking items.  The large cloth basket inserts are big enough to hold 12x12 paper.  This is where I store my American Crafts cardstock, adhesive, albums, embellishments and more!  Next to my bookcase is a basket overfilled with an assortment of punches.  Above is a large chalkboard framed sign with the inspirational words "You Were Made to Make a Difference"


My husband built me this large desk last year, this is where I do most of my creating.  It has lots of storage with 18 baskets total (9 on the right side and 9 on the left side).  This is where I store my camera equipment, ink and photo paper, ribbons, paints and more.  On top of my desk I keep two large craft mats from American Crafts.  I love that they match the color of my room and they help keep my white desk clean.  Above, my desk is a large chalkboard calendar that I sometimes use for keeping track of assignments.  In the corner is a large cabinet from Ikea.  I use it to store full collections and miscellaneous
items.  


On top of my bookcase, I store some of my American Crafts embellishments in a wire two tiered basket.  


I found this large distressed patina basket at a home store.  It is perfect for storing my American Crafts Thickers.


Here is a closeup view of my bookcase, where I store some of my albums. The brown floral boxes store my American Crafts adhesive.  I also store a lot of photo props in this cabinet.


Behind my large white desk sits my sewing desk.  It used to be a closet that we converted into a work area.  My husband built the sewing table into the wall.  On top of the table sits my sewing machine, miscellaneous embellishments in jars and baskets and a spinner that I bought from the hardware store and spray painted blue.  It holds my spray mists, paints, buttons and other embellishments.  Above the desk is a shelf with three large baskets.  I store fabric and other items here.


Your Favorite time of day to scrap?  I'm a night owl at heart, I get most of my creating done late at night when everyone else is sleeping.
How long do you usually sit down and create?  It depends, on the detail of the project.  It usually takes me anywhere between 1 hour to 2 hours to finish a project.  Because my computer sits on top of my desk, I sometimes get caught up watching a show on Netflix, then it takes me much longer. 
What is your favorite scrapbooking tool?  My Silhouette Cameo is my best friend, I use it constantly on projects.  My second favorite would be a tie between punches and my sewing machine.
How long have you been scrapping?  I started back in 1996 when there wasn't much but stickers and decorative borders.  I love that scrapbooking has evolved so much since then.
Do you have a favorite method of storage? I love my Expedit bookcase and my desk.  Also, I love my raskog cart from Ikea.
Do you ever purge your supplies?  If so, how often?  Yes, every year I go through and donate to a friend or organization or hold a yard sale.
Is this your dream space or do you have ideas for something else?  I love my scrap room, it is functional and organized, and flows nicely.  The two main things that I would like to change is to put in new flooring (carpet doesn't agree with messy paints) and the wall color.  I see a honey do list in the works.


Sunday, June 7, 2015

Scrapbook Circle and The Cut Shoppe Blog Hop!!!


This week we are teaming up with The Cut Shoppe to bring you loads of inspiration using our June Have a Little Fun Kit plus our favorite cut files from The Cut Shoppe.

Hop along with our Scrapbook Circle team and comment as you go. We will be selecting a winner from all of the blog hop comments to receive $20 to The Cut Shoppe.  Be sure to stop by The Cut Shoppe blog and hop along to see what their team created with our June kit. Comment on The Cut Shoppe hop and you are entered to win one of our June Kits!

Hope you find loads of inspiration at our blog hop here at Scrapbook Circle and then over at The Cut Shoppe too!

Here is my layout that I created for the hop, using the June Have a Little Fun Today kit and


I combined the awesome products from the June Have a Little Fun Today kit, along with the two June add-ons to create this page!  I used a large circular icon from The Cut Shoppe's Give It a Whirl cut file set as a fun backdrop for the page.  I cut it in half and then backed some of the pieces with papers from the kit.


Thanks for hopping with us today!  Next on the hop is the super talented Valerie!


Saturday, June 6, 2015

Pink Paislee | With You

 The papers and embellishments in the Atlas collection from Pink Paislee are not only great for travel photos, they are great for documenting those everyday memories too!  I created a family layout with this collection and added lots of little details.


To start off this layout, I went through the collection and picked out pieces that would fit the family theme of my layout.  I chose bits and pieces that would work with my photo.  The "X Marks the Spot" tag fit perfectly with the photo of my daughter and her cousins tickling each other, so I just had to include it.

I chose to use a background cut file for my layout.  I added lots of cut pieces to the background  and then added detail by adding die cut pieces, chipboard pieces, tags, ink and stitching.

Another great way to add lots of detail to your layout is layering.  I layered tags, and die cut pieces around my photo.


For my journaling I added some typed text to a tag and tucked it behind my photo.  The tag can easily be pulled out to read the journaling.


I cannot say enough about how amazing the patterns and colors of the pattern papers are to work with.  The embellishments are a perfect touch to add beautiful detail to your layouts.
Supplies:  Atlas collection from Pink Paislee;  X Marks the Spot cut file from The Cut Shoppe


Friday, June 5, 2015

American Crafts | Paperclips

It's Paper Clips week on the American Crafts blog!  Paperclips can be used as unique embellishments on your projects.  I used the 
Dear Lizzy paperclips to number the photos of my niece playing peek-a-boo
on my layout.


Supplies: Dear Lizzy Fine And Dandy (370091) - Accents & Phrases W/ Glossy Accents, Dear Lizzy Fine And Dandy (370099) - Ephemera W/ Gold Foil, Dear Lizzy Fine And Dandy (370095) - Acrylic Shapes, Dear Lizzy Fine And Dandy (370096) - Plastic Glitter Bows, Dear Lizzy Fine And Dandy (370103) - Shaped Paper Clips Gold Numbers, Dear Lizzy Fine And Dandy (370109) - Metal Rimmed Tags, Dear Lizzy Fine And Dandy (370061) - Fabulous Fun W/Gold, Dear Lizzy Fine And Dandy (370062) - Love Fest Paper, Dear Lizzy Fine And Dandy (370063) - Just Peachy Paper, Dear Lizzy Fine And Dandy (370064) - Stripey Straws Paper, Dear Lizzy Fine And Dandy (370066) Peonies Paper, Dear Lizzy Fine And Dandy (370067) - Celebrate Paper, Dear Lizzy Fine And Dandy (370069) - Make A Wish Paper, Dear Lizzy Fine And Dandy (370072) - Fine & Dandy Paper, Dear Lizzy Fine And Dandy (370073) - Bright Bows Paper, Dear Lizzy Fine And Dandy (370078) - Sweetest Soiree Paper, Dear Lizzy Fine And Dandy (370079) - Elated Paper, Dear Lizzy Fine And Dandy (370080) - Cheerful Chatter Paper, Dear Lizzy Fine And Dandy (370082) - Gleeful Paper, Cardstock (AM710-81) - White


How To:  Handcut about 50 elongated half circles from pattern paper, set aside.  Print five small photos and handcut into half circles (tip: use an already cut half circle as a template for your photos).  Line up the pattern paper half circles and photos onto white cardstock paper in seven horizontal rows, making sure to place a photo onto five of the rows, leaving the top row and bottom row blank.  Handcut the "hello circle" from the Fine & Dandy gold foil paper, cut into a half circle. Remove two patterned paper half circles from the third row and place cut "hello circle" in it's place.  Slip a paperclip over a half circle on each row that has a photo, before adhering down.  Adhere word stickers to a couple of half circle pieces.  Use a sewing machine to stitch all rows in place.  Flick black spray mist over page, being careful not to get mist on photos.  Stamp a date onto a metal rimmed tag and adhere "Admit One" sticker on top, adhere to bottom left hand side of layout.  Adhere clear acrylic shapes and die cut ephemera bow.  Finish by adhering plastic glitter bow. 


Thursday, June 4, 2015

Paper Camellia Guest Designer!!


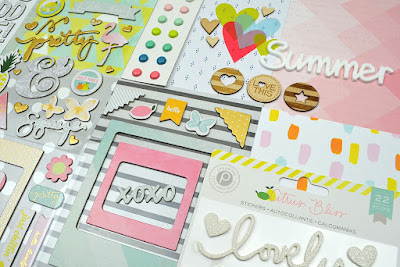
I'm guesting this month over at Paper Camellia!  Paper Camellia's June Kit is bursting with bits and pieces from Pink Paislee's Citrus Bliss collection.  

When I first got the kit in the mail I was so excited upon opening it!  It has so many fun papers and embellishments from some of my favorite manufacturer's!


And check out these fun exclusives that you get in the main kit this month!
Acrylic Words (Summer, Fun, Sun) - Paper Camellia Exclusive
Wood Veneer - Paper Camellia Exclusive 


Here are 3 layouts that I created with the lovely June Kit!


Inspired by the Chickaniddy tags, I decided to create this layout filled with tags.  I added some drops of paint, and stitching to complete the page.


I was immediately drawn to the 7 Paper Baxter 016 paper by Studio Calico, included in the main kit.  I couldn't wait to get that fun paper on a page.  So I paired it with two of my favorite things, a die cut background and watercolors!


For my third and final layout, I used one of my favorite basic shapes, hearts!  I cut out hearts and then trimmed them in half, I put them back together on a white ledger background, and embellished with ink, stamps, machine stitching, thickers, brads and embellishments.  I even managed to sneak a little journaling in there too.

I hope you have enjoyed my projects today, and be sure to stop by the Paper Camellia store to pick up their June 2015 kit.  It is filled with awesome!


Wednesday, June 3, 2015

Scrapbook Circle | Today

Tags, tags, tags!  I just can't get enough of them.   They make great embellishments, they are great for journaling, and they make a big impact on projects when they are all strung together!  For this month's designer choice layout, I decided to create a layout for Scrapbook Circle this month featuring tags!

To create my layout I used the June Have a Little Fun Today kit with the June Add-on List Keeper


I placed a gray tag (included in the main kit) behind my white cardstock base and then strung a line of Pink Paislee travel tags across the top of the page.  I used a sewing machine to stitch them down.  


I added some light stamping, a few drops of yellow spray mist and a few embellishments to finish off the page.  


Have you played with tags on a layout?  How about a card or pocket page?  We would love for you to share it with us on our Facebook Page.  Thanks for looking!


Tuesday, June 2, 2015

Pink Paislee and Page Maps

The Pink Paislee team has teamed up with PageMaps this month to bring you the June 2015 PageMaps!!  I was so excited when I got my sketch, I love working with Becky's sketches!


Here is the sketch Becky sent me to work with:


Here is the layout that I made based on the sketch using the fabulous Atlas collection.


I stuck pretty close to the overall theme of the sketch.  One thing I did change was using using tags in place of the three bottom photos.  Have I mentioned that I love everything about the Atlas collection?  There are so many wonderful pieces, I found it hard to choose a few and not over embellish my page.  I grouped stars from the ephemera pack along with cork star stickers to the top of the page.  I added a few drops of Heidi Swapp Navy spray mist, typed journaling and some light machine stitching.  I found the sketch was really easy and fun to work with and I just love the outcome!

Here are a few detail shots.


Make sure to stop over at the PageMaps page to see what the rest of the Design Team made, and while you're there, leave a comment for your chance to win the entire Atlas collection!